
These no bake energy balls are my go-to for mornings that start in chaos. No need to turn on the oven, just mix, roll, and go. They’re perfect for grabbing on the way out and keep well in the fridge, making mornings a little less frantic.
What I love most is how endlessly customizable they are. You can swap out ingredients based on what you have—adding a touch of cocoa, nuts, or dried fruit. It’s like creating a tiny, portable snack that reflects your mood and pantry, no fuss involved.
Sometimes I make a batch on Sunday just to have a quick, satisfying boost during busy weekdays. They remind me that simple, honest ingredients can come together into something nourishing, even if it’s just a handful of nuts, dates, and a dash of honey.
Focusing on how these energy balls can serve as a portable, no-fuss snack for busy mornings or on-the-go moments, emphasizing their convenience and the way they can be customized to fit different dietary needs and flavor preferences.
A Snack You Can Customize
- Making these energy balls feels like a small act of rebellion against busy mornings.
- I still get a little thrill when I see how quickly they come together—no oven required.
- There’s a quiet pride in turning pantry staples into something genuinely satisfying.
- Sometimes, when I pack these for a trip, I worry they won’t last, but they always do.
- I love that I can tweak the flavors based on whatever mood I’m in—cocoa, coconut, or vanilla all work.
Inspiration Behind These Energy Balls
I first started making these energy balls during a hectic phase at work when I needed quick, reliable snacks that wouldn’t spill or melt in my bag. One afternoon, I grabbed a handful of dates, nuts, and a splash of honey, and just mashed everything together. The smell of toasted coconut and chocolate from my first batch still makes me smile. Ever since, they’ve been my secret weapon for busy mornings and lazy afternoons alike.
Historical & Cultural Roots
- These energy bites trace back to traditional no-bake treats from the Mediterranean, where simplicity and nourishment were key.
- The concept of compact, portable snacks gained momentum in the 1960s health food movement, emphasizing quick energy on the go.
- Homemade energy balls surged in popularity during recent wellness trends, blending nostalgia with modern dietary needs.
Ingredient breakdown: key components
- Dates: I rely on Medjool dates—they’re sticky and sweet, making the mixture naturally caramel-y. If yours are dry, soak them briefly in warm water before chopping.
- Oats: Rolled oats give these energy bites a hearty texture. For a softer bite, try quick oats, but avoid instant oats—they get too mushy.
- Nut Butter: Peanut or almond butter adds richness and helps everything stick together. If you want a smoother texture, warm it up slightly first.
- Nuts & Seeds: Chopped almonds or chia seeds add crunch and nutrition. Toast the nuts lightly for extra flavor, but keep an eye so they don’t burn.
- Sweetener: Honey or maple syrup binds everything and balances the flavors. Use a little less if you prefer less sweetness or want a firmer bite.
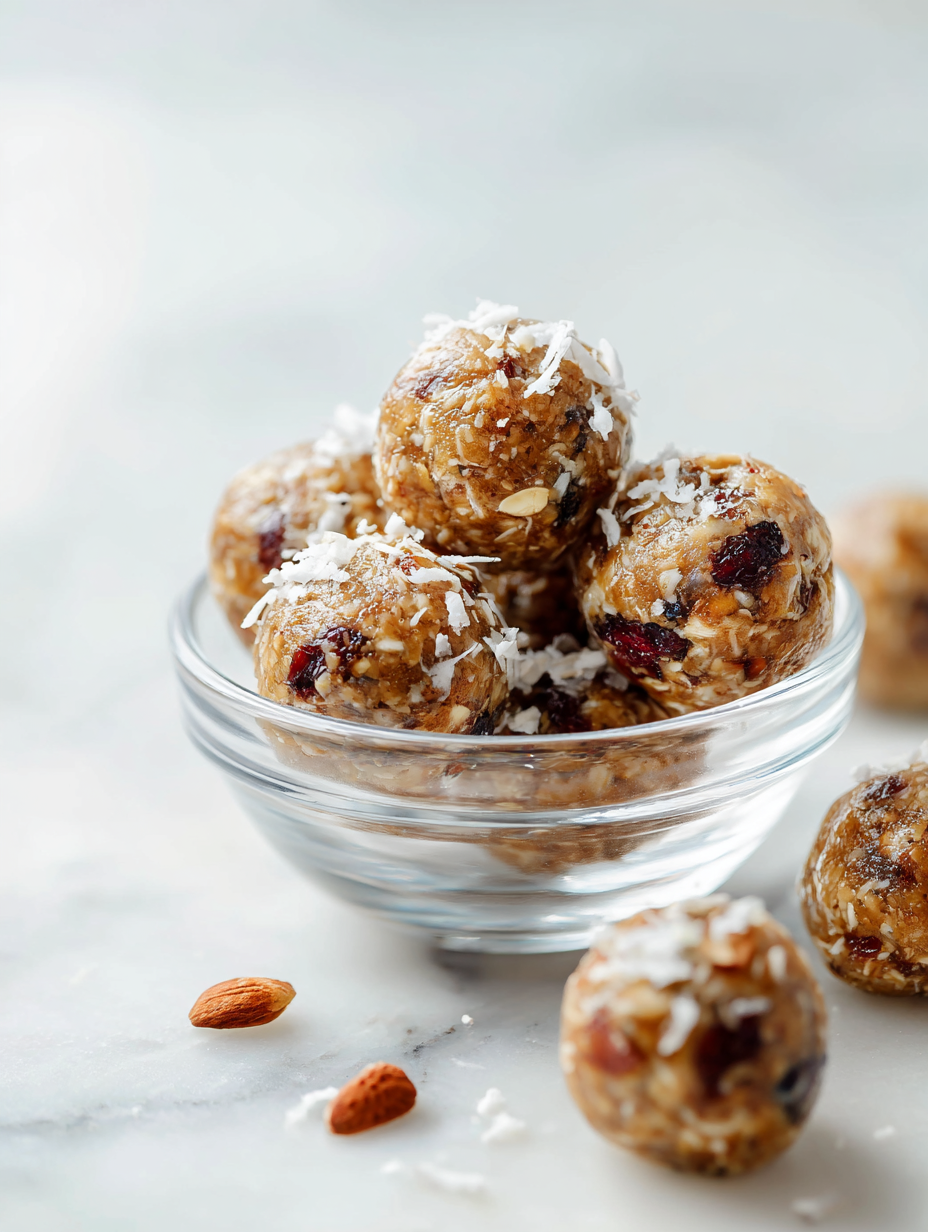
- Add-ins: Chocolate chips, coconut flakes, or dried fruit are optional but fun. Add these last to keep them evenly distributed, and be mindful of moisture.
- Coconut: Shredded coconut lends a tropical aroma and chewy texture. Toast lightly if you want a smoky note, but don’t overdo it to prevent burning.
Spotlight on key ingredients
Dates:
- I rely on Medjool dates—they’re sticky and sweet, making the mixture naturally caramel-y. If yours are dry, soak them briefly in warm water before chopping.
- Oats: Rolled oats give these energy bites a hearty texture. For a softer bite, try quick oats, but avoid instant oats—they get too mushy.
- Nut Butter: Peanut or almond butter adds richness and helps everything stick together. If you want a smoother texture, warm it up slightly first.
Coconut & Nuts:
- Coconut: Shredded coconut lends a tropical aroma and chewy texture. Toast lightly if you want a smoky note, but don’t overdo it to prevent burning.
- Chopped Nuts: Almonds or walnuts add crunch and flavor. Toast them lightly for extra aroma, but keep an eye so they don’t burn.
Notes for ingredient swaps
- Dairy-Free: Swap regular nut butter for coconut or sunflower seed butter. It’s thinner, so the mixture might be a tad softer.
- Sweetener: Use agave syrup or brown rice syrup instead of honey. Expect a slightly different flavor, less floral than honey.
- Oats: Try quinoa flakes if you’re gluten-free. They’re lighter and give a different crunch but work well as a binder.
- Add-ins: Swap chocolate chips for dried cranberries or chopped dried apricots. Adds a chewy, tangy burst instead of chocolate sweetness.
- Coconut: Use toasted coconut flakes for a smoky aroma or skip entirely if you want a more neutral flavor.
- Nuts & Seeds: Almonds can be swapped for walnuts or pumpkin seeds. They change the crunch and flavor profile but keep the texture.
- Binding agents: If honey or nut butter isn’t available, mashed bananas or applesauce can help hold everything together, but expect a softer, wetter ball.
Equipment & Tools
- Large mixing bowl: To combine all ingredients thoroughly.
- Sturdy spoon or spatula: To mix ingredients evenly and avoid sticking.
- Parchment paper-lined baking sheet: To hold the formed energy balls and prevent sticking.
Step-by-step guide to making energy balls
- Gather your equipment: a large mixing bowl, a sturdy spoon or spatula, and a small baking sheet lined with parchment paper.
- In the bowl, combine 1 cup of rolled oats, 1/2 cup of nut butter, and 1/4 cup of honey. Mix until well integrated, about 2 minutes.
- Chop 1/2 cup of dates finely. Add to the mixture, stirring thoroughly to distribute evenly. The mixture should become sticky and hold together when pressed.
- If using, fold in 1/4 cup of mini chocolate chips, coconut flakes, or chopped nuts. Mix gently to avoid breaking the chips.
- Using your hands, scoop out about a tablespoon of mixture and roll into a ball. Place each ball on the prepared baking sheet.
- Repeat until all mixture is used, aiming for roughly 12-15 balls, about 1 inch in diameter.
- Chill the balls in the fridge for at least 30 minutes. This helps them firm up and makes handling easier.
- Once chilled, they’re ready to serve or store. For longer storage, keep in an airtight container in the fridge for up to a week, or freeze for up to a month.
Place the formed balls on the tray and refrigerate for at least 30 minutes. Serve directly from the fridge or at room temperature. Store leftovers in an airtight container in the fridge for up to a week, or freeze for longer storage.
How to Know It’s Done
- The mixture is sticky enough to hold shape when pressed.
- Energy balls are firm but not hard, with a slight give when bitten.
- They have a uniform appearance, with no loose crumbs falling apart.
No-Bake Energy Balls
Ingredients
Equipment
Method
- Combine the rolled oats, chopped dates, and chopped nuts in a large mixing bowl. Give everything a good stir to evenly distribute.
- Add the nut butter and honey to the bowl. Stir vigorously until the mixture becomes sticky and starts to clump together, smelling nutty and sweet.
- If using, fold in the chocolate chips and toasted coconut flakes for added flavor and texture.
- Using your hands, scoop about a tablespoon of the mixture and roll it between your palms to form a compact ball. Repeat with remaining mixture, placing each ball on a parchment-lined baking sheet.
- Chill the energy balls in the refrigerator for at least 30 minutes to help them firm up and hold their shape.
- Once chilled, enjoy your energy balls straight from the fridge or at room temperature. Store leftovers in an airtight container in the fridge for up to a week or freeze for longer storage.
Notes
Pro Tips for Perfect Energy Balls
- Use slightly warmed nut butter for easier mixing and a smoother texture.
- Process dates until very sticky—this helps the balls hold together better during shaping.
- Lightly toast your nuts and coconut for a deeper, richer flavor that enhances the overall bite.
- Chill the mixture for at least 30 minutes—this firms it up, making rolling into balls much easier.
- If mixture feels too dry, add a tiny splash of honey or water, just enough to make it sticky again.
- For extra flavor, gently toast oats in a dry pan until fragrant—avoid burning to keep a mild, nutty aroma.
- Keep your hands damp when rolling to prevent sticking, especially if your mixture is a bit crumbly.
Common mistakes and how to fix them
- FORGOT to check mixture texture → Add a splash of water or honey to loosen.
- DUMPED ingredients too quickly → Mix thoroughly before adding more dry ingredients.
- OVER-TORCHED nuts or coconut → Toast on low heat, stirring constantly to prevent burning.
- MISSED chilling time → Chill for at least 30 minutes for firm, easy-to-roll balls.
Quick fixes and pantry swaps
- If mixture feels too loose, splash in a little water and knead thoroughly.
- When balls crack or fall apart, refrigerate for 15 minutes to firm up.
- Splash with a few drops of oil if nuts or coconut start to burn during toasting.
- Patch dry mixture by mixing in a teaspoon of honey or nut butter.
- Shield delicate add-ins like chocolate chips by folding them gently into the mixture.
Prep, store, and reheat tips
- Prepare the mixture a day in advance; it firms up in the fridge, making rolling easier and more satisfying.
- Store the energy balls in an airtight container in the fridge for up to a week; they stay fresh and chewy, with a nutty aroma.
- For longer storage, freeze the balls in a single layer, then transfer to a zip-top bag; they’ll keep up to a month and retain flavor.
- Reheat by letting them sit at room temperature for 10 minutes or giving them a quick 10-second zap in the microwave—just enough to soften slightly and boost aroma.
Top questions about energy balls
1. Can I use a different sweetener?
Yes, you can substitute maple syrup or agave for honey. It may alter the flavor slightly but works as a binder.
2. Can I swap the nut butter?
Absolutely. Use nut or seed butters like almond or sunflower seed for a different flavor and texture.
3. How long do energy balls last?
Store in an airtight container in the fridge for up to a week. They stay chewy and fresh.
4. Can I freeze the energy balls?
Yes, freezing extends their life. Place in a sealed bag for up to a month and thaw at room temp.
5. Are these gluten-free?
Yes, you can skip the oats or use gluten-free oats if needed. They might be a little softer or more crumbly.
6. Can I add other mix-ins?
Use chopped dried fruit or seeds instead of chocolate chips. Adds different textures and flavors.
7. Do I need to refrigerate before shaping?
Chill the mixture for at least 30 minutes, or it will be too sticky to roll properly.
8. What if the mixture is too dry?
If they feel too dry, add a small drizzle of honey or water until sticky enough to roll.
9. Can I enhance the flavor with extras?
Yes, you can add a pinch of sea salt or vanilla extract for extra flavor complexity.
10. How do I prepare sticky dates?
Use a food processor to chop dates finely, making the mixture stick together better and easier to shape.
These no bake energy balls are a reminder that simple ingredients can come together in honest, satisfying ways. When I make them, I appreciate the unpolished, tactile act of mixing and shaping, feeling the textures change under my fingers. They’re perfect for moments when you need a quick, nourishing boost without fuss or waiting.
In a world of fleeting trends and busy lives, these little bites offer a steady, reliable snack. They’re a small act of care—something you can keep in the fridge and reach for when hunger hits unexpectedly. Sometimes, that’s all a busy day really needs.