
Sometimes, the simplest recipes hold the most memories. These no bake cornflake cookies are one of those treasures, bringing back afternoons in the kitchen with a bowl of melted chocolate and crispy cornflakes. No fuss, no heat, just pure, crunchy sweetness that’s perfect for when the weather’s too hot to turn on the stove.
What I love most is how adaptable they are. A handful of ingredients that you probably already have, ready in minutes. They’re a quick fix for that nostalgic craving, reminding me of childhood snacks, but with a more grown-up, slightly richer flavor from a splash of good chocolate or a swirl of peanut butter.
This recipe is a nostalgic rescue for busy days when you need something sweet and satisfying without turning on the stove, especially when the summer heat makes cooking feel like an ordeal. It’s about reclaiming those simple childhood moments of sticky, crispy, peanut butter-laced snacks, but with a grown-up twist that makes you smile at the kitchen counter.
Childhood Treats Reimagined
- Making these cookies is a reminder of lazy summer afternoons, sticky fingers, and the smell of melting chocolate filling the kitchen.
- I love how quick they come together, especially on days when I need a sweet fix in a pinch, without the fuss of baking.
- There’s a certain pride in pulling out a jar of peanut butter and knowing I can whip up something nostalgic and satisfying in under ten minutes.
- These cookies are my go-to when I want to share a simple, no-fail treat that always brings a smile, no matter the occasion.
The story behind this recipe
This recipe was born out of a messy kitchen and a craving for something sweet but easy. I remember the first time I made these with my grandma—she just dumped everything into a bowl, stirred with a worn spoon, and somehow managed to create magic. That simple act of mixing, without any heat, always felt like a secret shortcut to childhood happiness. Now, whenever I need a quick sweet fix, I think back to those afternoons, and these cookies just come together effortlessly.
Historical & Cultural Tidbits
- These cookies originated during the Great Depression, as a way to stretch ingredients and avoid turning on the stove.
- Cornflakes were initially marketed as a healthy breakfast, but early recipes like these turned them into sweet, crunchy treats.
- The no-bake method became popular in the 1950s, when busy housewives sought quick, reliable dessert options without heating the kitchen.
- Variations of these cookies appeared in vintage cookbooks, often with added ingredients like raisins or coconut for extra flavor.
Key ingredients and tips
- Chocolate: I use semi-sweet chips that melt smoothly, giving a rich, glossy coating. Swap for dark or milk chocolate depending on your mood, but keep in mind the flavor shift.
- Cornflakes: They need to stay crispy but also absorb the chocolate well. Generic brands work fine, but look for those with a light, airy crunch—nothing too dense or stale.
- Peanut Butter: I prefer creamy, natural peanut butter for a smooth, slightly salty contrast. If you like a different nutty flavor, almond or cashew butter can work, just reduce the sweetness a bit.
- Butter: It adds a glossy sheen and helps the chocolate set perfectly. Use unsalted for control, or salted if you want a hint of extra savory depth—just cut back on added salt.
- Sweetener (optional): I sometimes toss in a touch of honey or maple syrup for added complexity. Use sparingly, as too much can make the cookies sticky and hard to shape.
- Vanilla Extract: A splash enhances the chocolate’s richness and adds a warm depth. Skip if you want a more straightforward, intense cocoa flavor.
- Optional Add-ins: Nuts, dried fruit, or coconut flakes—whatever gives your cookies a personal twist. Mix in just before combining, so they stay crunchy.
Spotlight on key ingredients
Chocolate & Cornflakes:
- Chocolate: I use semi-sweet chips that melt smoothly, giving a rich, glossy coating. Swap for dark or milk chocolate depending on your mood, but keep in mind the flavor shift.
- Cornflakes: They need to stay crispy but also absorb the chocolate well. Generic brands work fine, but look for those with a light, airy crunch—nothing too dense or stale.
Notes for ingredient swaps
- Dairy-Free: Swap butter for coconut oil or a neutral vegetable oil. Expect slightly different richness and texture, but still delicious.
- Vegan Chocolate: Use dairy-free chocolate chips or chopped dark chocolate with a splash of coconut milk for smooth melting and rich flavor.
- Nut Butter: Almond or cashew butter can replace peanut butter. These add a different nutty flavor but maintain creaminess.
- Sweetener: Honey or maple syrup can substitute sugar or corn syrup. They add a slight floral or caramel note, so adjust quantities to avoid stickiness.
- Cornflakes: Rice Krispies or crispy rice cereal work as substitutes. They’re lighter but keep the crunch, just less toasty flavor.
- Add-ins: Dried fruits, toasted coconut, or chopped nuts can be swapped or omitted. They add texture and flavor, so choose what suits your mood.
- Flavor Enhancers: A pinch of sea salt or a dash of vanilla extract can boost overall flavor. Adjust to taste for balanced sweetness.
Equipment & Tools
- Large mixing bowl: To combine ingredients evenly.
- Microwave-safe bowl: To melt chocolate and butter safely.
- Spoon or cookie scoop: To portion cookies neatly.
- Parchment paper: To prevent sticking and make cleanup easier.
- Cooling tray or sheet: To hold cookies as they set.
Step-by-step guide to no bake cookies
- Gather all ingredients: chocolate chips, cornflakes, peanut butter, butter, vanilla, and optional add-ins. Measure out everything before starting.
- Line a large baking sheet with parchment paper for easy cleanup and cooling.
- In a microwave-safe bowl, melt 1 cup (240g) of semi-sweet chocolate chips with 2 tablespoons (30g) of butter. Microwave in 30-second bursts, stirring each time, until smooth and glossy. (Approx. 1-2 minutes total)
- In a large mixing bowl, combine 1 cup (250g) peanut butter and the melted chocolate mixture. Stir until smooth and well incorporated. Smell the rich cocoa and peanut aroma.
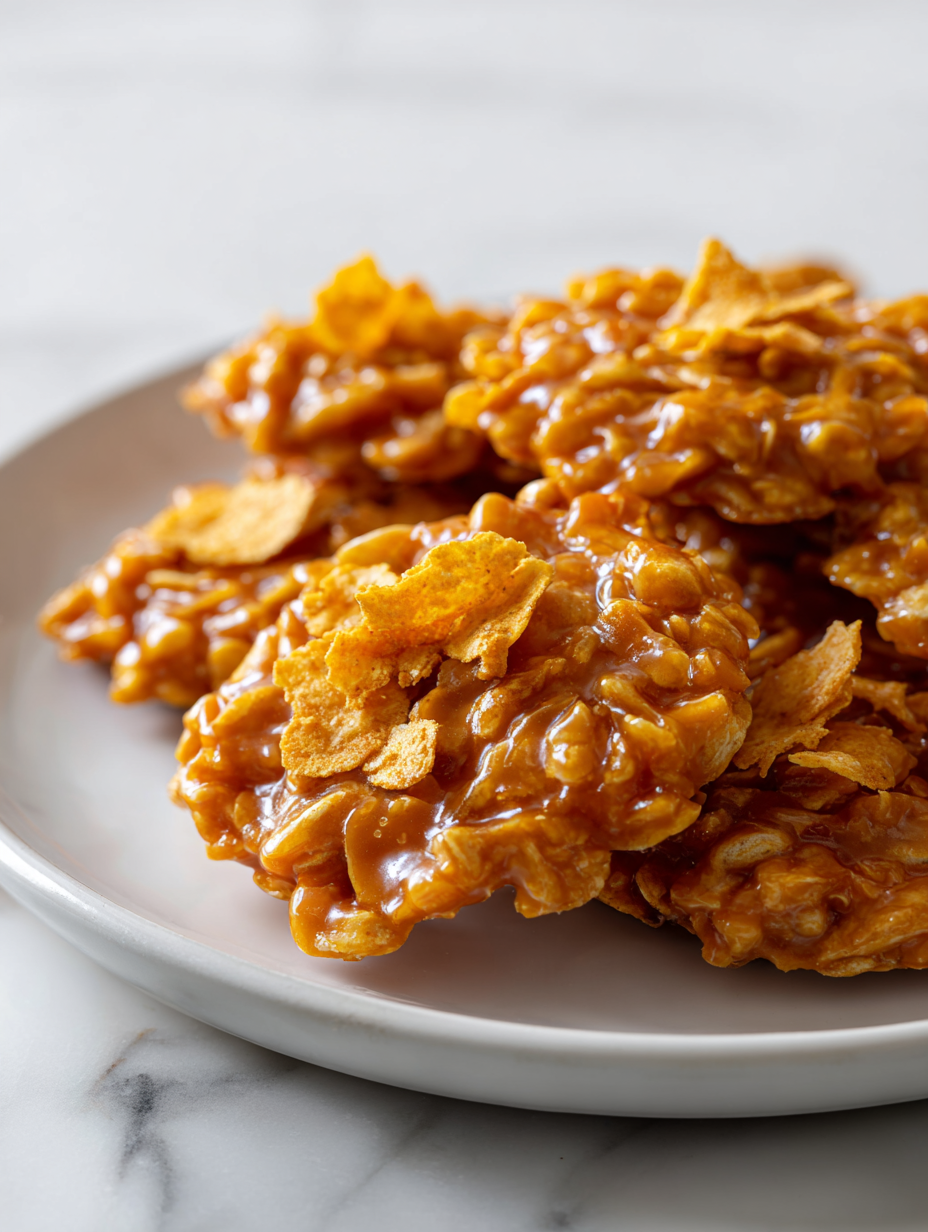
- Add 4 cups (120g) of cornflakes to the bowl. Gently fold, ensuring each flake gets coated with the chocolate-peanut mixture. The cornflakes should stay crispy but start to stick together slightly.
- If using, stir in any optional add-ins like chopped nuts, dried fruit, or coconut flakes now. Mix just enough to distribute evenly.
- Using a spoon or cookie scoop, drop spoonfuls of the mixture onto the prepared parchment. Flatten slightly if you prefer a more uniform shape.
- Let the cookies sit at room temperature for about 30 minutes, or until the chocolate sets and the cookies feel firm to touch.
- For a quicker set, place the tray in the fridge for 15-20 minutes. The chocolate will crackle as it cools, and the cookies will firm up with a shiny finish.
- Once set, peel the cookies off the parchment. Store in an airtight container at room temperature for up to 3 days, or in the fridge for a week.
Allow the cookies to rest at room temperature or fridge until fully set. Once firm, transfer to an airtight container. Serve directly from the fridge or at room temp, depending on your preference.
How to Know It’s Done
- Chocolate coating is glossy and firm after cooling.
- Cornflakes stay crispy without sogginess.
- Cookies hold shape and feel firm to touch when ready.
No Bake Cornflake Cookies
Ingredients
Equipment
Method
- Place the chocolate chips and butter in a microwave-safe bowl. Microwave in 30-second bursts, stirring well each time, until the mixture is smooth, glossy, and fully melted. This fills your kitchen with a rich chocolate aroma.
- Add the peanut butter and vanilla extract to the melted chocolate mixture. Stir until everything is silky smooth and well combined, creating a fragrant, thick chocolate-peanut butter blend.
- Gently fold the cornflakes into the chocolate mixture, using a spoon or spatula, until each flake is coated with the glossy chocolate. Be careful not to crush the flakes; fold gently to keep them crispy.
- Line a baking sheet with parchment paper to prevent sticking. Using a spoon or cookie scoop, drop spoonfuls of the mixture onto the parchment, pressing down lightly if you prefer a flatter cookie.
- Let the cookies sit at room temperature for about 30 minutes, or until the chocolate has set and the cookies feel firm to the touch. You’ll hear a slight crackle as the chocolate cools and hardens.
- If you want an even quicker set, place the tray in the fridge for 15-20 minutes. Once the chocolate is firm and shiny, your cookies are ready to enjoy!
Notes
Pro tips for perfect cookies
- Bolded mini-head: Use gentle heat → Melt chocolate slowly in short bursts to prevent scorching and achieve silky consistency.
- Bolded mini-head: Add ingredients gradually → Incorporate cornflakes last, folding gently to maintain crunch and prevent breakage.
- Bolded mini-head: Chill before shaping → Rest the mixture in the fridge for 15 minutes if it’s too sticky to scoop comfortably.
- Bolded mini-head: Check for gloss → The chocolate should be shiny and slightly firm when ready to set, not dull or greasy.
- Bolded mini-head: Use parchment paper → Prevent sticking and make cleanup easier, especially when cookies are still soft.
- Bolded mini-head: Don’t overmix → Gentle folding preserves the crunch of the cornflakes and prevents crushing them into powder.
- Bolded mini-head: Store properly → Keep cookies in an airtight container at room temp for up to three days or in the fridge for longer freshness.
Common mistakes and how to fix them
- FORGOT to check the chocolate’s melting point → Use 30-second bursts to prevent burning.
- DUMPED in all ingredients at once → Add ingredients gradually for even coating.
- OVER-TORCHED the chocolate → Remove from heat immediately if it starts to smell burnt.
- MISSED the cooling step → Let the cookies rest for at least 30 minutes for proper setting.
Quick Fixes and Pantry Swaps
- If chocolate seizes, splash in a teaspoon of vegetable oil to smooth it out.
- When cornflakes turn soggy, add a pinch of rice cereal for extra crunch.
- Splash cold water on melted chocolate if it thickens, then stir vigorously.
- Patch sticky mixture by chilling in the fridge for 10 minutes before shaping.
- Shield delicate cookies from humidity by storing in an airtight container with a silica packet.
Prep, store, and reheat tips
- You can prepare the cookie mixture a day in advance; just keep it covered in the fridge to prevent it from drying out, and the flavors will meld nicely overnight.
- Store the finished cookies in an airtight container at room temperature for up to three days. The chocolate will stay glossy and the cornflakes crisp if kept properly sealed.
- For longer storage, refrigerate the cookies for up to a week. They may lose a bit of crunch but will still taste sweet and satisfying.
- Reheat by letting them sit at room temperature for 10 minutes or placing in the fridge for a quick chill. If you want the chocolate to shimmer again, give them a quick 10-second zap in the microwave—just enough to melt the surface slightly without melting the whole cookie.
Top questions about no bake cookies
1. Can I use different types of chocolate?
Use semi-sweet chocolate chips for a balanced sweetness and smooth melting. You can swap for dark or milk chocolate, but expect a different flavor and sheen.
2. Can I substitute cornflakes?
Yes, cornflakes should stay crispy but absorb the chocolate flavor. Generic brands work fine, but look for light, airy flakes for the best crunch.
3. Can I use other nut butters?
Natural peanut butter adds a creamy, slightly salty flavor. Almond or cashew butter can be used for a different nutty taste, but adjust sweetness if needed.
4. Can I skip the butter?
Use unsalted butter for control over saltiness. Salted butter will work, but reduce any extra salt added to the recipe to prevent over-salting.
5. How do I know when they’re ready?
Refrigerate the cookies for at least 15-20 minutes to set the chocolate completely. They should feel firm and crackle slightly when touched.
6. How should I store these cookies?
Store in an airtight container at room temp for up to 3 days or in the fridge for a week. Let them come to room temp before serving if refrigerated.
7. What if the chocolate isn’t shiny?
If the chocolate cracks or looks dull, warm it slightly in short bursts in the microwave and stir until glossy again.
8. How can I keep them crispy?
To prevent sogginess, keep cookies in a sealed container away from humidity and serve within a few days for best crunch.
9. The mixture is too sticky, what now?
If mixture is too sticky, chill it in the fridge for 10-15 minutes before scooping to make shaping easier.
10. Can I add other flavors?
Add a pinch of sea salt or vanilla to enhance flavor, but avoid overdoing it to keep the chocolate front and center.
These cookies are a reminder that sometimes, the simplest ingredients and a little bit of patience make the best treats. There’s a comforting familiarity in the crunch and chocolate, especially when shared with someone who appreciates honest, homemade sweets. In this busy moment, they offer a little escape to childhood without any fuss or heat.
Whenever I make these, I think about how little it takes to turn pantry staples into something special. They’re imperfect, a bit nostalgic, and perfectly imperfect—just like those afternoons of carefree snacking. That’s what makes them worth keeping in the recipe box, on a day when comfort is needed most.