
Making these no-bake chocolate truffles isn’t just about the end treat, it’s about the quiet, deliberate act of mixing and rolling. In a world that’s constantly rushing, this simple ritual offers a moment of calm, a tiny escape where you focus on the texture of melted chocolate and the feel of cool hands shaping each little ball.
I’ve found that the process itself becomes a kind of meditation. No fancy equipment needed, just good quality chocolate, a pinch of patience, and a little bit of time to slow down. It’s a way to turn a handful of ingredients into a comforting, personal moment — a small act of care that’s surprisingly grounding.
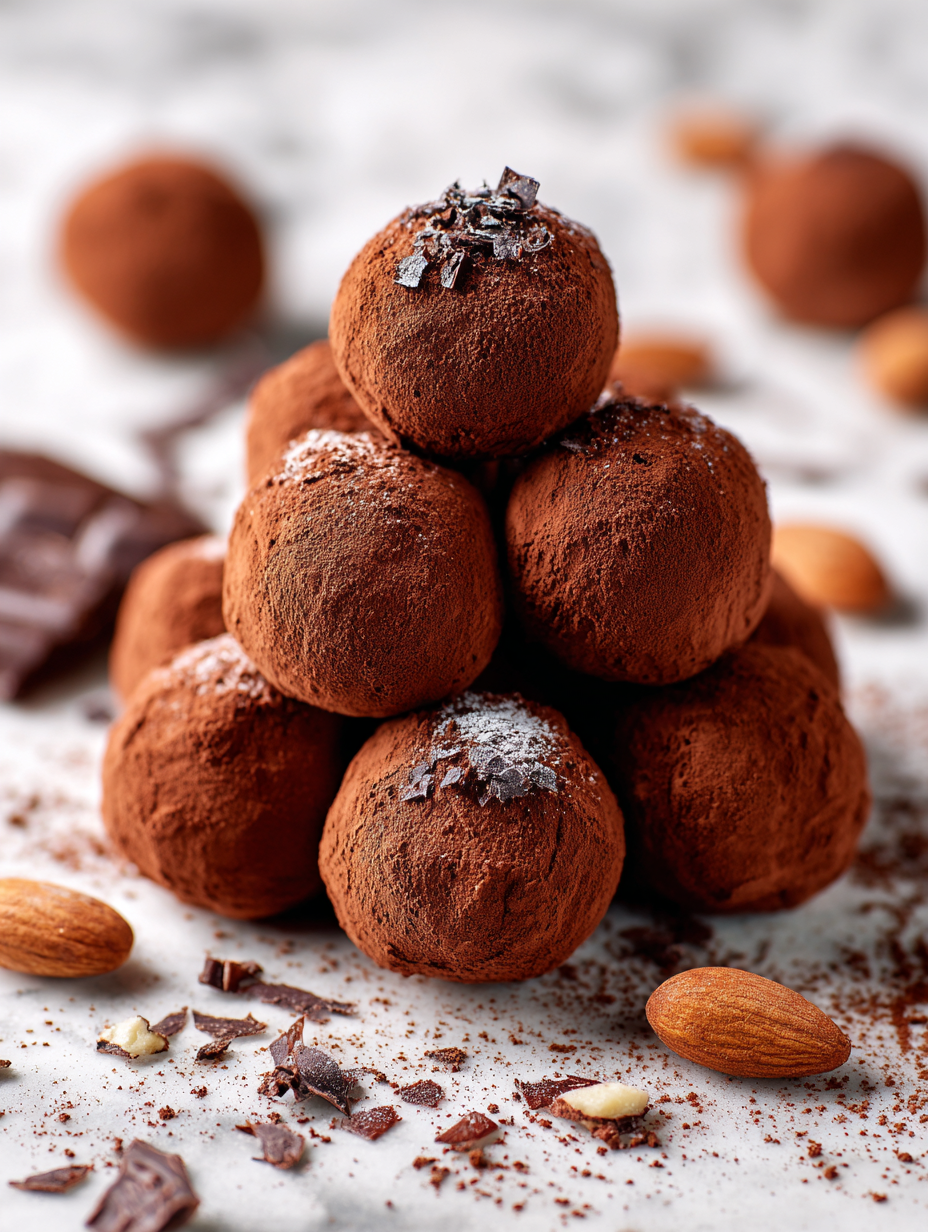
Focusing on the therapeutic ritual of making these truffles by hand, turning a simple task into a mindful, calming escape from digital chaos.
Turning Chaos into Calm
- Making these truffles by hand always feels like a small act of rebellion against the rush of daily life.
- I love how the smell of melting chocolate fills the kitchen, instantly calming my nerves.
- There’s a weird joy in rolling these into perfect little balls, like tiny treasures.
- Every batch reminds me of lazy afternoons with friends, sharing sweets and stories.
- Whenever I make these, I feel a quiet pride in turning simple ingredients into something special.
The story behind this recipe
- This recipe came from a lazy afternoon craving something rich and comforting, but without the fuss of baking. I remember rummaging through my pantry, finding a bit of leftover chocolate and some cream, and suddenly, the idea of no-bake truffles clicked. It’s a simple way to turn a few ingredients into a little moment of indulgence, especially when time feels tight.
- What keeps me coming back to this recipe is the tactile act of rolling the mixture into tiny balls—kind of meditative, really. It’s a small, handheld ritual that makes the whole process feel special, even if it’s just for myself or a quick gift. Plus, the way the chocolate melts in your mouth, that rich, smooth hit, is always worth the effort.
- heading
Trivia and Historical Notes
- Some say early 20th-century European kitchens popularized no-bake confections as quick, elegant treats for guests.
- During wartime, resourceful home cooks turned to no-bake recipes, making use of limited ingredients like chocolate and condensed milk.
- The simplicity of no-bake truffles made them a favorite for busy families and holiday gatherings for decades.
- In recent years, the trend has shifted towards more mindful, handmade sweets—these truffles fit right into that movement.
Ingredient breakdown: key components
- Dark chocolate: I prefer a high cocoa content, around 70%, for that deep, bittersweet richness. Swap with semi-sweet if you want milder flavor.
- Heavy cream: It’s what makes the truffle mixture smooth and pliable. Coconut cream can be a dairy-free alternative, but it will add a slight coconut aroma.
- Butter: Adds a glossy finish and a little extra richness. If you’re out, a splash of neutral oil can help smooth the mixture, though it won’t have the same buttery depth.
- Cocoa powder: I sift mine to avoid lumps and get a velvety coating. For a twist, try tossing some crushed nuts or sprinkles instead for texture.
- Flavorings (vanilla/espresso): A teaspoon of vanilla or a dash of espresso powder enhances depth. Skip or adjust based on your flavor preference—sometimes plain chocolate is perfect.
- Optional coatings (nuts, shredded coconut): Adds texture and visual appeal. Toast nuts beforehand for a smoky aroma, or use freeze-dried fruit powders for color and tang.
- Sweetener (optional): I usually don’t add extra sugar, but a tiny pinch of sea salt can elevate the chocolate’s flavor. Want more sweetness? Melt in a bit of honey or maple syrup.
Spotlight on key ingredients
Dark chocolate:
- I prefer a high cocoa content, around 70%, for that deep, bittersweet richness. Swap with semi-sweet if you want milder flavor.
- Heavy cream: It’s what makes the truffle mixture smooth and pliable. Coconut cream can be a dairy-free alternative, but it will add a slight coconut aroma.
- Cocoa powder: I sift mine to avoid lumps and get a velvety coating. For a twist, try tossing some crushed nuts or sprinkles instead for texture.
Cocoa powder:
- Heavy cream: It’s what makes the truffle mixture smooth and pliable. Coconut cream can be a dairy-free alternative, but it will add a slight coconut aroma.
- I sift mine to avoid lumps and get a velvety coating. For a twist, try tossing some crushed nuts or sprinkles instead for texture.
Notes for ingredient swaps
- Dairy-Free: Swap heavy cream for coconut cream or cashew cream. It adds richness but a slightly different flavor profile.
- Vegan: Use dairy-free chocolate and coconut or almond milk instead of cream. Expect a slightly different melt and texture.
- Sweetener: If you prefer less sugar, try maple syrup or agave nectar. They blend well but may alter the firmness slightly.
- Cocoa Powder: For a different flavor, try carob powder or raw cacao. Keep in mind, raw cacao is more bitter.
- Add-ins: Mix in dried fruits, chili flakes, or sea salt for extra dimension. Just be cautious with moisture levels.
- Nuts & Coatings: Use crushed pistachios, toasted coconut, or sprinkles instead of traditional nuts or cocoa powder. They add visual flair and texture.
- Flavored Extracts: Add a splash of orange or peppermint extract for a twist. Use sparingly to prevent overpowering the chocolate.
Equipment & Tools
- Small saucepan: To gently heat the cream without scorching.
- Mixing bowl: To blend the melted chocolate and cream smoothly.
- Spatula: To stir and combine ingredients gently.
- Cookie scoop or teaspoon: To portion out uniform truffle sizes.
- Parchment-lined baking sheet: To set the shaped truffles without sticking.
Step-by-step guide to no-bake truffles
- Gather your equipment: a mixing bowl, a spatula, a small cookie scoop or spoon, and a baking sheet lined with parchment. The bowl is for melting and mixing; the scoop helps shape uniform truffles.
- Chop the chocolate into small, even pieces. Using a sharp knife, aim for roughly 1 cm chunks to speed up melting. Set aside.
- Heat the heavy cream gently: in a small saucepan over low heat, warm until just about to simmer. You should see tiny bubbles at the edges, but no boiling. This takes about 2-3 minutes.
- Pour the hot cream over the chopped chocolate. Let sit for 1 minute to soften, then stir gently with the spatula until completely smooth and glossy. If chunks linger, microwave in 10-second bursts, stirring in between.
- Add a teaspoon of vanilla extract or espresso powder if using. Stir to incorporate well. The mixture should be thick but still pourable. If it’s too stiff, warm gently over a double boiler for 30 seconds.
- Let the chocolate ganache cool slightly, about 10 minutes, until it’s warm but not hot. It should have a velvety, spreadable texture.
- Using the cookie scoop or a teaspoon, portion out small amounts of the ganache. Roll each into a ball with your hands, about 1 inch in diameter. If the mixture sticks too much, dust your hands with cocoa powder.
- Place the formed truffles on the prepared baking sheet, spaced a few centimeters apart. Chill in the fridge for at least 1 hour until firm and set.
- Once chilled, roll each truffle in cocoa powder, finely chopped nuts, or shredded coconut for a decorative finish. Use a fork or tongs to avoid smudging the coating.
- Serve immediately or store in an airtight container in the fridge for up to 5 days. For longer storage, freeze for up to 2 weeks, then thaw in the fridge before serving.
Chill the shaped truffles for at least an hour until firm. Roll in your chosen coatings just before serving. Arrange on a plate or store in an airtight container in the fridge. Serve slightly chilled for the best texture and flavor.
How to Know It’s Done
- Chocolate mixture is smooth and glossy before cooling.
- Truffles are firm and hold shape after chilling.
- Coatings adhere evenly without melting or cracking.
No-Bake Chocolate Truffles
Ingredients
Equipment
Method
- Chop the dark chocolate into small, even pieces and place them in a mixing bowl.
- Gently heat the heavy cream in a small saucepan over low heat until tiny bubbles form at the edges, about 2-3 minutes. Avoid boiling.
- Pour the hot cream over the chopped chocolate and let sit for 1 minute. Then, gently stir with a spatula until the mixture becomes glossy, smooth, and silky.
- Add a teaspoon of vanilla extract if you like, and stir to incorporate. Let the ganache cool slightly for about 10 minutes until it thickens but remains pourable.
- Using a cookie scoop or teaspoon, portion out the ganache and gently roll each portion into a small ball between your palms. If the mixture is too sticky, dust your hands with a little cocoa powder.
- Place the shaped truffles on a parchment-lined baking sheet and chill in the fridge for at least 1 hour until firm and set.
- Once chilled, roll each truffle in sifted cocoa powder to coat evenly, tapping off any excess. For extra flavor, you can also roll them in crushed nuts or shredded coconut.
- Arrange the finished truffles on a serving plate or store them in an airtight container in the fridge until ready to enjoy. Serve slightly chilled for the best melt-in-your-mouth experience.
Notes
Pro Tips for Perfect Truffles
- Bolded Mini-Head: Use high-quality chocolate for a richer, more intense flavor that melts smoothly.
- Bolded Mini-Head: Gently warm the cream to just below boiling point; over-heating can cause separation or burnt flavor.
- Bolded Mini-Head: Stir the ganache until glossy; if lumpy, microwave in short bursts, stirring each time for even melt.
- Bolded Mini-Head: Chill the mixture until just firm; over-chilling makes rolling tricky and less pliable.
- Bolded Mini-Head: Coat the truffles in cocoa powder or nuts immediately after shaping to prevent sticking and enhance texture.
- Bolded Mini-Head: For a shiny finish, give the coated truffles a quick final roll in cocoa or nuts just before serving.
- Bolded Mini-Head: Use a small cookie scoop for uniform size; uneven sizes may affect chilling and presentation.
Common mistakes and how to fix them
- FORGOT to temper the chocolate → Melt slowly over double boiler for smooth texture.
- DUMPED in all ingredients at once → Mix ingredients gradually for even consistency.
- OVER-TORCHED the chocolate → Remove from heat immediately once melted, avoid scorching.
- SKIPPED chilling step → Chill until firm to ensure proper shape and coating adherence.
Quick fixes and pantry swaps
- When mixture is too stiff → Warm slightly or add a splash of cream.
- If coating cracks → Slightly reheat or re-dip in melted chocolate.
- Splash with sea salt → Enhances flavor and balances sweetness.
- Patch dull sheen → Briefly warm in microwave, then re-coat for shine.
- Shield against sticking → Dust hands with cocoa powder before rolling.
Prep, store, and reheat tips
- Chill the shaped truffles in the fridge for at least 1 hour to firm up the texture and make coating easier.
- Store the finished truffles in an airtight container layered with parchment paper; they stay fresh for up to 5 days in the fridge.
- For longer storage, freeze the truffles for up to 2 weeks; let thaw in the fridge for a few hours before serving.
- The flavors deepen slightly after a day or two in the fridge, so they taste even richer the next day.
- Reheat if needed by letting the truffles sit at room temperature for 10 minutes; avoid microwaving to prevent melting.
Top questions about no bake truffles
1. Can I use milk chocolate instead?
Use good quality dark chocolate, around 70% cocoa, for a rich, smooth melt that isn’t too sweet.
2. How long should I refrigerate the mixture?
Chill the mixture for about an hour until it’s firm enough to roll easily, but not too hard.
3. Can I make these vegan?
Yes, you can swap heavy cream with coconut cream or cashew cream for a dairy-free version, though the flavor shifts slightly.
4. My hands are too sticky to roll the truffles, what do I do?
If the mixture is too sticky, dust your hands with cocoa powder or chill it a bit longer before rolling.
5. How should I store leftover truffles?
Store the finished truffles in an airtight container in the fridge for up to 5 days or freeze for longer storage.
6. Can I coat the truffles with something other than cocoa powder?
To add crunch, roll the truffles in crushed nuts, shredded coconut, or even sprinkles right after shaping.
7. Why did my coating crack or peel off?
If the chocolate cracks when coating, briefly re-melt it to restore smoothness before dipping again.
8. Should I serve these at room temperature or cold?
Chill the truffles until firm, then serve slightly chilled for the best texture and flavor.
9. How can I elevate the flavor of these truffles?
Adding a pinch of sea salt or a splash of vanilla enhances the chocolate flavor and balances sweetness.
10. Can I decorate the truffles with other chocolates?
You can drizzle melted white or dark chocolate on top for a decorative finish and extra flavor layer.
Making these no-bake chocolate truffles isn’t just about satisfying a sweet tooth, it’s about finding a little moment of calm amid the chaos. The smell of melting chocolate, the gentle rolling, those tiny, imperfect balls—each step feels grounding in a way that’s hard to describe but easy to appreciate.
They’re perfect for spontaneous treats or last-minute gifts that carry a bit of love and effort. Sometimes, the simplest recipes turn out to be the most memorable, especially when you add a dash of your own touch.