
This no-bake nut bars recipe is my cheat code for a sweet fix that feels homemade but doesn’t demand oven time. It’s a reminder that simple ingredients, when combined with a little patience, can turn into something seriously satisfying. Plus, I love that I can assemble these in the morning and have a snack ready before I even think about lunch.
What really draws me in is how these bars carry the nostalgic warmth of childhood snacks—crunchy, sticky, with that unmistakable roasted nut aroma—yet they’re so effortless to make. No fuss, no mess, just a sturdy, honest treat that hits all the right notes. It’s a little indulgence I can whip up on a busy weeknight or stash away for when friends drop by.
This recipe is inspired by my childhood nostalgia for weekend baking with my grandma, but I’ve modernized it with a no-bake approach. It’s about capturing that warm, nutty aroma without turning on the oven, making it perfect for quick, honest treats. I love how these bars bring back memories of messy hands and sweet, sticky fingers, yet are simple enough to whip up on a busy weekday.
Origin of these nut bars
This recipe came from a chaotic weekend in my tiny kitchen, where I desperately needed a sweet escape that wouldn’t add to the mess. I remembered a batch of nuts and honey I had sitting around, and suddenly, no-bake seemed like the only way to go. It’s funny how some of the best ideas pop up amidst the clutter, turning simple ingredients into something I reach for when I need comfort fast.
Ingredient breakdown: key components
- Medjool dates: They add a natural sweetness and stickiness that helps hold everything together. If you want less sugar, try dried figs or apricots, but your bars will be less chewy and more fruity.
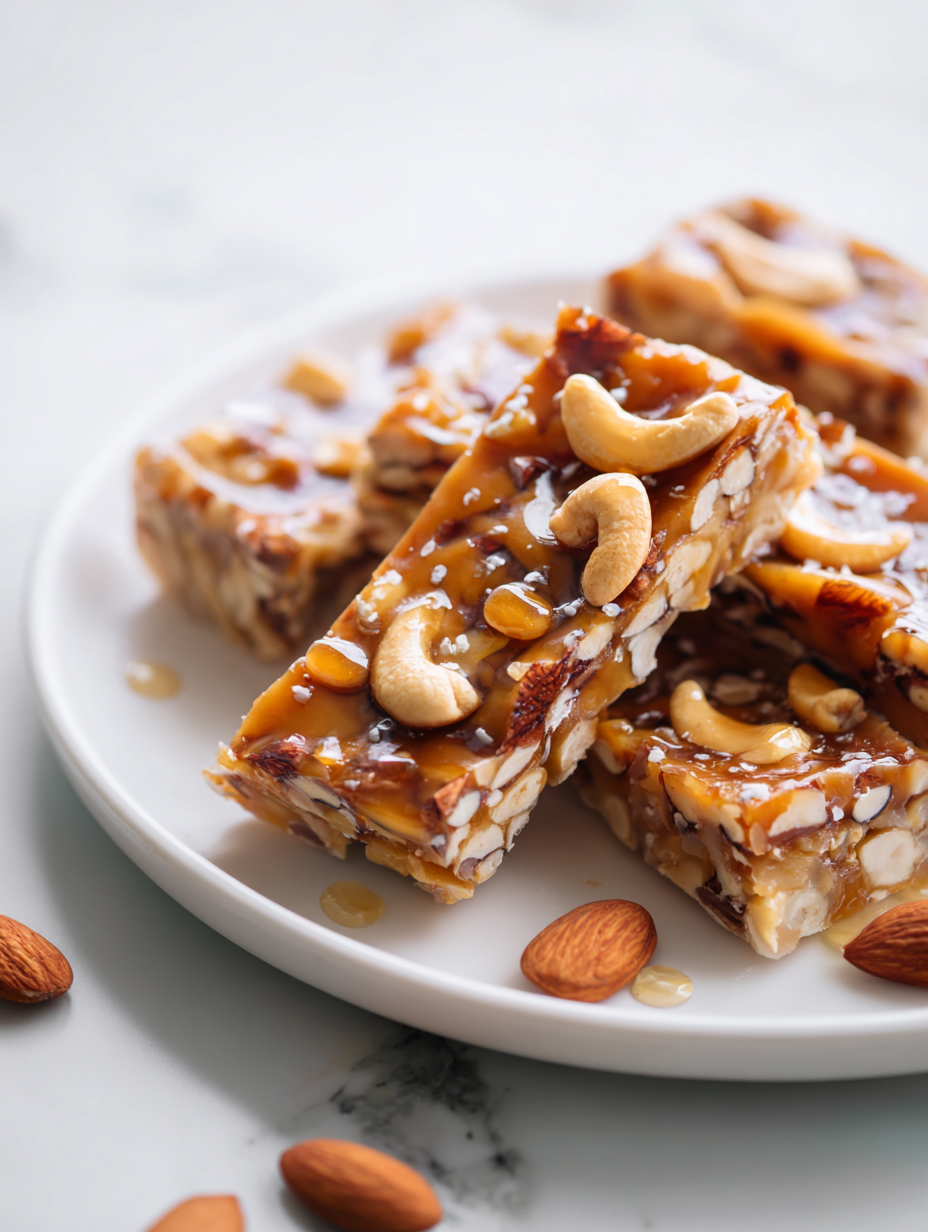
- Mixed nuts: I love a combo of almonds, cashews, and walnuts for texture and flavor. Toast them lightly for an extra nutty aroma, or swap in roasted chickpeas for a crunch with a different twist.
- Honey: It’s my glue and sweetener, giving a lovely amber glow and a subtle floral note. If you prefer a milder taste, maple syrup works but will give a different richness and less chewiness.
- Dark chocolate: I melt it for a glossy, rich coating that’s just slightly bitter. For a sweeter note, use milk chocolate, or skip it for a more straightforward nutty bar—less decadent, more natural.
- Coconut oil: It makes the chocolate shiny and helps it set smoothly. Use coconut butter for a richer, more coconut-forward flavor, or omit for a firmer, crisper chocolate layer.
- Vanilla extract: Just a splash adds warmth and depth. If you don’t have vanilla, a pinch of cinnamon or a dash of almond extract can bring a new layer of aroma.
- Sea salt: A tiny pinch enhances all the flavors and cuts through the sweetness. For a smoky twist, sprinkle with smoked sea salt or skip it if you prefer a more straightforward nutty taste.
Spotlight on key ingredients
Medjool dates:
- They add a natural sweetness and stickiness that helps hold everything together. If you want less sugar, try dried figs or apricots, but your bars will be less chewy and more fruity.
- Mixed nuts: I love a combo of almonds, cashews, and walnuts for texture and flavor. Toast them lightly for an extra nutty aroma, or swap in roasted chickpeas for a crunch with a different twist.
Dark chocolate:
- I melt it for a glossy, rich coating that’s just slightly bitter. For a sweeter note, use milk chocolate, or skip it for a more straightforward nutty bar—less decadent, more natural.
- Coconut oil: It makes the chocolate shiny and helps it set smoothly. Use coconut butter for a richer, more coconut-forward flavor, or omit for a firmer, crisper chocolate layer.
Notes for ingredient swaps
- Sweeteners: Honey adds a rich, floral sweetness and sticky texture. Swap with maple syrup for a milder, caramel-like flavor, or agave syrup for a more neutral taste—just note the consistency might change slightly.
- Nuts: A mix of almonds, cashews, and walnuts gives crunch and depth. Use roasted chickpeas for a plant-based crunch, or switch to pecans or hazelnuts for a different, buttery note.
- Dried fruits: Dates are sweet, sticky, and help bind. For a different chew, try dried apricots or figs—less sticky but still flavorful and bright.
- Chocolate: Dark chocolate melts smoothly for a glossy coating. Milk chocolate offers a sweeter, creamier taste, or omit chocolate altogether for a pure nutty bar with extra caramel notes.
- Coconut oil: It helps the chocolate set shiny and smooth. Substitute with coconut butter for a richer coconut aroma or skip for a firmer, crisper coating.
- Vanilla: Adds warmth and depth. Almond extract or a pinch of cinnamon can add a different aroma, but skip if you want a straightforward nutty flavor.
- Sea salt: Boosts all flavors. Use smoked sea salt for a smoky edge, or omit for a more pure, nutty profile.
Equipment & Tools
- 20×20 cm (8×8 inch) pan: To shape and set the bars
- Silicone spatula: For mixing and pressing the mixture
- Double boiler or microwave-safe bowl: To melt the chocolate gently
- Parchment paper: For lining the pan and easy removal
- Sharp knife: To slice the bars cleanly
Step-by-step guide to no-bake nut bars
- Gather all equipment: a 20×20 cm (8×8 inch) pan, a silicone spatula, a double boiler or microwave-safe bowl, and parchment paper. Line the pan with parchment for easy removal.
- In a microwave-safe bowl or using a double boiler, melt 200g dark chocolate and 2 tbsp coconut oil until glossy and smooth, about 2-3 minutes in microwave, stirring every 30 seconds. Set aside to cool slightly.
- In a large mixing bowl, combine 1 cup mixed nuts (chopped if large), 1 cup Medjool dates (pitted and chopped), and 1/2 cup honey. Mix with a spatula until well coated and sticky.
- Pour the nut and date mixture into the prepared pan. Use the back of a spoon or spatula to press it down evenly, about 2-3 minutes. Ensure it’s compact but not overly packed.
- Slowly pour the melted chocolate over the nut mixture. Use a spatula to spread it evenly to cover all the bits. Tap the pan gently to settle the chocolate and remove air bubbles.
- Sprinkle a pinch of sea salt or smoked sea salt on top for enhanced flavor contrast. Lightly press the salt into the chocolate if needed.
- Place the pan in the fridge for at least 2 hours, or until the chocolate is firm and set. This allows the bars to develop their structure and flavor.
- Once set, lift the slab out using the parchment paper. Slice into 8-10 bars with a sharp knife. For cleaner cuts, wipe the knife with warm water between slices.
- Finish by resting the bars at room temperature for 10 minutes before serving to soften slightly and enhance flavor. Store in an airtight container at room temperature or in the fridge for up to a week.
Rest the bars in the fridge for at least 2 hours. Once firm, lift out using parchment and slice into portions. Let sit at room temp for 10 minutes before serving for optimal softness and flavor.
How to Know It’s Done
- Chocolate is shiny and fully melted, with no lumps.
- Nut and date mixture is compact and sticky enough to hold shape.
- Bars are firm and hold together when sliced, with a clean cut.
No-Bake Nut Bars
Ingredients
Equipment
Method
- Line your 20x20 cm (8x8 inch) pan with parchment paper to make removal easier later.
- In a microwave-safe bowl or using a double boiler, gently melt the dark chocolate along with 2 tablespoons of coconut oil, stirring until smooth and glossy. This should take about 2-3 minutes in the microwave, stirring every 30 seconds, or slowly melting over low heat on the stove.
- In a large mixing bowl, combine the chopped mixed nuts and chopped Medjool dates. Add the honey and vanilla extract, then stir everything together until the mixture is sticky, fragrant, and well coated—this aroma of toasted nuts and sweet dates will fill your kitchen.
- Transfer the nut and date mixture into your prepared pan. Use the back of a spatula or your fingers to press it down firmly and evenly, creating a compact, sturdy base. Pressing it well helps the bars hold their shape when sliced.
- Pour the melted chocolate evenly over the pressed-down mixture. Use a spatula to spread it out smoothly, covering all the ingredients with a glossy layer. Gently tap the pan on the counter to settle the chocolate and remove any air bubbles.
- Sprinkle a tiny pinch of sea salt or smoked sea salt over the top of the chocolate layer to enhance the flavor contrast. Lightly press the salt into the chocolate if needed for better adhesion.
- Place the pan in the refrigerator for at least 2 hours, or until the chocolate is fully set and firm. This chilling step ensures the bars hold together perfectly when sliced.
- Once the chocolate has hardened, lift the slab out of the pan using the parchment paper and place it on a cutting board. Use a sharp knife to cut into 8-10 bars, wiping the blade with a warm damp cloth between cuts for clean, neat slices.
- Let the bars sit at room temperature for about 10 minutes before serving. This softens the chocolate slightly and enhances the aroma of the nuts and cocoa, making each bite irresistible.
Notes
Tips for perfect nut bars
- Use room temperature chocolate for smoother melting and fewer lumps.
- Chill the nut mixture briefly before pressing to prevent sticking and help shape.
- Press down firmly when compacting in the pan for even, clean slices.
- Use a warm, damp knife for slicing to get neat, crack-free bars.
- Spread melted chocolate quickly to avoid thickening or setting unevenly.
- Tap the pan on the counter after pouring chocolate to release air bubbles and settle the layer.
- Allow the bars to sit at room temp for 10 minutes after fridge time to soften the chocolate slightly.
Common mistakes and how to fix them
- FORGOT to measure ingredients precisely → Use a scale for accuracy.
- DUMPED in too much liquid → Drain excess or reduce liquid quantities.
- OVER-TORCHED the chocolate → Melt slowly on low heat, stir constantly.
- MISSED chilling time → Chill until bars are firm and chocolate is set.
Quick fixes and pantry swaps
- When chocolate seizes, splash in a teaspoon of coconut oil to smooth it out.
- If mixture is too sticky, refrigerate 10 minutes before pressing into the pan.
- Dumped in too much salt? Rinse the nuts and start fresh for a balanced flavor.
- Over-torched chocolate? Patch it with a fresh batch and stir quickly to save the shine.
- Shield the bars from humidity by wrapping tightly; shimmer in the chocolate remains crisp.
Prep, store, and reheat tips
- Prep the nut mixture and chop ingredients a day in advance to save time and keep everything fresh. The aromas will be even more inviting when you assemble.
- Store the assembled bars tightly wrapped in parchment or an airtight container at room temperature for up to 3 days. Expect the chocolate to soften slightly but stay deliciously rich and nutty.
- For longer storage, freeze the bars wrapped in foil or in a container for up to 1 month. Thaw at room temperature for 10-15 minutes before slicing to maintain texture.
- Reheat slightly if needed by letting the bars sit at room temperature for 5 minutes or warming briefly at 30°C (86°F) in the microwave. The chocolate may soften, releasing a tempting aroma of cocoa and nuts.
Top questions about no bake nut bars
1. How do I know when the mixture is ready?
Look for a firm, slightly sticky texture. When pressed, it should hold together without crumbling.
2. Can I use milk or white chocolate instead?
Use high-quality dark chocolate for a rich flavor and glossy finish. Cheaper chocolates may seize or crack.
3. How long should I refrigerate the bars?
Chill the bars for at least 2 hours until the chocolate is fully set and the bars feel firm to the touch.
4. How should I store these nut bars?
Store in an airtight container at room temperature for up to 3 days, or freeze for longer storage.
5. My mixture is crumbly, what can I do?
If the mixture is too dry, add a tiny splash of honey or a few drops of water to help it bind.
6. How do I get neat slices?
Use a warm, damp knife to slice cleanly through the chilled bars, preventing cracking and sticking.
7. Can I add more salt or other toppings?
Add a pinch of sea salt on top of the chocolate for a flavor boost and contrast to sweetness.
8. Can I substitute honey with another sweetener?
Yes, you can swap honey for maple syrup or agave. The bars will be slightly less chewy but still delicious.
9. Can I use raw instead of roasted nuts?
Use roasted, unsalted nuts for the best flavor and crunch. Raw nuts will work but may be less aromatic.
10. How do I melt chocolate properly?
Yes, you can melt the chocolate in a double boiler or in short bursts in the microwave, stirring frequently.
These no-bake nut bars are a reminder that simplicity can be deeply satisfying, especially when you rely on honest ingredients and a little patience. They carry the warmth of childhood memories—crunchy, sticky, with a roasted nut aroma that fills the kitchen. In times when quick comfort matters most, these bars deliver a perfect, unpretentious treat.
Plus, they’re flexible enough to adapt to what’s in your pantry, making them a go-to for busy days or spontaneous cravings. Once set, they slice cleanly and keep well, making them a handy stash to have on hand. There’s nothing fancy about them, just honest flavors and a little bit of love in every bite.