
This no-bake oat squares recipe is my secret weapon for those days when the oven feels like an unnecessary chore. It’s surprisingly satisfying, with a chewy, nutty base that comes together in minutes, no baking needed. Plus, it’s a real crowd-pleaser, whether I’m prepping for a quick snack or a last-minute sweet treat.
What I love most? It’s honest, straightforward, and adaptable. I can toss in whatever dried fruits or seeds I have lying around, making each batch a little different. It’s the kind of recipe that turns chaos into comfort—no fuss, just good, honest ingredients pressed into a pan and left to set. Perfect for lazy weekends or busy weekday afternoons.
This recipe is my go-to when I need a quick, satisfying treat that doesn’t require turning on the oven, especially during those crazy busy days or hot summer afternoons.
The story behind this recipe
- This recipe was born out of a chaotic afternoon when I needed something sweet but didn’t want to turn on the oven. I had a handful of oats and a bit of honey, and suddenly, pressing everything into a pan felt like the easiest, most honest way to get a treat on the table. It’s become a kind of comfort food—simple, no-fuss, and endlessly adaptable.
- I remember the first time I made these, I was in a rush, but the smell of toasted oats and melting chocolate filled the kitchen, making everything feel calmer. Over the years, these squares have gathered stories—their chewy bites reminding me of lazy Sunday mornings, quick snacks after long bike rides, and sharing with friends during hurried gatherings.
- heading
- The story behind this recipe
Ingredient breakdown: key components
- Old-fashioned oats: I prefer the chewy texture they give, but steel-cut oats make it denser and nuttier—try swapping if you like a heartier bite.
- Honey: It’s the glue that brings everything together with a mellow sweetness and gooey feel—consider maple syrup for a smokier tone, or agave for a neutral sweetness.
- Natural peanut butter: Adds creaminess and richness, but sunflower seed butter can work if you want nut-free—just expect a slightly different flavor profile.
- Dark chocolate chips: I love the contrast of melty, bittersweet pockets, but chopped dried fruits like cranberries or apricots can add a chewy, tangy surprise.
- Coconut oil: It helps bind and gives a subtle shine, but butter melts in smoothly too—just keep an eye on the consistency for easy pressing.
- Vanilla extract: It deepens the sweetness and aroma; skip it if you want a more straightforward, oat-forward flavor, or add a pinch of cinnamon for warmth.
- Sea salt: Just a pinch wakes everything up; if you’re into more contrast, sprinkle some flaky sea salt on top before chilling.
Spotlight on key ingredients
Old-fashioned oats:
- I love their chewy texture and nutty flavor that holds up well in no-bake treats. They soften just enough but still offer a satisfying bite. If you prefer a denser square, try steel-cut oats for a more substantial chew.
- Honey: It’s the gooey binder that gives a mellow sweetness and a slight floral aroma. When heated, it becomes sticky and helps everything cling together. Swap with maple syrup for a smoky undertone or agave for a neutral sweetness, but expect slight changes in texture.
Honey:
- Natural peanut butter: Adds creamy richness and a subtle roasted flavor that balances the sweetness. It melts smoothly into the mixture, creating a luscious, sticky texture. If you’re nut-free, sunflower seed butter works just as well, though it has a milder flavor and a slightly different consistency.
- ingredient
Notes for ingredient swaps
- Dairy-Free: Use coconut oil instead of butter for binding—expect a slightly coconutty flavor and softer texture.
- Sweeteners: Swap honey for maple syrup for a smoky, richer taste, or agave nectar for a more neutral sweetness.
- Nut Butter: Almond or cashew butter can replace peanut butter—each brings a different nutty depth and creaminess.
- Chocolate: White chocolate chips add sweetness and creaminess, but dried fruits like cranberries offer tang and chew.
- Oats: Steel-cut oats will give a denser, nuttier bite, but stick with rolled oats for a more tender chew.
- Flavor Enhancer: Add a dash of cinnamon or nutmeg for warmth, or vanilla extract to deepen the sweetness.
- Add-ins: Chopped nuts or seeds can replace chocolate chips, offering crunch and extra nutrition—try sunflower or pumpkin seeds.
Equipment & Tools
- 20x20cm (8×8 inch) baking pan: To shape and set the squares.
- Mixing bowls: Combine ingredients thoroughly.
- Spatula: Spread and press mixture evenly.
- Parchment paper: Prevent sticking and facilitate removal.
- Knife: Cut into squares cleanly.
Step-by-step guide to no bake oat squares
- Gather your equipment: a 20x20cm (8×8 inch) baking pan, mixing bowls, a spatula, and parchment paper. Line the pan with parchment for easy removal.
- In a large mixing bowl, combine 2 cups of old-fashioned oats, 1/2 cup of honey, 1/2 cup of natural peanut butter, and 1 teaspoon of vanilla extract. Mix well until everything is coated and sticky.
- Melt 1/4 cup of coconut oil in a small saucepan over low heat, about 2 minutes, until just melted and fragrant. Pour into the oat mixture and stir thoroughly. The mixture should be moist and slightly glossy.
- Press the mixture evenly into the prepared pan. Use the back of a spatula or your hands to flatten and compact it. Aim for a smooth, level surface.
- Sprinkle 1/4 cup of chocolate chips evenly over the top, pressing them gently into the mixture. This helps them stay embedded after chilling.
- Chill the pan in the fridge for at least 2 hours, or until firm. If in a hurry, place in the freezer for 30-45 minutes, checking that the mixture feels solid and holds together when pressed.
- Once set, lift the square block out of the pan using the parchment edges. Cut into 9 or 12 even squares using a sharp knife. If the edges crack, gently press the pieces back together.
- Serve immediately or store in an airtight container. For best texture, keep in the fridge and enjoy within 5 days. You can also freeze for up to a month, wrapping each square in plastic wrap before freezing.
- To reheat or soften, leave squares at room temperature for 10 minutes or microwave on low for 10 seconds until just warm and chewy.
- Enjoy these simple, chewy oat squares as a quick snack, breakfast on the go, or a sweet treat after a long day.
Chill the pressed mixture in the fridge for at least 2 hours until firm. Remove from pan using parchment, cut into squares, and serve. Keep stored in an airtight container in the fridge for up to 5 days or freeze for longer storage.
How to Know It’s Done
- Mixture is evenly combined and sticky enough to press without crumbling.
- Chocolate chips are embedded in the surface and pressed lightly.
- The mixture is firm and holds shape after chilling for at least 2 hours.
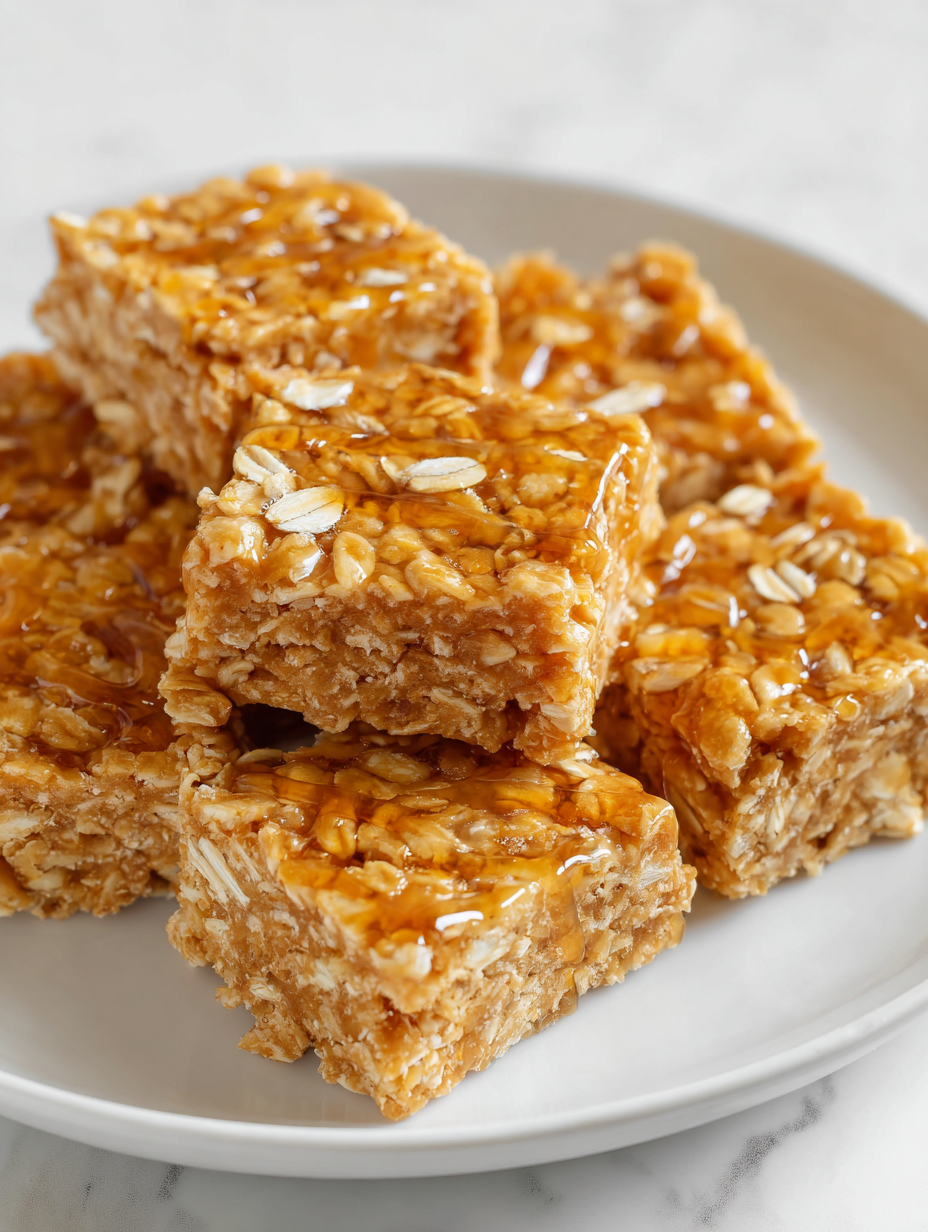
No-Bake Oat Squares
Ingredients
Equipment
Method
- Line your baking pan with parchment paper, leaving some overhang for easy removal.
- In a large mixing bowl, combine the oats, honey, peanut butter, vanilla extract, and coconut oil. Mix everything thoroughly until the mixture is sticky and well coated, with a slightly glossy appearance.
- Once mixed, press the mixture firmly into the prepared pan using the back of a spatula or your hands, creating an even layer. Tapping the pan on the counter can help compact it tightly.
- Sprinkle the chocolate chips evenly over the pressed mixture, pressing lightly to embed them into the surface.
- Sprinkle a pinch of sea salt over the top, adding contrast and enhancing the sweetness.
- Place the pan in the fridge and chill for at least 2 hours, or until the mixture is firm and set. For quicker setting, you can pop it in the freezer for about 30-45 minutes.
- Once set, lift the entire block out of the pan using the parchment overhang. Use a sharp knife to cut into 12 even squares.
- Serve immediately or store in an airtight container in the fridge for up to 5 days. For longer storage, wrap individually and freeze, then thaw slightly before enjoying.
Notes
Pro tips for perfect no bake squares
- Bolded mini-head: Use parchment paper: It prevents sticking and makes removal a breeze, especially when pressing the mixture.
- Bolded mini-head: Don’t overmix: Fold ingredients gently to keep the oats intact—overmixing makes the squares dense and tough.
- Bolded mini-head: Chill properly: Let the squares set in the fridge for at least 2 hours to achieve the perfect chewy consistency.
- Bolded mini-head: Press firmly: Compact the mixture tightly into the pan to prevent crumbling and ensure even slices.
- Bolded mini-head: Adjust sweetness: Taste the mixture before setting; add a drizzle of honey or maple syrup if it feels under-sweetened.
- Bolded mini-head: Melt chocolate carefully: Use low heat or a double boiler to avoid burning, leaving the chocolate glossy and smooth.
- Bolded mini-head: Cut with a sharp knife: Slightly warm the blade or refrigerate before slicing for clean, even edges.
Common mistakes and how to fix them
- FORGOT to pack ingredients tightly → Press mixture firmly to avoid crumbly squares.
- DUMPED in too much honey → Balance sweetness by reducing honey or adding more oats.
- OVER-TORCHED chocolate → Add chocolate at lower heat, stir constantly to avoid burning.
- MISSED chilling time → Ensure at least 2 hours in fridge for proper setting.
Quick fixes and pantry swaps
- When mixture is too crumbly → Splash in a tiny bit of warm water and stir until cohesive.
- If squares are too soft → Patch by pressing mixture back into the pan and chilling longer.
- When chocolate chips don’t embed → Shield with a gentle press and chill for an extra 30 minutes.
- If mixture sticks to hands → Rescue with damp hands or a touch of oil on fingers, then press firmly.
- Always keep a pantry swap in mind: swap dried fruits for seeds to shimmer in texture and flavor.
Prep, store, and reheat tips
- You can prepare the mixture a day ahead; just cover and keep in the fridge, where it stays fresh and sticky.
- Store the cut squares in an airtight container in the fridge for up to 5 days; the flavors deepen slightly, and they stay chewy.
- For longer storage, wrap individual squares in plastic wrap and freeze for up to a month; they become a bit firmer but still chewy after thawing.
- Reheating isn’t necessary, but if you prefer a softer bite, microwave on low for 10 seconds and watch for a warm, gooey texture with a faint aroma of toasted oats.
Top questions about no bake oat squares
1. Can I use a different sweetener?
Yes, you can swap honey for maple syrup or agave nectar. It will slightly change the sweetness and texture, but still work well.
2. Can I substitute the peanut butter?
Absolutely. Use nut or seed butters like almond or sunflower seed butter. They give a similar creaminess but a different nutty flavor.
3. Are these dairy-free?
Yes, you can. If you want them dairy-free, skip butter or chocolate chips, or use dairy-free alternatives like coconut oil and dairy-free chocolate.
4. How long do I need to chill them?
Chill the squares for at least 2 hours in the fridge. They should feel firm when pressed and hold their shape when cut.
5. My mixture is crumbly, what do I do?
If your mixture feels too crumbly, add a teaspoon of warm water and stir gently until it sticks together better.
6. How do I get clean slices?
Use a sharp knife warmed slightly or cooled in hot water for clean, even cuts. Wipe the blade in between slices for neat edges.
7. How should I store leftovers?
Store the squares in an airtight container in the fridge for up to 5 days. For longer storage, freeze individually wrapped squares for up to a month.
8. Can I prepare this ahead?
You can prepare the mixture a day in advance. Keep it covered in the fridge and press into the pan when ready to set.
9. How do I reheat or soften them?
To soften chilled squares, microwave on low for about 10 seconds or leave at room temperature for 10 minutes.
10. Why is my chocolate burning?
When the chocolate melts with a crackling sound, it’s perfect. If it burns and smells burnt, lower the heat and stir more often.
These no-bake oat squares are the kind of simple treat I turn to when I need something honest and quick. The smell of toasted oats and melting chocolate always pulls me into a moment of quiet satisfaction. They’re perfect for those busy afternoons or when I want a little sweetness without the fuss.
In the end, it’s about the small, imperfect pleasures—pressing the mixture into the pan, waiting for it to set, then cutting into those chewy, chocolate-studded squares. They remind me that sometimes, the best things are the easiest to make and the hardest to forget.