
These no-bake peanut butter bars are my go-to when I need a quick, satisfying treat that doesn’t demand turning on the oven. They bring back childhood memories of sticky fingers and sweet, salty bites, but with a grown-up twist thanks to richer peanut butter and a hint of vanilla. It’s one of those recipes I keep in my back pocket for busy afternoons or unexpected guests.
What I love most is how simple yet deeply comforting they are. No fuss, no long waits—just a few ingredients, some mixing, and you’re done. Plus, they’re totally customizable: a dash of sea salt here, a sprinkle of chocolate chips there. These bars are honest, unpolished, and honest-to-goodness delicious—a little bit nostalgic, a little bit daring.
Focusing on how these bars offer a no-fuss, nostalgic treat that combines childhood comfort with grown-up flavors, perfect for those days when you want something sweet without the fuss of baking.
Nostalgic comfort in every bite
- Making these bars takes me back to lazy childhood afternoons, yet they feel like a secret adult indulgence.
- I love how these bars are my secret weapon for unexpected guests—sweet and satisfying in minutes.
- There’s a weird thrill in skipping the oven, especially when the kitchen smells like roasted peanuts and melted chocolate.
- Each time I make them, I realize how simple ingredients can create something genuinely addictive and comforting.
- These bars remind me that sometimes, the best treats are the ones you whip up with what’s already in your pantry.
The inspiration behind these bars
- This recipe was born out of a lazy Sunday afternoon when I realized I had a stash of peanut butter and a sweet tooth that couldn’t wait. No oven, no fuss, just melting, mixing, and setting—simple as that. I wanted something that felt indulgent but didn’t demand much effort, perfect for those moments when time is tight but cravings are loud.
- Every time I make these, I remember how my grandma used to toss together quick treats with whatever was in her pantry. There’s a kind of magic in transforming humble ingredients into something so satisfying, especially when it’s cold outside and you need a little extra comfort.
- heading
- story_type
Contextual origin and fun facts
- These bars likely originated as a homemade solution during wartime shortages, where simple ingredients like peanut butter and graham crackers were common.
- The no-bake format became popular in the mid-20th century, offering an easy, quick treat before modern refrigeration was widespread.
- Peanut butter bars are a staple in American comfort food, often linked to school bake sales and potluck desserts.
- The combination of peanut butter and chocolate in these bars echoes the classic pairing found in candies like Reese’s Cups, which gained popularity in the 1920s.
- In some regions, similar recipes are called ‘peanut butter squares’ or ‘no-bake energy bars,’ showing their versatility and widespread appeal.
Breakdown of key ingredients
- Creamy peanut butter: I use smooth, salty peanut butter for that rich, oozy texture—swap for almond butter if you prefer a nuttier, slightly sweeter flavor.
- Honey or corn syrup: Adds a glossy, sticky sweetness that binds everything; if you want less sweetness, try maple syrup but expect a slightly different chew.
- Graham cracker crumbs: The classic base that gives structure and a hint of toasty flavor—crushed digestive biscuits work well if you’re outside the US.
- Chocolate chips: I love semi-sweet for balance, but dark chocolate or milk chocolate can be swapped for different flavor profiles—just melt in gently for a shiny top.
- Butter: Keeps the mixture smooth and helps the bars set firm; for dairy-free, coconut oil is a good substitute but will add a coconut aroma.
- Vanilla extract: A splash enhances the richness—omit if you want a more straightforward peanut flavor, but it’s worth the depth.
- Salt: Just a pinch to cut the sweetness and bring out the peanut butter—sea salt flakes add a nice crunch and burst of flavor.
Spotlight on key ingredients
Peanut Butter:
- Creamy peanut butter: I use smooth, salty peanut butter for that rich, oozy texture—swap for almond butter if you prefer a nuttier, slightly sweeter flavor.
- Honey or corn syrup: Adds a glossy, sticky sweetness that binds everything; if you want less sweetness, try maple syrup but expect a slightly different chew.
- Graham cracker crumbs: The classic base that gives structure and a hint of toasty flavor—crushed digestive biscuits work well if you’re outside the US.
Chocolate & Butter:
- Chocolate chips: I love semi-sweet for balance, but dark chocolate or milk chocolate can be swapped for different flavor profiles—just melt in gently for a shiny top.
- Butter: Keeps the mixture smooth and helps the bars set firm; for dairy-free, coconut oil is a good substitute but will add a coconut aroma.
Notes for ingredient swaps
- Nuts & Butters: Almond or cashew butter can replace peanut butter for a different nutty flavor, but may alter the oozy texture slightly.
- Sweeteners: Maple syrup or agave nectar work as alternatives to honey or corn syrup, offering different sweetness profiles and consistency.
- Cracker Base: Digestive biscuits or gluten-free graham crackers can swap in for traditional graham crumbs, adjusting for flavor and texture.
- Chocolate: Dark chocolate or dairy-free chocolate chips can be used instead of semi-sweet for a richer or vegan-friendly topping.
- Butter & Fats: Coconut oil is a good dairy-free substitute that will add a subtle coconut aroma and slightly softer set.
- Flavor Enhancers: A touch of sea salt flakes or flavored salts can elevate the overall taste and add crunch.
- Additional Mix-ins: Stir in chopped nuts, dried fruit, or coconut flakes before pressing into the pan for added texture and flavor variation.
Equipment & Tools
- 20x20cm (8×8 inch) pan: To hold and shape the bars during setting.
- Mixing bowl: To combine and mix ingredients.
- Spatula: To press, spread, and mix ingredients smoothly.
- Microwave-safe bowl: To melt chocolate and peanut butter mixture evenly.
- Sharp knife: To slice the bars cleanly after setting.
Step-by-step guide to no-bake bars
- Gather your equipment: a 20x20cm (8×8 inch) square pan, a mixing bowl, a spatula, and a microwave-safe bowl for melting chocolate.
- In the microwave-safe bowl, combine 1 cup (250g) of creamy peanut butter, 1/2 cup (120ml) honey, and 1/4 cup (60g) of unsalted butter. Microwave in 30-second bursts, stirring between, until smooth and oozy, about 1.5 minutes total.
- In the mixing bowl, crush 1 1/2 cups (150g) of graham cracker crumbs into fine crumbs. You can use a food processor or seal crackers in a bag and crush with a rolling pin.
- Pour the melted peanut butter mixture over the cracker crumbs. Mix thoroughly with a spatula until the crumbs are evenly coated and sticky.
- Press this mixture firmly into the prepared pan—use the back of a spatula or your fingers to create an even, compact layer. Chill in the fridge for 20 minutes to set.
- Meanwhile, melt 1 cup (180g) of chocolate chips in the microwave in 20-second bursts, stirring each time until smooth and shiny. Be careful not to overheat or burn the chocolate.
- Pour the melted chocolate evenly over the chilled peanut butter layer. Use a spatula to spread smoothly and ensure all edges are covered.
- Refrigerate the assembled bars for at least 1 hour, or until the chocolate is firm and the bars are set. For best results, leave them in the fridge overnight.
- Once set, remove from the fridge and slice into squares with a sharp knife. Wipe the knife clean between cuts for neat edges.
- Serve immediately or store in an airtight container in the fridge. Let sit at room temperature for 5 minutes before serving for softer, more melt-in-your-mouth bites.
Chill the bars in the fridge for at least 1 hour, or until firm. Slice into squares and serve directly from the fridge or at room temperature for a softer bite. Keep leftovers covered in the fridge, and bring to room temp for 5 minutes before eating if refrigerated.
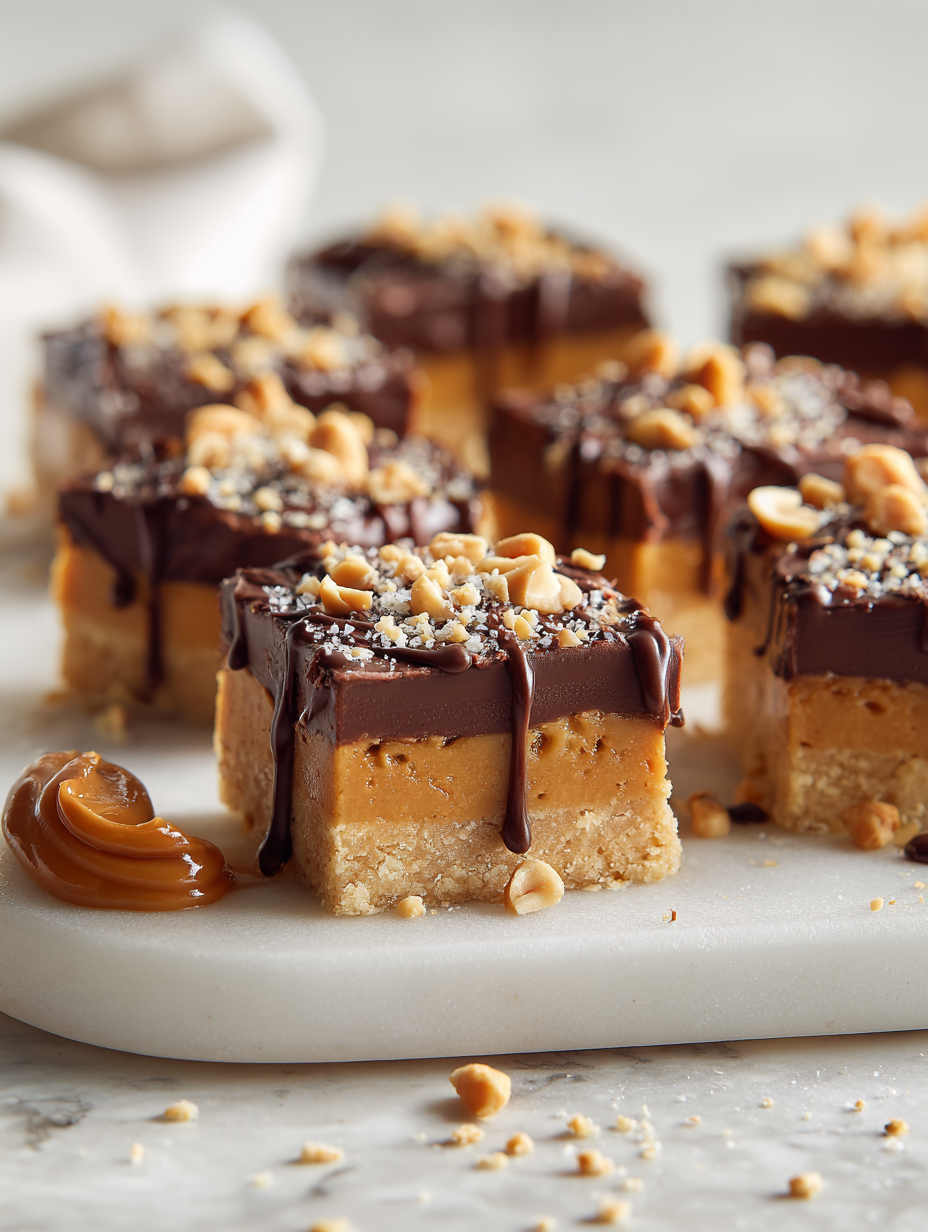
How to Know It’s Done
- Chocolate topping is shiny and firm, not sticky or dull.
- Bars hold their shape when cut, not crumbling or soft.
- Peanut butter layer is compact and slightly sticky, not greasy or loose.
No-Bake Peanut Butter Bars
Ingredients
Equipment
Method
- Place the peanut butter, honey, and butter in a microwave-safe bowl. Microwave in 30-second bursts, stirring well each time, until the mixture is smooth, glossy, and fragrant, about 1.5 minutes total.
- In a large mixing bowl, crush the graham crackers into fine crumbs, either using a food processor or sealing them in a plastic bag and pounding with a rolling pin.
- Pour the melted peanut butter mixture over the graham cracker crumbs. Use a spatula to thoroughly mix until all the crumbs are coated and sticky, creating a uniform, dough-like texture.
- Press the mixture firmly into the prepared pan, spreading evenly with the back of a spatula or your fingers. Chill in the fridge for 20 minutes to set and firm up.
- Meanwhile, melt the chocolate chips in a microwave-safe bowl in 20-second bursts, stirring each time until smooth, shiny, and fully melted. This should take about 1 minute total.
- Remove the pan from the fridge and pour the melted chocolate evenly over the chilled layer. Use a spatula to spread the chocolate smoothly across the surface.
- Refrigerate the bars for at least 1 hour, or until the chocolate is firm and the bars are set. For best results, leave them overnight.
- Once set, use a sharp knife to cut the bars into squares, wiping the knife clean between cuts for neat edges.
- Serve the bars immediately or store them in an airtight container in the fridge. For softer bites, let them sit at room temperature for 5 minutes before enjoying.
Tips for the best no-bake bars
- Bolded Tip: Use room temperature peanut butter to ensure smooth mixing without lumps.
- Bolded Tip: Microwave chocolate in short bursts, stirring often, to prevent scorching and achieve glossy melt.
- Bolded Tip: Press mixture firmly into the pan with the back of a spatula for an even, compact base.
- Bolded Tip: Chill the bars in the fridge for at least an hour to ensure clean, neat slicing.
- Bolded Tip: Wipe your knife with a damp cloth between cuts to prevent sticking and jagged edges.
- Bolded Tip: For extra shine, briefly warm the chocolate topping with a blowtorch or gentle heat before serving.
- Bolded Tip: If the mixture feels too sticky to press, sprinkle a little extra cracker crumbs to help handleability.
Common mistakes and how to fix them
- FORGOT to measure ingredients accurately → Use a scale for consistency.
- DUMPED in all chocolate at once → Melt chocolate gradually to prevent burning.
- OVER-TORCHED the chocolate → Remove from heat as soon as it’s smooth and shiny.
- MISSED chilling time → Let the bars set fully in the fridge for clean cuts.
Quick fixes and pantry swaps
- When mixture feels too sticky → Splash with a little more cracker crumbs to firm it up.
- If chocolate cracks when melting → Patch with a few seconds in the microwave, stirring gently.
- DUMPED in too much honey → Balance with a touch more peanut butter or crackers to stabilize texture.
- Over-chilled bars → Shield with a brief 10-second microwave blast to soften before slicing.
- When bars crumble → Rescue by pressing together gently and chilling again for a softer set.
Prep, store, and reheat tips
- Prepare the mixture and press into the pan ahead of time; it firms up better when chilled overnight, making slicing easier.
- Store the bars in an airtight container in the fridge for up to 5 days; the flavors meld and the texture stays firm.
- For longer storage, freeze the bars wrapped tightly in plastic, and they will keep well for up to 2 months. Thaw in the fridge before serving.
- Refrigerated bars maintain their chewy texture and rich flavor; reheat briefly at room temperature if you prefer softer bites, about 5 minutes, until slightly pliable.
Top questions about no-bake peanut butter bars
1. Can I use crunchy peanut butter?
Use creamy peanut butter for a smooth, oozy texture that binds well. Crunchy peanut butter will add texture but may be a bit chunkier.
2. How long do I need to chill the bars?
Chill the bars for at least an hour, or until the chocolate topping is shiny and set. They should hold their shape when cut.
3. Can I swap peanut butter for other nut butters?
Yes, you can substitute almond or cashew butter for peanut butter, but expect a slightly different flavor and texture.
4. What kind of chocolate should I use?
Use semi-sweet chocolate chips for a balanced flavor. Dark chocolate or dairy-free chips work well too, just melt gently.
5. How should I store these bars?
Store the bars in an airtight container in the fridge for up to 5 days. They keep well but taste best slightly softened at room temperature.
6. Can I freeze the bars?
You can freeze the bars for up to 2 months, wrapped tightly. Thaw in the fridge or at room temperature before serving.
7. Can I use a different sweetener?
Choose honey or corn syrup for the sticky sweetness that binds the ingredients. Maple syrup is a good alternative but may add a different flavor note.
8. What can I use instead of graham crackers?
Crushed digestive biscuits or gluten-free graham crackers can replace traditional crumbs, adjusting for flavor and texture.
9. How do I cut the bars without crumbling them?
Use a sharp knife, wiped clean between cuts, to get neat, clean slices without crumbling.
10. What if the mixture is too sticky to press?
If the mixture feels too sticky, sprinkle in a few more cracker crumbs or refrigerate briefly to firm it up.
These no-bake peanut butter bars are more than just a quick treat—they’re a reminder that simple ingredients can create something truly satisfying. When I need a comforting snack without the fuss of baking, they’re what I reach for, especially on busy days or when friends drop by unexpectedly.
Plus, they’re endlessly adaptable, whether you add a pinch of sea salt, sprinkle some chocolate chips, or swap in different nut butters. Sitting with a square, feeling the rich peanut aroma and that glossy chocolate top, I always think how honest and unpretentious these bars are—something everyone should have in their recipe stash.