
These no-bake date bars are the kind of snack I turn to when life gets busy and I need something satisfying without the fuss. There’s a nostalgic pull to their chewy, nut-studded bite that reminds me of simpler mornings or impromptu visits from friends. It’s almost like a little pocket of comfort I can toss together in minutes, no oven required.
What I love most is how flexible they are—swap in your favorite nuts, add a sprinkle of coconut, or keep them plain. They’re a practical, honest treat that feels like a small act of kindness, both for myself and anyone who bites into one. Plus, they’re a reminder that sometimes, the simplest ingredients make the best snacks.
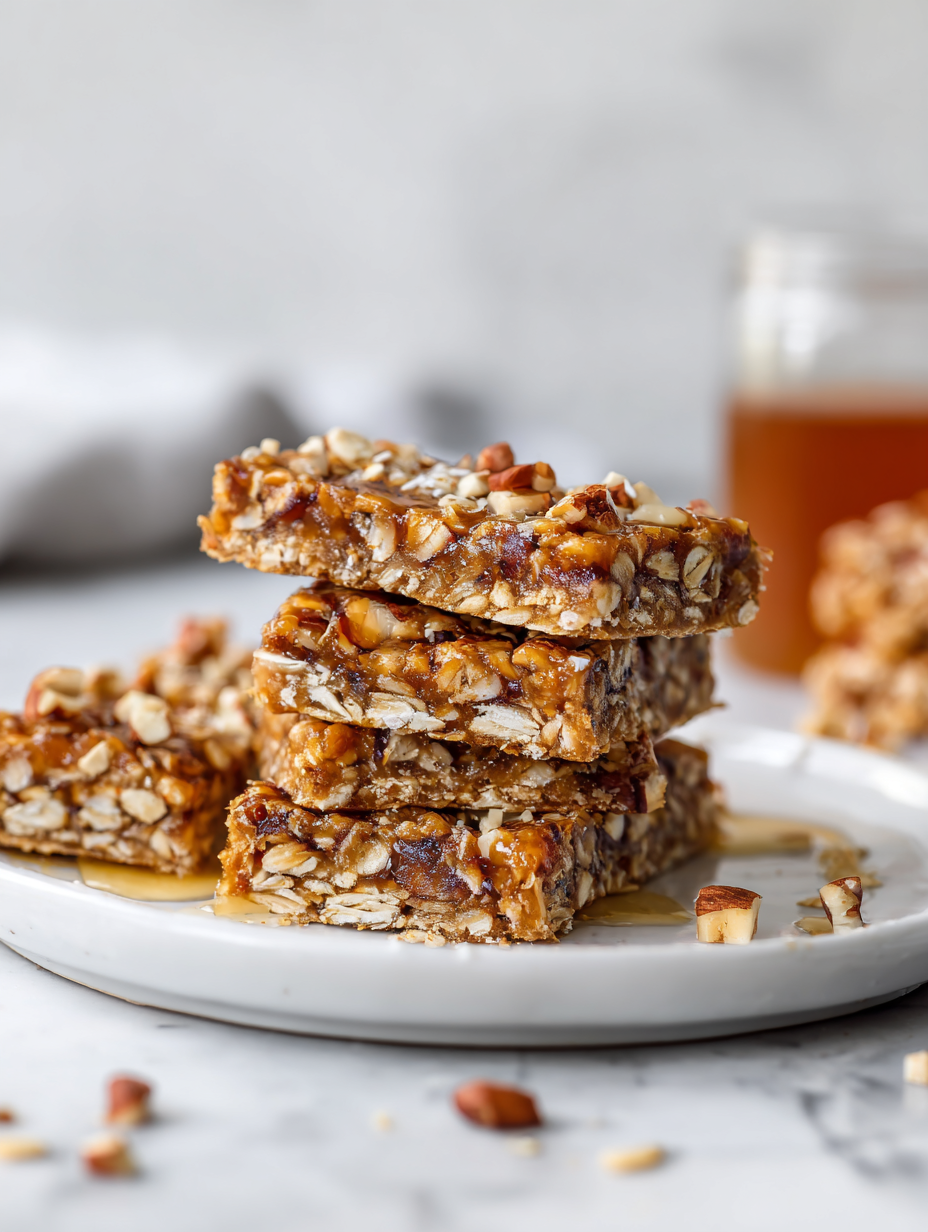
Focusing on how these no-bake date bars serve as a nostalgic, no-fuss comfort snack that’s perfect for busy mornings or unexpected guests, highlighting their simplicity and the satisfying chew of dates and nuts combined.
Story Behind the Bars
- This recipe came together on a lazy afternoon when I was rummaging through my pantry, looking for something sweet but no-fuss. I remembered how my grandmother used to keep a stash of dates and nuts for whenever she needed quick energy or just a little treat. I wanted to recreate that feeling—simple, honest, and satisfying without turning on the oven.
- It’s funny how a handful of ingredients can evoke such nostalgia. These bars remind me of childhood mornings, sticky fingers and all, but with a grown-up twist of nuttiness and richness. They became my go-to for busy mornings or when I need a quick, wholesome pick-me-up on the go.
- heading
- Story Behind the Bars
Key Ingredients Breakdown
- Dates: I love the natural caramel sweetness they bring, with a chewy, slightly sticky texture. If they’re too dry, soak them in warm water for 10 minutes before chopping.
- Nuts: I prefer a mix of almonds and cashews for crunch, but feel free to swap in walnuts or pecans. Toasted nuts add a smoky aroma, so give them a quick toast if you have the time.
- Oats: Rolled oats give a hearty chew; I usually use old-fashioned oats. For a softer bar, try quick oats, but they make a more fragile crust.
- Binder: Honey or maple syrup keeps everything sticky and holds the bars together. Use honey for a richer flavor, but maple syrup makes it slightly lighter and more floral.
- Optional add-ins: A pinch of sea salt or a sprinkle of shredded coconut can elevate the flavor. I love a dash of sea salt to balance the sweetness, especially if I add chocolate chunks.
- Coconut oil: Just enough to help bind and add a subtle richness. If you prefer a firmer texture, use a tad more. The coconut aroma during mixing is a lovely hint of what’s to come.
- Chocolate chips: I often press a handful on top before chilling for that extra indulgent touch. Choose dark or semi-sweet for a balanced bitterness, or leave them out for a pure date-nut bite.
Spotlight on key ingredients
Dates:
- I love how they turn into a sticky, caramel-like paste when blended, giving the bars their signature chew. If they seem dry, soaking helps loosen them up for easier processing.
- Their natural sweetness is intense and oozes a rich, honeyed aroma as you blend, making every bite feel decadently sweet without added sugar.
Nuts:
- I prefer a rough chop of almonds and cashews for a hearty crunch, but toasted nuts add a smoky depth that makes the bars more complex. If you’re short on time, use pre-toasted or roasted varieties.
- Their oils release a fragrant aroma when mixed, and toasting them beforehand amplifies that nutty, warm scent, elevating the overall flavor.
Ingredient Swap Tips
- Dairy-Free: Swap honey for agave syrup. The bars stay sticky and sweet, but with a more neutral flavor.
- Nut-Free: Use toasted sunflower seeds or pumpkin seeds instead of nuts. Adds crunch without the allergy risk.
- Vegan: Replace honey with maple syrup or coconut nectar. Expect a slightly different caramel note, but still delicious.
- Gluten-Free: Ensure your oats are certified gluten-free. Keeps the bars safe for celiac or gluten-sensitive diets.
- Sweetener Variation: Use brown rice syrup for a richer, malty flavor that pairs well with dates and nuts.
- Flavor Boost: Add a splash of vanilla extract or a sprinkle of cinnamon for extra warmth and aroma.
- Texture Twist: Incorporate shredded coconut or chia seeds for additional chewiness or a bit of crunch.
Equipment & Tools
- 20×20 cm (8×8 inch) square pan: To shape and hold the mixture for slicing.
- Spatula: To mix ingredients and press the mixture into the pan.
- Sharp knife: To cut the set bars into squares or rectangles.
- Parchment paper: To prevent sticking and make removal easier.
- Small saucepan: To gently warm the honey or syrup for better mixing.
Step-by-step guide to no bake date bars
- Gather your equipment: a 20×20 cm (8×8 inch) square pan, a spatula, a sharp knife, and a parchment paper sling. Line the pan with parchment, leaving an overhang for easy removal.
- Chop the dates into small pieces. If they seem dry or hard, soak them in warm water for 10 minutes, then drain thoroughly. This softens them for easier blending.
- In a large mixing bowl, combine the chopped dates, oats, and your choice of nuts (roughly chopped). Add a pinch of sea salt if desired. Mix well to distribute evenly.
- In a small saucepan over low heat (about 60°C/140°F), melt the honey or maple syrup with a tablespoon of coconut oil until warm and slightly runny, about 2 minutes. This helps it blend smoothly.
- Pour the warm syrup mixture over the dry ingredients. Use a spatula to fold everything together until thoroughly coated and sticky. The mixture should clump together when pressed.
- Transfer the mixture to your prepared pan. Press firmly with the back of a spatula or your fingers to create an even, compact layer. Aim for about 1.5-2 cm (0.6-0.8 inches) thickness.
- Use the overhang of parchment to lift the bars out of the pan. Place on a cutting board and slice into rectangles or squares, about 2.5 cm (1 inch) wide.
- Lay the cut bars on a parchment-lined tray. Refrigerate for at least 2 hours, or until firm and set. This resting period helps the bars hold together after slicing.
- Once chilled, check the texture. They should be firm but chewy. If the edges crumble, give them a gentle press. For a softer bite, let them sit at room temperature for 10 minutes before serving.
- Serve directly from the fridge or at room temp. Store leftovers in an airtight container in the fridge for up to a week, or freeze for up to a month. Thaw slightly before eating for maximum chewiness.
Once sliced, store the bars in an airtight container in the fridge for at least 2 hours to set fully. Serve chilled or at room temperature, depending on your preference. For a softer, more pliable bite, let them sit out for 10 minutes before eating.
How to Know It’s Done
- Mixture holds together when pressed, not crumbly.
- Bar surface is matte, not sticky or shiny.
- Bars are firm and set after chilling, with a chewy bite.
No-Bake Date Bars
Ingredients
Equipment
Method
- Chop the dates into small pieces and soak them in warm water for about 10 minutes if they seem dry or hard, then drain thoroughly.
- Place the chopped dates into a large mixing bowl along with the oats, chopped nuts, and a pinch of sea salt. Stir everything together until evenly combined.
- In a small saucepan over low heat, warm the honey and coconut oil until just melted and blended, about 2 minutes. This creates a sticky, fragrant mixture.
- Pour the warm honey mixture over the dry ingredients, then fold everything together with a spatula until the mixture is sticky and well coated, with the dates and nuts evenly dispersed.
- Line your square pan with parchment paper, leaving a slight overhang for easy removal. Transfer the mixture into the pan and press it firmly into an even layer using the spatula or your fingers.
- If desired, sprinkle chocolate chips on top and gently press them into the surface for extra indulgence.
- Refrigerate the pan for at least 2 hours, or until the mixture is firm and set. This helps the bars hold together when sliced.
- Once chilled, lift the set mixture out of the pan using the parchment overhang. Place on a cutting board and slice into squares or rectangles, about 2.5 cm (1 inch) wide.
- Arrange the bars on a tray or plate. Serve immediately or store in an airtight container in the fridge for up to a week. For longer storage, freeze wrapped bars and thaw before enjoying.
Pro Tips for Perfect Bars
- Use a slightly warm spatula to press mixture — it helps compact everything smoothly.
- Mix ingredients thoroughly — ensure sticky date paste coats all nuts and oats for even texture.
- Chill the bars in the fridge for at least 2 hours — this sets the structure and prevents crumbling.
- When pressing into the pan, use the back of a spoon or your fingers for an even, dense pack.
- For a glossy finish, briefly warm honey before mixing — it blends better and adds a subtle sheen.
- Slice with a sharp, clean knife — wipe between cuts for neat edges and minimal squishing.
- Store bars in an airtight container in the fridge — they stay chewy and fresh up to a week.
Common mistakes and how to fix them
- FORGOT to soften dates, resulting in a tough, crumbly mixture. Soak for 10 minutes before chopping.
- DUMPED too much honey, making the bars overly sticky. Use just enough to bind ingredients.
- OVER-TORCHED nuts, which can turn bitter. Toast nuts gently until golden, then cool before mixing.
- MISSED the chilling step, causing bars to be soft and fall apart. Chill at least 2 hours for firmness.
Quick Fixes and Pantry Swaps
- When mixture is crumbly, splash in a bit more honey to help it stick.
- If bars are too soft, chill longer or add a touch more oats for firmness.
- DUMPED too much nuts? Press them more firmly into the mixture to hold better.
- If bars stick to the pan, PATCH with a quick swipe of coconut oil or spray.
- Splash warm water on the knife for cleaner cuts through sticky bars.
Prep, store, and reheat tips
- Prepare the mixture ahead: chop dates and nuts the night before to save time and keep ingredients fresh.
- Store the cut bars in an airtight container in the fridge for up to a week; the chewy texture stays intact.
- For longer storage, freeze the bars wrapped in parchment and foil for up to a month; thaw at room temperature before serving.
- Refrigerated bars will be firm and chewy; let them sit at room temperature for 10 minutes to soften slightly before eating.
- Reheat briefly in the microwave (10-15 seconds) if you prefer slightly warmer, gooey bites—watch for melting edges.
Top questions about no bake date bars
1. Can I use dried dates that seem hard?
Use soft, plump dates for easiest blending and chewy texture. Drier dates might need soaking first.
2. Can I make these vegan?
Yes, swapping honey for maple syrup keeps it vegan. Expect a slightly lighter, more floral flavor.
3. How long should I chill the bars?
Chill the bars for at least 2 hours until firm. If they’re still soft, refrigerate longer or add a touch more oats.
4. How do I get clean slices?
Use a sharp knife wiped clean between cuts. Slightly warming the knife helps slice through sticky mixture.
5. How should I store leftovers?
Store bars in an airtight container in the fridge for up to a week. For longer, freeze wrapped in parchment and foil.
6. My mixture is too crumbly, what can I do?
If mixture feels crumbly, add a splash more honey or syrup to help it hold together better.
7. Should I toast the nuts?
Toasting nuts beforehand adds a smoky, nutty aroma. So let them cool completely before mixing.
8. How do I ensure the bars are compact?
Use a sturdy pan and press mixture firmly with the back of a spoon or your fingers for an even layer.
9. Can I customize the ingredients?
Adding shredded coconut or chia seeds can change texture—use sparingly if you want a chewy, nutty bite.
10. Bars are too sticky—what now?
If bars are too sticky, refrigerate longer or add more oats to balance moisture and firmness.
These no-bake date bars are a tiny act of rebellion against the hectic pace of life. They remind me that simple, honest ingredients can turn into something unexpectedly satisfying. Right now, they feel like the perfect little treat to have on hand, whether for a quick breakfast or an unplanned visit from a friend.
There’s a quiet pleasure in biting into one—chewy, nutty, with just enough sweetness to settle the mind. Making them is straightforward, but the flavor and texture punch way above their effort. Sometimes, it’s the simplest recipes that end up feeling like a small victory.