
There’s something about cookie dough—those tiny specks of sugar and butter, the soft, almost raw texture—that I’ve always loved. But I don’t always want to deal with raw eggs or the mess of baking, especially when a craving hits unexpectedly. So I started making these no bake cookie dough bites, and honestly, they’re a game changer for satisfying that nostalgic urge.
These bites are like a little piece of childhood comfort, but safe and easy enough for grown-ups to whip up at a moment’s notice. They’re perfect for when you need a quick pick-me-up, a small treat that’s as much about the memories as it is about the flavor. Plus, they come together faster than you can say ‘cookie dough,’ no oven required.
Focusing on the nostalgic joy of childhood treats, but making them safe and convenient for grown-ups who crave that familiar, comforting bite without the risk.
Childhood Comfort Reimagined
- Making these bites always takes me back to lazy afternoons with friends, laughter mixing with sweet smells.
- I love how simple ingredients come together, reminding me that comfort really is just a spoonful away.
- There’s a small thrill in sneaking a second or third, knowing they’re safe and just as indulgent as the real deal.
- Craving something sweet but quick? These bites save the day, no guilt, no fuss, just pure joy.
Childhood Comfort Reimagined
This recipe was born out of a need for a quick, safe way to indulge in that childhood craving for cookie dough. One day, I realized I was tired of risking raw eggs or dealing with baking, but still wanted that rich, sweet bite. So I started experimenting with ingredients I always had on hand, aiming for that perfect balance of creamy, chewy, and just a hint of vanilla. Now, these bites are my go-to for instant comfort — no fuss, no oven, just pure, honest flavor.
Trivia on Cookie Dough Bites
- These bites draw inspiration from classic cookie dough, which has been a childhood favorite across many cultures.
- The trend of edible cookie dough surged in the early 2010s, with many bakeries offering safe, egg-free versions as treats.
- Historically, cookie dough was often avoided for safety reasons, but modern recipes like this one make it a guilt-free indulgence.
Ingredient breakdown: key components
- Butter: I use unsalted butter for that rich, slightly salty base; you can swap in coconut oil if you want dairy-free, but it’ll lose some of that melt-in-your-mouth feel.
- Brown Sugar: The molasses in brown sugar gives these bites their chewy, caramel flavor; white sugar will make it a bit more straightforward, less deep but still sweet.
- Vanilla Extract: Just a splash brightens everything with a warm aroma; if you’re out, a tiny dash of almond extract adds a nutty twist, but don’t overdo it.
- Flour: I prefer all-purpose for that sturdy, slightly nutty background; gluten-free blends work if you need them, but expect a slightly different texture—more crumbly, less cohesive.
- Chocolate Chips: Use semi-sweet for classic richness or dark for that smoky, bittersweet punch; mini chips melt more easily into the dough, making bites extra gooey.
- Milk (or cream): A splash helps bind the dough—whole milk adds creaminess, but almond or oat milk keeps it dairy-free without sacrificing much flavor.
- Salt: Just a pinch heightens all the sweet and vanilla; omit if you’re watching sodium, but honestly, it’s the little thing that keeps the flavor balanced.
Spotlight on key ingredients
Chocolate Chips:
- Butter: I prefer unsalted for that smooth, rich base; using coconut oil gives a slightly nuttier, more coconut-forward flavor.
- Semi-sweet melt beautifully, spreading that deep, smoky sweetness; mini chips melt faster and create pockets of gooey richness.
Brown Sugar:
- Its molasses notes add a caramel depth and chewy texture that white sugar can’t replicate exactly, but you can swap with coconut sugar for a more subtle flavor.
- Butter: Warm, slightly salty, it helps everything come together and lends that melt-in-your-mouth quality; margarine can be a substitute but loses some richness.
Notes for ingredient swaps
- Dairy-Free: Coconut oil replaces butter for creaminess, but expect a slightly nuttier, less melt-in-your-mouth texture.
- Sugar Alternatives: Maple syrup or honey can be used instead of brown sugar, adding a rich, floral note—use less to avoid stickiness.
- Flour Options: Gluten-free oat flour works well, though it gives a slightly grainier texture—adjust with a splash more milk if needed.
- Chocolate Variations: Dark chocolate or dairy-free chips swap in easily; expect deeper, more bittersweet flavors, and slightly less sweetness.
- Add-ins: Dried fruits like cranberries or chopped nuts can replace chocolate chips—bring chewiness or crunch, depending on your choice.
- Flavor Boosts: A pinch of cinnamon or espresso powder can add warmth or depth—start small, taste as you go.
- Sweetener Boost: A drizzle of honey or agave on top before chilling can enhance sweetness and shine.
Equipment & Tools
- Mixing bowl: To combine ingredients thoroughly
- Spatula: For folding and mixing ingredients
- Baking sheet: To set the bites in place
- Parchment paper: Prevent sticking and easy clean-up
Step-by-step guide to cookie dough bites
- Gather your equipment: a mixing bowl, a spatula, a baking sheet, and parchment paper. The bowl is for mixing, spatula for folding, sheet for setting the bites, and parchment paper to prevent sticking.
- In the mixing bowl, combine 1/2 cup (115g) softened unsalted butter and 1/2 cup (100g) brown sugar. Mix until creamy and slightly fluffy, about 2 minutes. Smell for that warm caramel aroma.
- Add 1 teaspoon vanilla extract and a pinch of salt. Mix well. You should notice a fragrant, warm vanilla scent as you go.
- Stir in 1 1/2 cups (180g) all-purpose flour gradually. It might seem dry at first, but keep folding until dough forms. If it’s too crumbly, add a teaspoon of milk or cream to loosen it up.
- Fold in 3/4 cup (135g) semi-sweet chocolate chips. The dough should be chewy and speckled with melty bits now. If the chocolate sinks, gently fold again to distribute.
- Scoop out tablespoon-sized portions of dough, roll into balls, and place on the parchment-lined baking sheet. Slightly flatten each ball with your fingers for even bites.
- Chill in the refrigerator for at least 30 minutes. This helps set the dough and enhances flavor. The dough will firm up and become easier to handle.
- Once chilled, serve immediately, or store in an airtight container. For best texture, let them sit at room temperature for 5 minutes before eating. They should be chewy, with a slight shimmer of melted chocolate on top.
Chill the assembled bites in the refrigerator for at least 30 minutes. Serve straight from the fridge or let sit at room temp for 5 minutes to soften slightly. Plate with a small stack or scatter on a tray for sharing.
How to Know It’s Done
- Dough is cohesive and slightly sticky but not wet.
- Chocolate chips are evenly distributed, without sinking too much.
- Bites hold shape when rolled, with a slight sheen after chilling.
No-Bake Cookie Dough Bites
Ingredients
Equipment
Method
- Combine the softened butter and brown sugar in a mixing bowl, then use a spatula to mix until the mixture is smooth and creamy, about 2 minutes. You’ll notice it becomes slightly fluffy and fragrant with caramel notes.
- Add the vanilla extract and a pinch of salt to the mixture, then stir well until fragrant and combined. This step enhances the warm aroma and flavor of the dough.
- Gradually fold in the flour, a little at a time, mixing thoroughly after each addition. The dough will start to come together, becoming thick and slightly crumbly but still manageable. If it feels too dry, add a teaspoon of milk or cream to loosen it up.
- Gently fold in the chocolate chips, distributing them evenly throughout the dough. You’ll see the dough become speckled with melty chocolate, and it should hold together when rolled into a ball.
- Scoop out tablespoon-sized portions of the dough and roll each into a compact ball with your hands. Place the bites on a parchment-lined baking sheet, then gently flatten each slightly with your fingers for even bites.
- Refrigerate the bites for at least 30 minutes to help them firm up and develop flavor. The dough will become more cohesive and easier to handle once chilled.
- Once chilled, serve the cookie dough bites straight from the fridge for a chewy, melt-in-your-mouth texture with gooey chocolate pockets. For softer bites, let them sit at room temperature for about 5 minutes before eating.
Notes
Pro tips for perfect cookie dough bites
- Bolded mini-head: Use room temperature butter to ensure smooth, creamy dough without lumps.
- Bolded mini-head: Chill the dough briefly before rolling to make handling easier and bites more uniform.
- Bolded mini-head: Mix chocolate chips gently to prevent them from sinking to the bottom of the dough.
- Bolded mini-head: Slightly under-mix the dough for a more rustic texture and prevent overworking the ingredients.
- Bolded mini-head: Freeze the bites for 10-15 minutes for an extra firm, satisfying crunch when biting into them.
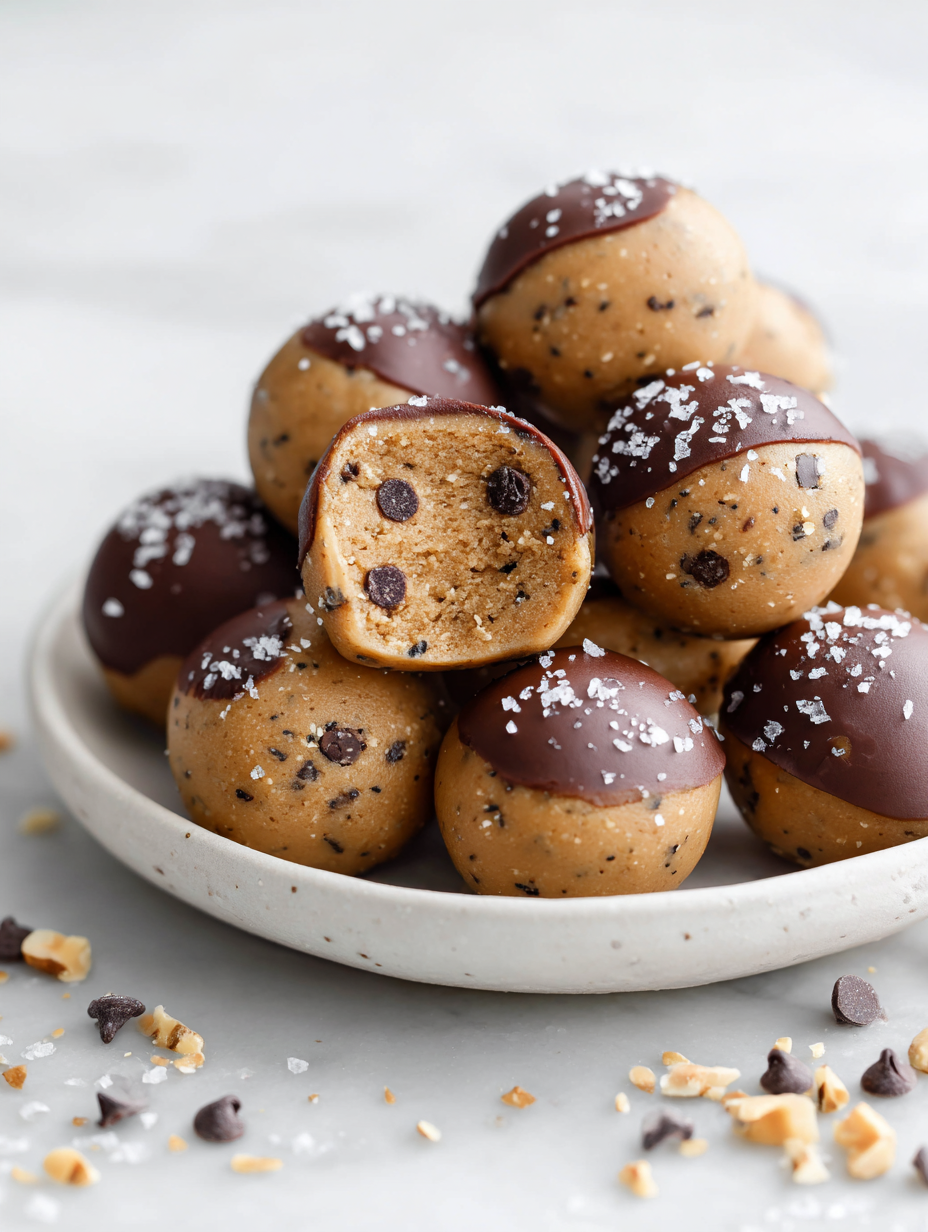
- Bolded mini-head: Add a pinch of sea salt on top before chilling to enhance sweetness and add flavor contrast.
- Bolded mini-head: Use mini chocolate chips for more melty pockets and a more decadent bite.
Common mistakes and how to fix them
- FORGOT to check dough consistency → Adjust with more flour or milk.
- DUMPED in too much chocolate → Fold in gradually to avoid sinking.
- OVER-TORCHED sugar → Use low heat, stir constantly, prevent burning.
- MISSED refrigerating step → Chill for at least 30 minutes for proper set.
Quick Fixes for Common Issues
- When dough is too sticky → Splash in a little more flour and knead gently.
- If chocolate sinks → Dampen chips lightly before folding to help suspend evenly.
- Dumped in too much salt → Rinse quickly with water, then start fresh with proper measurement.
- Over-torched sugar → Reduce heat and stir constantly, smell for caramel aroma before proceeding.
- Splash of milk needed → Add a teaspoon at a time until dough reaches ideal consistency.
Prep, store, and reheat tips
- Prepare the dough and portion into bites ahead of time; keep refrigerated for up to 24 hours to maintain freshness and prevent melting.
- Store the cookie dough bites in an airtight container in the fridge; they stay good for 4–5 days, with flavors mellowing slightly over time.
- For longer storage, freeze the bites for up to 1 month; wrap tightly to avoid freezer burn and preserve flavor.
- Reheat chilled bites briefly at room temperature—about 5 minutes—until they soften, or give them a quick 10-second zap in the microwave for a warm, gooey treat, watching for melted chocolate and a fragrant, caramel scent.
Top questions about cookie dough bites
1. Is this recipe really safe to eat raw?
Yes, using heat-treated flour makes this recipe safe to eat raw. No risk of bacteria or raw flour taste.
2. My dough is too dry or sticky, what should I do?
If the dough feels too dry, add a splash of milk or cream. If too sticky, mix in a little more flour.
3. How long should I chill the cookie dough bites?
Chill the bites in the fridge for at least 30 minutes to help them firm up and develop flavor.
4. Can I make these dairy-free?
You can substitute coconut oil for butter for a dairy-free version, but it will be a bit less creamy.
5. Should I use regular or mini chocolate chips?
Mini chocolate chips melt better and distribute more evenly, creating gooey pockets in each bite.
6. How should I store these cookie dough bites?
Store leftovers in an airtight container in the fridge for up to 5 days. Freeze for longer storage.
7. What are good add-ins or toppings?
You can add nuts, dried fruit, or a sprinkle of sea salt on top before chilling to customize the flavor.
8. Why do my chocolate chips sink to the bottom?
If the chocolate chips sink, try lightly dampening them before folding into the dough to suspend them better.
9. How important is butter temperature?
Use room temperature butter for a smooth, evenly mixed dough, which prevents lumps and ensures good texture.
10. Can I reheat these bites?
For a warmer, softer bite, give the chilled bites a quick 10-second zap in the microwave—watch for melting chocolate.
These no bake cookie dough bites are a small, sweet reminder of childhood, packaged in a way that’s safe and quick. They’re perfect for those moments when a craving sneaks up on you, and you need something satisfying without the fuss of baking.
Plus, they’re endlessly adaptable—swap ingredients, add your favorite mix-ins, or just enjoy them as is. Sometimes, all you really need is a little sweet bite that’s ready in minutes and leaves you with that nostalgic, comforting taste.