
There’s something about the slightly underbaked center of a chocolate fondant that feels like a secret shared between the cook and the eater. That perfect balance—rich, molten chocolate against a tender crumb—makes each bite a little revelation. It’s a dance of textures, where the gooey interior contrasts with the crisp edges, and I’ve always loved how it feels like a warm hug in dessert form.
Making a fondant at home can seem intimidating, but it’s honestly about controlling that moment of perfection. It’s not about being perfect—it’s about embracing that slight underbaking that turns the dessert into something memorable. When the warm aroma starts to fill the kitchen and you see that shiny, crackly top give way to that oozy chocolate center, you know you’ve nailed it.
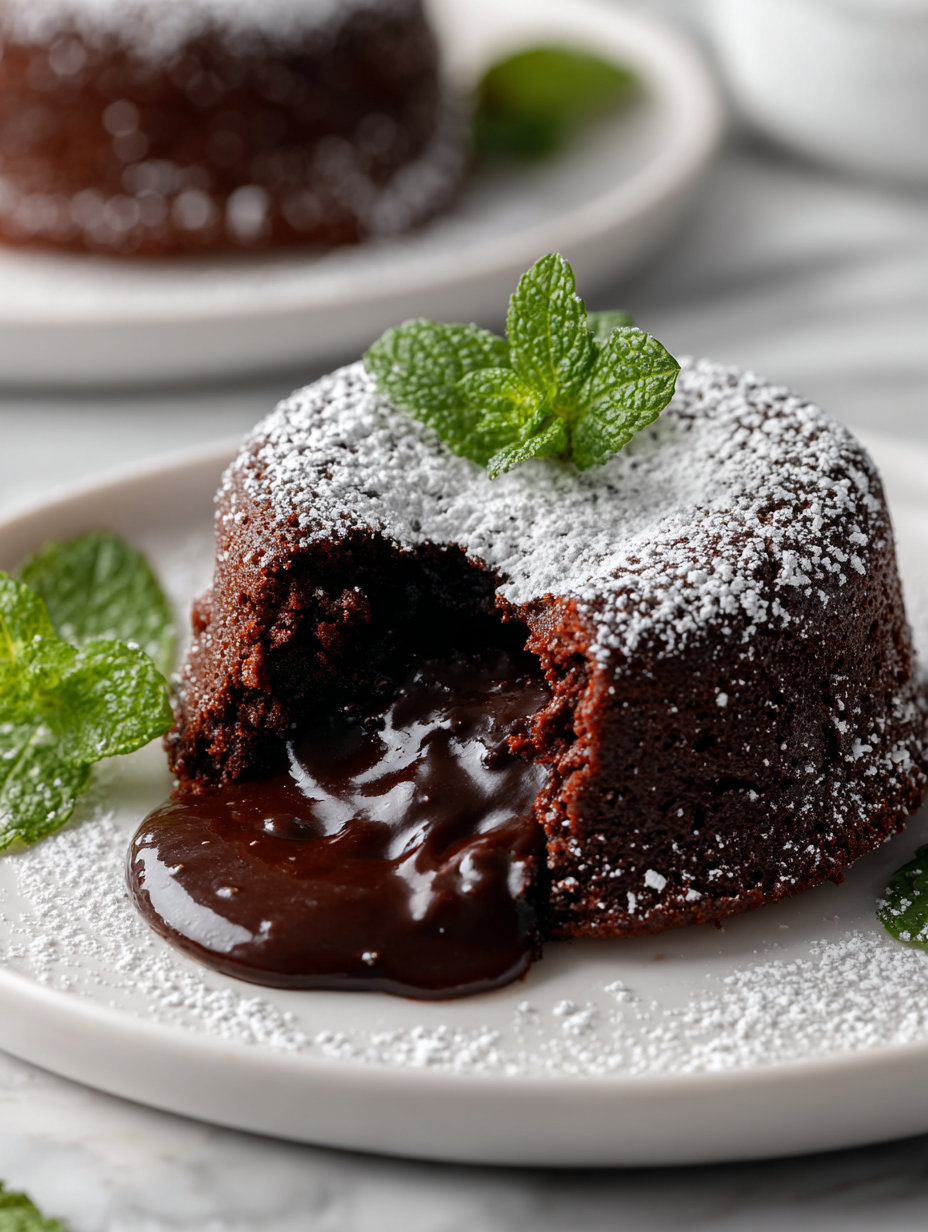
Focusing on how the slightly underbaked center of a chocolate fondant offers a perfect balance between rich, molten chocolate and a tender crumb, revealing the textural contrast that makes this dessert irresistibly satisfying.
The secret to perfect molten centers
- That moment when the center stays molten—pure magic, like a secret I keep in my kitchen.
- I love how a warm fondant can turn a simple dinner into a special occasion, even if it’s just for myself.
- There’s a quiet pride in pulling these out perfectly, knowing I’ve balanced gooey richness with tender crumb.
- Sometimes, I get a little chaotic trying to perfect the bake—but each attempt teaches me something new.
- Nothing beats the feeling of slicing into one and seeing that glossy, oozing chocolate—pure joy.
The story behind this recipe
- This recipe was born out of a late-night craving for something intensely chocolatey but with that perfect, almost-molten center. I remember experimenting in my small kitchen, trying to get that balance just right—too runny, and it was a mess; too firm, and it lost its magic. It’s funny how a simple dessert can become a little personal project, a bit chaotic but always rewarding.
- I’ve always loved how chocolate fondant feels like a secret indulgence—something you can’t quite get enough of, yet it’s so easy to mess up if you’re not paying attention. It’s one of those desserts that looks fancy but is surprisingly forgiving if you keep an eye on timing. Every time I make it, I feel a little bit like I’ve cracked a code, even if I’ve only made it a dozen times.
- heading: The story behind this recipe
Chocolate Fondant Trivia
- Chocolate fondant, also called lava cake, was reportedly invented in the 1980s, with several claims of origin—France, the US, and the UK all lay claim to the first recipe.
- The name ‘fondant’ refers to the melting interior, derived from the French word for ‘melting’ or ‘soft’. It highlights the dessert’s signature gooey center.
- Originally, chefs used slightly underbaked chocolate cakes to achieve that rich, molten core, but modern recipes often rely on precise timing and temperature control.
- The technique of creating a liquid center in baked goods predates chocolate fondant but became popularized with this dessert, especially in upscale restaurants.
- Historically, chocolate fondant was seen as a decadent, almost theatrical dessert—perfect for special occasions or impressing dinner guests.
Ingredient breakdown: key components
- Dark chocolate: I prefer a good-quality 70% cocoa bar—rich, slightly bitter, but melts smoothly, creating that luscious, oozy center. Swap for milk chocolate if you want a sweeter, milder fondant, but it won’t have the same depth.
- Butter: Creamy unsalted butter makes the batter tender and glossy. Use a neutral-tasting one; salted butter could alter the balance of sweetness and saltiness in the final dessert.
- Eggs: Fresh, large eggs help achieve the right structure—think tender but resilient. For a slightly lighter texture, try adding an extra yolk, or use a few egg whites for a more delicate crumb.
- Sugar: Fine caster sugar dissolves quickly, giving a smooth batter. You can substitute with superfine sugar if you don’t have caster, but avoid coarse sugar—it won’t blend as well and might cause graininess.
- Flour: Just a touch of plain flour stabilizes the batter without making it dense. Almond flour can be an interesting swap for a nuttier flavor, but it influences the texture and richness.
- Cocoa powder: Unsweetened cocoa deepens the chocolate flavor and adds richness. Dutch-processed cocoa will give a smoother, less acidic taste, while natural cocoa offers a brighter, more tangy note.
- Optional flavoring: A splash of vanilla or a pinch of sea salt enhances the chocolate’s complexity. Experiment with chili powder for a subtle kick or orange zest for brightness, if you’re feeling bold.
Spotlight on key ingredients
Chocolate:
- Dark chocolate: I prefer a good-quality 70% cocoa bar—rich, slightly bitter, but melts smoothly, creating that luscious, oozy center. Swap for milk chocolate if you want a sweeter, milder fondant, but it won’t have the same depth.
- Butter: Creamy unsalted butter makes the batter tender and glossy. Use a neutral-tasting one; salted butter could alter the balance of sweetness and saltiness in the final dessert.
- Eggs: Fresh, large eggs help achieve the right structure—think tender but resilient. For a slightly lighter texture, try adding an extra yolk, or use a few egg whites for a more delicate crumb.
Sugar & Flour:
- Cocoa powder: Unsweetened cocoa deepens the chocolate flavor and adds richness. Dutch-processed cocoa will give a smoother, less acidic taste, while natural cocoa offers a brighter, more tangy note.
- Flour: Just a touch of plain flour stabilizes the batter without making it dense. Almond flour can be an interesting swap for a nuttier flavor, but it influences the texture and richness.
- Sugar: Fine caster sugar dissolves quickly, giving a smooth batter. You can substitute with superfine sugar if you don’t have caster, but avoid coarse sugar—it won’t blend as well and might cause graininess.
Notes for ingredient swaps
- Dairy-Free: Swap butter with coconut oil or a dairy-free margarine. Expect a slightly different richness and texture, but still satisfying.
- Vegan: Use vegan dark chocolate and almond or coconut milk instead of butter and eggs. The flavor will be slightly fruitier and less creamy.
- Sugar Alternatives: Replace caster sugar with coconut sugar or maple syrup. Be aware it may alter moisture and bake time slightly.
- Gluten-Free: Substitute plain flour with almond flour or gluten-free baking mix. The texture may become a bit denser but still decadent.
- Chocolate Type: Use milk chocolate for a sweeter, milder fondant—less intense but more approachable for some palates.
- Cocoa Powder: Dutch-processed cocoa yields a smoother, less tangy flavor, while natural cocoa gives a brighter, more acidic note.
- Add-ins: Mix in a pinch of chili powder or orange zest for a flavor twist—use sparingly to complement the rich chocolate.
Equipment & Tools
- Ramekins: For baking individual fondants, ensuring even heat and shape.
- Double boiler or microwave: To gently melt chocolate without scorching.
- Mixing bowls: To combine and fold ingredients smoothly.
- Whisk or electric mixer: To beat butter and sugar until fluffy.
- Baking tray: To hold ramekins for even heat during baking.
- Knife: To loosen the edges and invert the fondant.
Guide to Perfect Chocolate Fondant
- Preheat your oven to 200°C (390°F). Grease and lightly dust your ramekins with cocoa powder to prevent sticking.
- Chop 200g (7 oz) of good-quality dark chocolate into small pieces. Melt it gently over a double boiler or in short bursts in the microwave, stirring until smooth and glossy. Set aside to cool slightly.
- In a mixing bowl, beat 100g (1/2 cup) of unsalted butter with 100g (1/2 cup) of caster sugar until pale and fluffy, about 2-3 minutes. Add 2 large eggs, one at a time, mixing well after each.
- Stir in 1 teaspoon of vanilla extract if using. Gently fold in the melted chocolate until fully combined. Sift in 50g (1/2 cup) of plain flour and 15g (2 tablespoons) of unsweetened cocoa powder. Fold just until the batter is smooth and shiny.
- Divide the batter evenly among your prepared ramekins, filling each about three-quarters full. Place on a baking tray for easy handling.
- Bake in the preheated oven for 10-12 minutes. The edges should be set but the center still soft and slightly jiggly when gently shaken. The top will be glossy and crack slightly.
- While baking, prepare a serving plate or ramekin holder. Once out of the oven, let the fondants rest for 1-2 minutes. Carefully run a thin knife around the edges to loosen if needed.
- Invert each ramekin onto a plate and let sit for 15 seconds before gently lifting. The surface should crack open, revealing the molten center. Serve immediately with a dusting of cocoa or a dollop of cream.
Let the baked fondants rest for 1-2 minutes, then carefully invert onto plates. Serve immediately, ideally with a dusting of cocoa or a scoop of vanilla ice cream for contrast.
How to Know It’s Done
- The top is shiny and crackly, with a slight jiggle in the center when shaken.
- The edges pull away slightly from the ramekin, indicating doneness.
- When gently pressed, the center feels soft but not liquid like lava, just warm and slightly gooey.
Chocolate Fondant
Ingredients
Equipment
Method
- Chop the dark chocolate into small pieces and melt it gently over a double boiler or in short bursts in the microwave, stirring until smooth and glossy. Set aside to cool slightly and smell that rich aroma.
- In a mixing bowl, beat the unsalted butter and caster sugar together until pale and fluffy, about 2-3 minutes. This creates a light, creamy base that will give the fondant its tender crumb.
- Add the eggs one at a time, beating well after each addition. The mixture should become smooth and slightly thickened, with a gentle sheen.
- Stir in the vanilla extract if using. Then, fold in the melted chocolate until fully incorporated, creating a glossy, dark batter.
- Sift the plain flour and cocoa powder together, then gently fold into the chocolate mixture just until no streaks remain. Be careful not to overmix to keep the batter light.
- Grease your ramekins well and dust with cocoa powder to prevent sticking. Divide the batter evenly among four ramekins, filling each about three-quarters full.
- Place the ramekins on a baking tray and bake in a preheated oven at 200°C (390°F) for 10-12 minutes. The edges should be set but the center still jiggly when gently shaken.
- Once baked, remove the ramekins from the oven and let them rest for 1-2 minutes. Gently run a knife around the edges to loosen them if needed.
- Invert each ramekin onto a plate and carefully lift it away. The surface should crack open slightly, revealing the shiny, molten chocolate center.
- Serve immediately with a dusting of cocoa powder or a scoop of vanilla ice cream for extra indulgence. Enjoy the warm, gooey interior contrasted with the tender crumb.
Notes
Pro tips for perfect fondant
- Use high-quality chocolate for a richer, more intense molten core.
- Slightly underbake—edges should be firm but center still jiggly and shiny.
- Grease ramekins well and dust with cocoa to prevent sticking and crack-free release.
- Let the fondants rest for a minute after baking to avoid runny centers on first cut.
- Crack the top gently with a knife before inverting to reveal that glossy, crackly surface.
- Bake one at a time if your oven runs hot—overbaking ruins that oozy center.
- For extra flavor, add a pinch of sea salt or a hint of chili powder to the batter.
Common mistakes and how to fix them
- MISTAKE: FORGOT to preheat oven → Fix: Preheat oven early for even baking.
- DUMPED: Excess flour → Fix: Use accurate measurement to avoid dense texture.
- OVER-TORCHED: Baked too long → Fix: Remove when edges are set, center jiggles slightly.
- UNDERRIPE: Using bad-quality chocolate → Fix: Choose good-quality, high-cocoa content chocolate.
Quick fixes and pantry swaps
- If the center isn’t molten, splash a teaspoon of hot water and microwave 10 seconds more.
- When the surface cracks prematurely, reduce baking time by 1 minute and check again.
- Dumped too much flour? Fix with extra melted chocolate to restore moistness and richness.
- Overbaked? Shield edges with foil and serve immediately for a softer center.
- When the chocolate is too firm, pantry swap: melt with a splash of warm milk for a smoother finish.
Prep, store, and reheat tips
- You can prepare the batter up to a day ahead. Cover and refrigerate; the flavors deepen overnight and the batter firms up slightly, making it easier to portion.
- Store baked fondants in an airtight container in the fridge for up to 2 days. Reheat gently in the oven at 150°C (300°F) for about 5 minutes until warm and gooey again—observe the center for that perfect molten texture.
- The flavors develop a richer, more integrated taste if left a day or two, but the texture can become slightly firmer. Serve straight from fridge or reheat for that just-baked feel.
- Reheating too long or at too high a temperature will overcook the center, turning that luscious ooze into a solid block. Keep an eye and test the center with a gentle shake or probe for warmth.
Top questions about chocolate fondant
1. How do I get the perfect molten center?
A molten core is achieved by baking just enough so that the edges are set but the center remains gooey. Timing is key—around 10-12 minutes usually does it.
2. What chocolate should I use for best results?
Use high-quality dark chocolate with at least 70% cocoa for a rich, glossy interior that melts smoothly in your mouth.
3. How can I prevent overbaking?
Baking at too high heat or for too long will overcook the center. Keep an eye on the edges—they should be firm but not dry.
4. Should I rest the fondants before serving?
Let the fondants rest for about a minute after baking, then invert carefully. This helps the molten interior stay intact when you serve.
5. How do I know when they’re baked enough?
If the top isn’t shiny or crackly, they may need a few extra seconds in the oven. The surface should crack slightly when done.
6. What tools do I need for baking?
Use ramekins that are well-greased and dusted with cocoa powder to help release the fondants smoothly without cracks.
7. Can I make fondant batter in advance?
You can prepare the batter a day ahead, cover tightly, and refrigerate. Just bake straight from the fridge, adding an extra minute or two.
8. How do I reheat leftover fondant?
Reheat in a low oven (around 150°C/300°F) for 5 minutes until just warm and gooey again. Watch the center—don’t overdo it.
9. What if the center isn’t gooey enough?
If the center isn’t molten, try adding a splash of hot water to the ramekin and microwaving for a few seconds to revive the gooey texture.
10. Can I use different types of chocolate?
Substitute with milk chocolate for a sweeter, milder flavor, but expect a less intense molten core. Adjust baking time slightly if needed.
There’s something about the warm, gooey center of a well-made chocolate fondant that feels like a quiet celebration. It’s a reminder that sometimes, the perfect moment is just a few seconds of careful timing away. When that molten core oozes out with each cut, it’s a small, imperfect miracle worth every effort.
In this chaotic kitchen world, fondant is a little act of patience and attention, a chance to create something memorable even on a busy day. The smell of melting chocolate, the crack of the surface, and that first spoonful of richness—these are the simple joys that remind me why I keep coming back to this dessert, again and again.