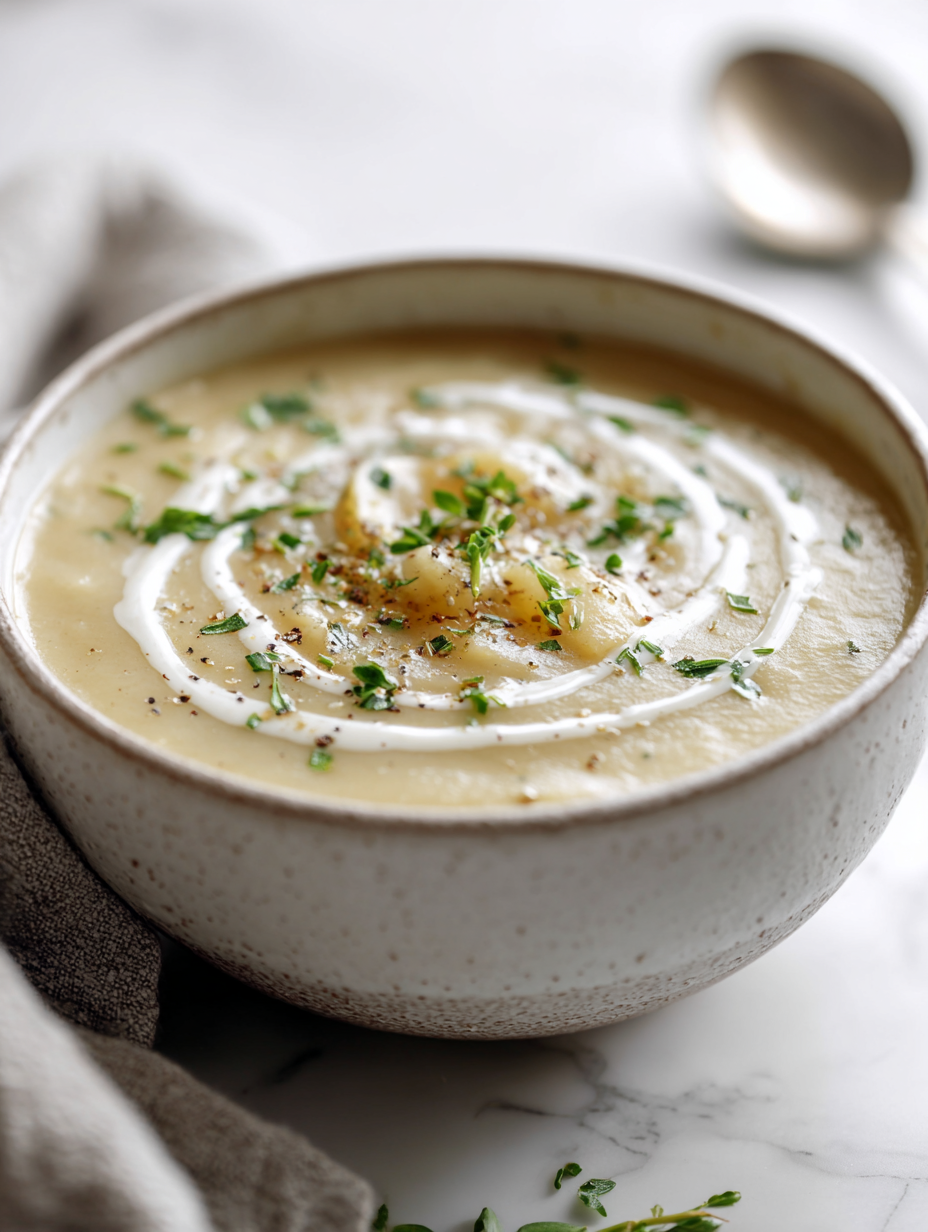
Category: Main Course

  • Rachael Ray’s 30-Minute Meals: A Twist on Classic Comfort

    Rachael Ray’s 30-Minute Meals: A Twist on Classic Comfort

    Rachael Ray’s 30-minute meals have always been my lifeline—quick, reliable, and forgiving. But lately, I’ve been playing with a twist, adding a smoky paprika rub to my chicken for depth. It’s a small change, but it transforms the dish from familiar to memorable in no time.

    Why I keep coming back to this recipe

    Because it’s a real deal weeknight hero. The flavors stay bright and the process stays simple. It’s forgiving enough to tweak, yet reliable enough to become a household staple, especially when I need dinner fast but still crave something tasty.

    Breaking down the ingredients

    • Chicken breasts: Juicy, lean, and quick to cook. Use thighs for more flavor and tenderness.
    • Bell peppers: Sweet and crisp, add color and freshness. Skip if you prefer more heat or spice.
    • Garlic: Gives a punch of aroma and flavor. Use fresh for that bright, pungent hit.
    • Paprika: Smoky and rich, it’s my secret for depth. Swap for smoked chipotle for more heat.
    • Broth or wine: Adds moisture and a subtle acidity. Use water in a pinch, but flavor will be milder.
    • Herbs: Fresh parsley or cilantro brighten up the dish. Dried works in a pinch.
    • Lemon: Brightens everything with zesty acidity. Lime can be a lively substitute.

    Tools of the trade for speedy cooking

    • Large skillet: For searing proteins and sautéing vegetables in one pan.
    • Sharp knife: To chop and prep ingredients swiftly and safely.
    • Cutting board: A clean surface for all your chopping needs.
    • Measuring spoons and cups: To keep your seasonings and liquids just right.
    • Tongs: For flipping proteins and tossing vegetables without breaking a sweat.

    Step-by-step guide to a speedy, flavorful dinner

    Step 1: Gather your ingredients and prep all your tools first. It’s the only way to keep everything flowing smoothly.

    Step 2: Heat your pan over medium-high heat until it’s just starting to shimmer. Add oil and wait for the sizzle.

    Step 3: Cook your proteins first; they need a good sear—about 3-4 minutes per side or until golden.

    Step 4: Toss in aromatics, then your quick-cook vegetables; stir often to prevent sticking and burning.

    Step 5: Finish with a splash of broth or wine, cover, and let everything simmer for 5 minutes.

    Step 6: Check that your chicken or fish hits 75°C (165°F). It should be opaque and flaky.

    Step 7: Rest your meat for a few minutes, then serve hot with a sprinkle of herbs or a squeeze of lemon.

    Cooking checkpoints to watch for

    • Protein should be golden and slightly caramelized; don’t rush the sear.
    • Vegetables need to be crisp-tender; overcooking makes them mushy and dull in flavor.
    • Sauce should thicken slightly; if too watery, simmer uncovered for a few more minutes.

    Common mistakes and how to fix them

    • Over-browning or burning the protein.? SEARED PROTEIN TOO DARK? Lower heat and cook longer, then finish with a lid.
    • Overcooking vegetables.? VEGETABLES MUSHY? Remove them early, or add to the pan later for crunch.
    • Sauce becoming too gloopy.? SAUCE TOO THICK OR STICKY? Add a splash of broth or water and stir.
    • Lack of flavor.? UNDERSALTED? Season in layers—add salt as you go.

    Smoky Paprika Chicken with Bell Peppers and Herbs

    This quick and flavorful dish features juicy chicken breasts seared to perfection, coated in smoky paprika rub, and cooked alongside sweet bell peppers and garlic. Finished with a splash of broth and fresh herbs, it offers a tender, vibrant, and aromatic meal with a rich, savory sauce.
    Prep Time 10 minutes
    Cook Time 20 minutes
    Total Time 30 minutes
    Servings: 4
    Course: Main Course
    Cuisine: Homestyle
    Calories: 350

    Ingredients
      

    • 4 pieces chicken breasts pounded to even thickness for uniform cooking
    • 2 bell peppers bell peppers any color, sliced into strips
    • 3 cloves garlic minced
    • 1 tablespoon smoked paprika for depth of flavor
    • 1/2 cup broth or wine adds moisture and acidity
    • 2 tablespoons olive oil for searing and sautéing
    • Fresh herbs parsley or cilantro chopped for garnish
    • 1 lemon lemon zested and juiced

    Equipment

    • Large skillet
    • Sharp knife

    Method
     

    1. Pat the chicken breasts dry and season them generously with salt, pepper, and half of the smoked paprika. Set aside.
    2. Heat a large skillet over medium-high heat and add a tablespoon of olive oil until shimmering and just starting to smoke.
    3. Place the chicken breasts in the skillet and sear for about 3-4 minutes on each side, until golden brown and cooked through. Remove and set aside to rest.
    4. Add the remaining oil to the skillet and toss in the minced garlic. Sauté for about 30 seconds until fragrant, with a slight sizzle.
    5. Add the sliced bell peppers to the skillet and sauté for 3-4 minutes until they start to soften but remain crisp, and you see some charred spots for extra flavor.
    6. Sprinkle the remaining smoked paprika over the peppers and stir to coat evenly, releasing a smoky aroma.
    7. Pour in the broth or wine, scraping up any browned bits from the bottom of the pan, then cover and simmer for 5 minutes to meld flavors and keep everything moist.
    8. Slice the rested chicken breasts and add them back to the skillet, nestling into the peppers and sauce. Cook uncovered for another 2-3 minutes until heated through.
    9. Finish by squeezing fresh lemon juice over the dish, sprinkling with chopped herbs, and zesting a little lemon peel for brightness.
    10. Serve hot, garnished with extra herbs and lemon wedges if desired. Enjoy the tender, smoky, and vibrant flavors!
    This recipe isn’t just about speed; it’s about reclaiming dinner from the chaos of busy nights. A few simple techniques turn humble ingredients into something satisfying and fresh, no matter the day’s mood. Keep experimenting with your favorite proteins and vegetables to make it truly yours, and enjoy the process as much as the meal.

  • Jamie Oliver’s Chicken Fajitas: A Rustic Take on a Classic

    Jamie Oliver’s Chicken Fajitas: A Rustic Take on a Classic

    Fajitas are one of those dishes that feel like a celebration of simplicity—grab some bright peppers, juicy chicken, and a handful of spices, and you’ve got a meal that’s both quick and satisfying. I love how the sizzling sound and smoky aroma turn a humble supper into a little party in the kitchen.
    What makes this version stand out is the marinade—simple, fresh, and punchy, it elevates the everyday into something special. Plus, it’s a dish that invites improvisation, a perfect canvas for whatever’s lurking in your fridge.

    Why I Keep Coming Back to This Recipe

    It’s honest, straightforward, and forgiving. The smoky aroma filling the kitchen, the juicy bites, and the vibrant crunch make it a satisfying, no-fuss meal. I love how adaptable it is—adding different peppers or toppings keeps it fresh. It’s a dish I return to when I want something lively but uncomplicated, especially after a long day.

    Inside the Ingredients: What Makes Them Shine

    • Chicken breasts: My go-to for quick cooking, tender bites that soak up flavors. Feel free to swap for thighs for more flavor.: Lean, mild, and juicy, they’re the backbone of this dish.
    • Bell peppers: Bright, sweet, and a little smoky when charred. Use red, yellow, or orange for color—green works too but less sweet.: They add crunch and a pop of color, essential for the visual and flavor contrast.
    • Onions: I prefer red onions—they caramelize beautifully and add a subtle sharpness. Yellow or white can work.: They soften and sweeten, balancing the spice.
    • Lime juice: Essential for that zesty brightness, wake up all the flavors. Swap with lemon if needed, but lime keeps it authentic.: A splash brightens everything and cuts through the richness.
    • Spices: Smoked paprika, cumin, chili flakes—my secret weapons for smoky heat and depth. Adjust to your heat tolerance.: They transform simple chicken into a flavor-packed dish.
    • Tortillas: Warm, soft, perfect for wrapping. Corn or flour—whatever you prefer, just make sure they’re fresh.: They hold everything together, a handheld feast.
    • Fresh cilantro: Adds herbal freshness, a sprinkle right before serving. Parsley can be a mild substitute.: Bright, aromatic, and a little grassy.

    Tools of the Trade for Perfect Fajitas

    • Large frying pan: To get that high heat for searing and charring.
    • Sharp knife: To slice the chicken and vegetables evenly.
    • Cutting board: Keeps your workspace tidy and safe.
    • Bowl for marinating: To toss and coat the chicken evenly with spices and lime.

    Step-by-Step to Flavorful Fajitas

    Step 1: Gather your equipment: a large frying pan, a sharp knife, a cutting board, and a bowl for marinating.

    Step 2: Slice the chicken breasts into thin strips, about 1 cm wide. Marinate with lime juice, smoked paprika, cumin, and a pinch of salt. Let sit for 15 minutes.

    Step 3: Preheat your pan over medium-high heat (about 200°C/390°F). Add a splash of oil, then lay the chicken strips flat. Cook for 4-5 minutes, stirring occasionally until browned.

    Step 4: Add sliced peppers and onions to the pan, cook for another 5-7 minutes until vegetables soften and edges char slightly.

    Step 5: Warm your tortillas in a dry pan or microwave. Serve the chicken and veg scooped into tortillas, with fresh cilantro and a squeeze of lime.

    Cooking Checkpoints & Tips

    • Ensure the chicken is cooked through—internal temp should reach 75°C/165°F.
    • Vegetables should be tender with slightly charred edges for that smoky flavor.
    • The tortillas should be warm and pliable, not dry or brittle.

    Common Mistakes & How to Fix Them

    • Adding cold ingredients to a hot pan, causing steaming instead of searing.? FORGOT to preheat the pan—fix by heating for at least 2 minutes before adding ingredients.
    • Oil pooling and splattering.? DUMPED too much oil—use just enough to coat the pan lightly, about a teaspoon.
    • Charring the vegetables too much, losing flavor.? OVER-TORCHED the peppers—reduce heat slightly and stir more frequently to prevent burning.
    • Juicy chicken turning dry when sliced immediately.? Not resting the chicken—let it sit for 3 minutes after cooking to retain juices.

    Chicken Fajitas

    Chicken fajitas are a vibrant, sizzling dish featuring tender strips of marinated chicken cooked with colorful peppers and onions. The quick stir-frying process creates a smoky aroma and a slightly charred exterior, culminating in a juicy, flavorful filling wrapped in warm tortillas. Brightened with lime and fresh cilantro, this dish is both lively and satisfying, perfect for a casual celebration in your kitchen.
    Prep Time 20 minutes
    Cook Time 15 minutes
    Total Time 35 minutes
    Servings: 4
    Course: Main Course
    Cuisine: Mexican
    Calories: 350

    Ingredients
      

    • 2 pieces chicken breasts sliced into thin strips
    • 2 assorted bell peppers sliced into strips, use a mix of colors
    • 1 large red onion sliced into thin strips
    • 2 tablespoons lime juice freshly squeezed
    • 1 teaspoon smoked paprika
    • 1/2 teaspoon cumin
    • 1/4 teaspoon chili flakes adjust to taste
    • 8 pieces flour tortillas warm before serving
    • 2 tablespoons olive oil
    • Fresh cilantro chopped, for garnish

    Equipment

    • Large frying pan
    • Sharp knife
    • Cutting board
    • Bowl for marinating

    Method
     

    1. Gather your equipment: a large frying pan, a sharp knife, a cutting board, and a bowl for marinating.
    2. Slice the chicken breasts into thin strips about 1 cm wide, ensuring even pieces for quick cooking.
    3. In a bowl, combine lime juice, smoked paprika, cumin, chili flakes, and a pinch of salt. Toss the chicken strips in this marinade and let sit for about 15 minutes, allowing the flavors to soak in and the chicken to become tender.
    4. Preheat your large frying pan over medium-high heat until hot, and add about a tablespoon of olive oil. Once shimmering, lay the marinated chicken strips flat in the pan.
    5. Sear the chicken for 4-5 minutes, stirring occasionally, until browned and cooked through. You should hear a satisfying sizzle and see the chicken develop a slight caramel color.
    6. Add sliced peppers and onions to the pan with the chicken, spreading them out evenly. Continue cooking for another 5-7 minutes, stirring occasionally, until the vegetables soften and develop a few charred edges for smoky flavor.
    7. While the filling cooks, warm the tortillas in a dry skillet or microwave until soft and pliable, about 20-30 seconds.
    8. Once everything is ready, spoon the hot chicken and vegetable mixture into each tortilla, dividing evenly.
    9. Garnish each fajita with freshly chopped cilantro and a squeeze of lime for a burst of freshness and brightness.
    10. Serve immediately while warm, allowing everyone to enjoy the smoky, juicy, and vibrant flavors wrapped in soft tortillas.

    Notes

    For an extra punch, add sliced jalapeños or a dollop of sour cream. Make sure not to over-char the vegetables to keep their sweetness and texture.
    This dish is all about embracing the chaos of the skillet, where smoky peppers meet juicy chicken. No need for perfection—just good ingredients and a hot pan. Feel free to toss in extra chili flakes or swap the peppers for something sweeter, like pineapple, if you’re feeling adventurous. Keep it informal, keep it tasty, and enjoy the messy, satisfying process.

  • Snoop Dogg’s Mac and Cheese with a Twist of Nostalgia and Soul

    Snoop Dogg’s Mac and Cheese with a Twist of Nostalgia and Soul

    Snoop Dogg’s mac and cheese isn’t just a recipe, it’s a mood. It’s about turning simple ingredients into something soulful, with a little swagger and a lot of comfort. I’ve messed up plenty of times, but that’s part of the charm—learning to trust the process and taste along the way.

    Why I Keep Coming Back to This Dish

    It’s the kind of comfort food that feels like a warm hug, especially when life’s chaotic. The smoky cheese aroma, the gooey texture—each bite sparks a little celebration of simple pleasures. It’s also endlessly customizable, so I can tweak and experiment without losing that nostalgic core.

    What’s Inside the Bowl: Ingredient Truths

    • Cheddar cheese: Sharp and gooey, it’s the backbone of this dish. Substitute with Monterey Jack for a milder, creamier melt.
    • Milk: Adds creaminess, but you can swap with half-and-half for richness or a splash of heavy cream for extra velvety texture.
    • Butter: Gives richness and helps thicken the sauce. Olive oil can work in a pinch, but it changes the flavor.
    • Flour: Creates the roux, thickening the sauce. Gluten-free flour blends can replace it without losing the texture.
    • Pasta: Elbow macaroni is classic, but shells or cavatappi add visual flair and hold sauce well.
    • Hot sauce or smoked paprika (optional): Adds a smoky, spicy kick. Use in moderation, or skip for a pure cheese experience.
    • Herbs (like parsley or chives): Fresh herbs brighten the dish. Dried can work, but fresh is best for flavor punch.

    Gear Up: The Essentials for a Soulful Mac Attack

    • Large pot: Boil pasta efficiently and evenly.
    • Skillet: Make the cheese sauce and brown the top.
    • Whisk: Combine ingredients smoothly and avoid lumps.
    • Cheese grater: Freshly grate cheese for better melt and flavor.
    • Baking dish: Finish the dish with a crispy, cheesy crown.

    How to Make Snoop Dogg’s Mac and Cheese from Scratch

    Step 1: Gather your equipment: a large pot for boiling, a sturdy skillet for sauce, a whisk, and a cheese grater.

    Step 2: Bring a big pot of salted water to a rolling boil—about 100°C/212°F. Cook your pasta until just al dente, around 8 minutes, then drain.

    Step 3: In your skillet, melt butter over medium heat (about 160°C/320°F). Add flour and stir until golden, about 2 minutes—this is your roux.

    Step 4: Slowly pour in milk while whisking, keep the heat steady. When it thickens and coats the back of a spoon, add cheeses gradually, stirring constantly.

    Step 5: Combine pasta with cheese sauce. Transfer to a baking dish, sprinkle extra cheese on top, and bake at 180°C/356°F for 15-20 minutes until bubbling and golden.

    Step 6: Let it rest 5 minutes before serving; this helps the cheese set a bit. Serve hot, with a sprinkle of chopped herbs or hot sauce if you like.

    Step 7: Check for doneness: sauce should be creamy, pasta tender but firm, and top slightly crispy.

    Cooking Checks and Tips to Keep It Real

    • Cheese should melt smoothly without clumping or breaking apart.
    • Pasta texture: tender but not mushy, with a slight bite.
    • Sauce consistency: creamy and thick enough to coat the pasta without running.
    • Baking: top should be bubbly and crispy, not burnt or soggy.

    Common Pitfalls and How to Dodge Them

    • Pouring all cheese in at once.? Add cheese gradually to avoid clumping.
    • Cooking the cheese sauce on high heat.? Simmer gently to prevent curdling.
    • Leaving the sauce unattended.? Stir constantly to keep sauce smooth.
    • Using pre-shredded cheese with anti-caking agents.? Use fresh cheese for better melt.

    Snoop Dogg’s Mac and Cheese

    This soulful mac and cheese combines sharp cheddar cheese with a creamy roux, baked to perfection for a gooey, golden finish. The dish features tender pasta coated in a rich, smoky cheese sauce, creating a comforting and customizable classic with a touch of swagger. It’s a warm hug in every bite, perfect for turning simple ingredients into a mood-lifting meal.
    Prep Time 10 minutes
    Cook Time 30 minutes
    Total Time 40 minutes
    Servings: 4
    Course: Main Course
    Cuisine: American
    Calories: 550

    Ingredients
      

    • 8 oz elbow macaroni or shells, cavatappi
    • 4 tbsp butter or olive oil
    • 2 tbsp flour gluten-free if needed
    • 1 cup milk or half-and-half, heavy cream
    • 2 cups sharp cheddar cheese freshly grated
    • to taste hot sauce or smoked paprika optional, for smoky spice
    • parsley or chives a few fresh herbs for garnish

    Equipment

    • Large pot
    • Skillet
    • Whisk
    • Cheese grater
    • Baking dish

    Method
     

    1. Bring a large pot of salted water to a rolling boil. Add the pasta and cook until al dente, about 8 minutes. Drain and set aside.
    2. In your skillet, melt the butter over medium heat until it starts to foam and smells nutty. Add the flour and whisk constantly for about 2 minutes, until the mixture turns golden and has a slightly nutty aroma.
    3. Slowly pour in the milk while whisking steadily to prevent lumps. Continue whisking until the mixture thickens and coats the back of a spoon, about 3-4 minutes.
    4. Add the grated cheddar cheese gradually, stirring constantly until melted and smooth. If you like a smoky kick, stir in hot sauce or smoked paprika now.
    5. Fold the cooked pasta into the cheese sauce until evenly coated, feeling the creamy texture develop as you combine.
    6. Transfer the cheesy pasta mixture into a baking dish. Sprinkle a little extra cheese on top for a crispy crust when baked.
    7. Bake in a preheated oven at 180°C (356°F) for 15-20 minutes, until bubbling and golden on top.
    8. Remove from the oven and let rest for 5 minutes. This helps the cheese set slightly and makes serving easier.
    9. Garnish with chopped fresh herbs for a bright flavor boost and a pop of color.
    10. Serve hot, scooping generous portions onto plates, and enjoy the gooey, smoky goodness that’s full of soulful comfort.

    Notes

    Feel free to customize with bacon, jalapeños, or extra cheeses for your personal twist.
    This dish isn’t just about cheesy comfort; it’s about capturing a vibe that’s both laid-back and indulgent. You can tweak the cheeses, add some smoky bacon or jalapeños, or keep it simple and let the cheesy charm shine. Whatever you do, it’s a recipe that begs for a relaxed moment, a cold drink, and a good mood.

  • Oprah Winfrey’s Turkey Chili: A Heartfelt, Unconventional Take on Comfort Food

    Oprah Winfrey’s Turkey Chili: A Heartfelt, Unconventional Take on Comfort Food

    This turkey chili is a recipe born from a need for honest, hearty comfort food without all the fuss. It’s a dish that’s forgiving, adaptable, and rooted in the kind of flavors that warm you from the inside out. I love how it evolves with every batch, a little smoky, a little tangy, and always satisfying.

    Why This Chili Calls Me Back

    It’s the kind of dish that tastes like a hug, no matter the season. The slow simmering unlocks a depth of flavor that’s both familiar and surprising. Plus, it’s forgiving enough for improvisation, which makes every batch feel personal and worth returning to.

    Breaking Down the Ingredients

    • Ground turkey: A lean, mild base that takes well to smoky spices. Great for a lighter chili, but you can swap in chicken or beef.: Keeps the chili light and tender, absorbing flavors beautifully.
    • Canned crushed tomatoes: The tangy backbone of the chili. Go for low-sodium if you’re watching salt, but never skip the richness.: Provides a vibrant, oozy base that simmer’s into a rich sauce.
    • Kidney beans: Heartier and creamier, they add texture and meaty bite. Rinse well to avoid excess salt.: A satisfying, velvety contrast to the turkey.
    • Smoked paprika: Adds a deep smoky aroma that transforms the dish. Use regular paprika if you prefer milder flavor.: Gives a subtle, smoky depth that’s essential.
    • Onions and peppers: The flavor foundation. Use yellow onions and bell peppers for sweetness or poblanos for a smoky kick.: Builds layers of sweetness and heat, essential for depth.

    Tools of the Trade for a Good Chili

    • Large heavy-bottomed pot: To evenly cook and develop flavors over a steady heat.
    • Wooden spoon: For stirring and breaking apart the turkey.
    • Measuring spoons and cups: To keep your spices and liquids in balance.
    • Knife and cutting board: Chopping onions, peppers, and garlic efficiently.

    Cooking the Perfect Oprah-Style Turkey Chili

    Step 1: Gather all your ingredients and equipment. Preheat your large pot over medium heat.

    Step 2: a. Add a splash of oil, and sauté diced onions and peppers until fragrant, about 5 minutes.

    Step 3: b. Stir in garlic, cumin, and smoked paprika; cook until spices release their aroma, about 1 minute.

    Step 4: c. Add ground turkey, breaking it apart with a spoon. Cook until browned, about 8 minutes.

    Step 5: d. Pour in crushed tomatoes, kidney beans, and corn. Bring to a simmer, then lower heat.

    Step 6: e. Let it cook uncovered for 20-30 minutes, stirring occasionally. The chili should thicken and develop deep flavor.

    Step 7: f. Taste and adjust salt and pepper. If too acidic, a pinch of sugar balances it out.

    Step 8: g. Serve hot, garnished with fresh cilantro or a squeeze of lime.

    Culinary Checkpoints & Tips for Success

    • Look for a rich, deep red color in your chili, a sign it’s developing flavor.
    • The aroma should be smoky with hints of cumin and garlic; if not, cook spices a bit longer.
    • Your chili should be thick enough to hold a spoon upright, not soupy or watery.

    Common Pitfalls & How to Dodge Them

    • Skipping the browning step.? If you forget to brown the turkey, it will be bland. Sear it well for flavor.
    • Making it too watery.? If your chili is too thick, stir in a splash of broth or water.
    • Burning the spices.? Over-torched spices can turn bitter. Reduce heat and cook spices gently.
    • Not balancing the acidity.? If it’s too acidic, stir in a tiny pinch of sugar.

    Hearty Turkey Chili

    This turkey chili is a comforting, hearty dish made with lean ground turkey simmered with crushed tomatoes, kidney beans, and smoky spices. It develops a rich, deep flavor through slow simmering, resulting in a thick, vibrant sauce with a slightly smoky and tangy taste. The final dish is warm, satisfying, and perfect for a cozy meal.
    Prep Time 15 minutes
    Cook Time 30 minutes
    Total Time 45 minutes
    Servings: 4
    Course: Main Course
    Cuisine: American
    Calories: 350

    Ingredients
      

    • 1 lb ground turkey lean
    • 1 can canned crushed tomatoes
    • 1 can kidney beans rinsed and drained
    • 1 tsp smoked paprika
    • 1 medium yellow onion diced
    • 1 bell pepper red or green diced
    • 2 cloves garlic minced
    • 1 tbsp olive oil
    • to taste salt and pepper

    Equipment

    • Large heavy-bottomed pot
    • Wooden spoon
    • Measuring spoons and cups
    • Knife
    • Cutting board

    Method
     

    1. Heat a large heavy-bottomed pot over medium heat and add a splash of olive oil.
    2. Add diced onions and peppers to the pot. Sauté until they become fragrant and slightly softened, about 5 minutes, stirring occasionally.
    3. Stir in minced garlic and smoked paprika, cooking for about 1 minute until the mixture releases a fragrant aroma and the spices darken slightly.
    4. Add ground turkey to the pot, breaking it apart with your spoon. Cook until it is browned and cooked through, about 8 minutes, until it no longer looks pink and starts to brown.
    5. Pour in the crushed tomatoes and add the rinsed kidney beans. Stir everything together and bring to a gentle simmer.
    6. Lower the heat to maintain a gentle simmer and cook uncovered for 20-30 minutes, stirring occasionally. The chili will thicken and develop richer flavors.
    7. Taste the chili and season with salt and pepper as needed. If the acidity feels too strong, stir in a tiny pinch of sugar to balance the flavors.
    8. Once the chili is thick and bubbling, it’s ready to serve. Ladle into bowls and garnish with fresh herbs or a squeeze of lime if desired.

    Notes

    For extra smoky flavor, try adding a dash of chipotle powder or smoked chili flakes. Leftovers taste even better the next day as flavors meld.
    This turkey chili isn’t just about filling bellies, it’s about gathering around a bowl that’s warm, honest, and a little messy. It’s a recipe that invites you to tweak, to make it your own, and to find comfort in its familiar chaos. Enjoy the process, and let your taste buds lead you to new layers of flavor.

  • A Cozy Twist on Taco Soup: Depth of Flavor in Every Ladle

    A Cozy Twist on Taco Soup: Depth of Flavor in Every Ladle

    Taco soup feels like a warm hug on a chilly day, but it’s also a perfect way to use up odds and ends lurking in your fridge. I started making this after a chaotic grocery run left me with too many cans and not enough time. Now, it’s a go-to for busy nights and casual weekends—simple, satisfying, and endlessly forgiving.

    Why I keep coming back to this recipe

    It’s the kind of dish that adapts to my mood and ingredients on hand. The warmth spreads through the kitchen, and the flavors evolve with every spoonful. Plus, it’s one of those recipes that feels like a warm blanket, no matter the season. It’s honest, messy, and comforting—what more could I ask for?

    Breaking down the ingredients

    • Ground beef: It’s the savory backbone, browns beautifully, and adds richness. Swap for ground turkey or lentils for a lighter or vegetarian version.: Provides hearty flavor and protein.
    • Canned diced tomatoes: Bright, slightly acidic, adds freshness. Use fire-roasted for a smoky kick, or fresh tomatoes in summer.: Lends a tangy, juicy base.
    • Black beans: Creamy, earthy, and filling. Rinse well to reduce excess salt, or swap for kidney beans or chickpeas.: Adds fiber and hearty texture.
    • Corn: Sweet and smoky if grilled first. Frozen or fresh works, just thaw first for best texture.: Gives a pop of color and sweetness.
    • Spices: Cumin, chili powder, smoked paprika—each layer adds smoky warmth and heat. Adjust quantity to suit your taste.: Creates the signature taco flavor profile.
    • Beef broth: The liquid canvas that pulls everything together. Use chicken or vegetable broth for a different vibe.: Enriches the soup with savory depth.
    • Toppings: Shredded cheese, sour cream, cilantro—builds flavor and texture with each bite. Feel free to add sliced jalapeños or avocado.: Personalize and elevate the bowl.

    Tools of the trade for taco soup

    • Large heavy-bottomed pot: To evenly cook and simmer the soup without scorching.
    • Sharp knife: For chopping vegetables and meat efficiently.
    • Wooden spoon: Stirring and scraping the bottom of the pot to prevent sticking.
    • Measuring cup: Accurately portioning liquids and spices.

    Step-by-step for a hearty, flavorful taco soup

    Step 1: Gather your equipment: a large heavy-bottomed pot, a sharp knife, a wooden spoon, and a measuring cup.

    Step 2: In a big pot over medium heat (about 160°C/320°F), sauté diced onions and bell peppers until fragrant and slightly caramelized, about 5 minutes.

    Step 3: Add ground beef, breaking it apart, cook until browned and no longer pink, around 8 minutes.

    Step 4: Stir in garlic, cumin, chili powder, and smoked paprika, cook for 1 minute until spices are fragrant.

    Step 5: Pour in diced tomatoes, black beans, corn, and beef broth. Bring to a simmer, about 10 minutes.

    Step 6: Taste and adjust salt and pepper.

    Step 7: Serve hot, topped with shredded cheese, sour cream, and fresh cilantro.

    Cooking checkpoints to keep in mind

    • Ensure the beef is browned and crumbly, not clumped or undercooked.
    • Spices should be toasted lightly in the oil for maximum flavor.
    • The soup should simmer gently to meld flavors without boiling over.
    • Taste and adjust seasoning at the end to suit your palate.

    Common pitfalls and how to fix them

    • Under-seasoned soup.? Add more seasoning if the soup tastes flat.
    • Soup sticking to the bottom of the pot.? Don’t forget to stir regularly to avoid burning.
    • Boiling over or toughening ingredients.? Simmer gently; if boiling too hard, reduce heat.
    • Overly dense or gloopy texture.? If the soup is too thick, add a splash of broth or water.

    Hearty Taco Soup

    This comforting taco soup combines ground beef, diced tomatoes, black beans, and corn simmered with warm spices. Its thick, chunky texture is topped with melted cheese, sour cream, and cilantro, making it a flavorful and satisfying bowl perfect for any chilly day. The dish is easy to customize with your favorite toppings and ingredients on hand.
    Prep Time 15 minutes
    Cook Time 25 minutes
    Total Time 40 minutes
    Servings: 6
    Course: Main Course
    Cuisine: American
    Calories: 350

    Ingredients
      

    • 1 lb ground beef or ground turkey or lentils for lighter/vegetarian version
    • 1 can diced tomatoes fire-roasted adds smoky flavor
    • 1 can black beans rinsed and drained
    • 1 cup corn frozen or fresh, thawed if frozen
    • 1 tsp cumin ground spice
    • 1 tsp chili powder adjust to taste
    • 1/2 tsp smoked paprika adds smoky warmth
    • 2 cups beef broth or chicken/vegetable broth
    • 1 medium onion diced
    • 1 bell pepper red bell pepper diced
    • to taste salt and pepper
    • to taste shredded cheese cheddar or Mexican blend
    • to taste sour cream for topping
    • a handful cilantro chopped, for garnish

    Equipment

    • Large heavy-bottomed pot
    • Sharp knife
    • Wooden spoon
    • Measuring cup

    Method
     

    1. Gather your equipment: a large heavy-bottomed pot, a sharp knife, a wooden spoon, and a measuring cup.
    2. Dice the onion and red bell pepper into small, even pieces. They will soften and release aroma as they cook.
    3. Heat the pot over medium heat and add a splash of oil. Sauté the diced onion and bell pepper until fragrant and slightly caramelized, about 5 minutes, until they look soft and have a golden hue.
    4. Add the ground beef to the pot, breaking it apart with your wooden spoon. Cook until browned and no pink remains, about 8 minutes, until it crumbles and develops a deep color.
    5. Stir in garlic if desired (not listed), cumin, chili powder, and smoked paprika. Cook for 1 minute until the spices are fragrant and slightly toasted, filling the kitchen with warm aroma.
    6. Pour in the diced tomatoes, black beans, corn, and beef broth. Stir everything together, scraping the bottom of the pot to lift any flavorful browned bits.
    7. Bring the mixture to a gentle simmer and cook for about 10 minutes, allowing flavors to meld and the soup to thicken slightly.
    8. Taste the soup and add salt and pepper as needed to enhance the flavor.
    9. Serve the hot soup in bowls, topped generously with shredded cheese, a dollop of sour cream, and chopped cilantro for a fresh finishing touch.

    Notes

    Feel free to customize toppings or add sliced jalapeños for extra heat. If the soup gets too thick, stir in a splash of broth or water to loosen it up. This dish is perfect for make-ahead meals—just reheat and enjoy!
    This taco soup isn’t just about filling your belly; it’s about the memories stirred up with each spoonful. I love how simple ingredients come together into something richer and more complex than expected. Feel free to tweak the toppings or spice level—this soup welcomes your personal touch. Pour yourself a bowl, and enjoy the slow, comforting warmth.

  • Best Chili Recipe: A Heartfelt Take on a Classic with a Twist of Nostalgia

    Best Chili Recipe: A Heartfelt Take on a Classic with a Twist of Nostalgia

    Making chili is about more than just mixing ingredients. It’s a ritual of sorts, a slow simmer into something comforting and familiar. I’ve learned over the years that the best chili balances smoky, spicy, and a touch of sweetness, with a depth that only comes from patience.
    This recipe is a bit of a throwback, inspired by childhood weekends and smoky campfires. It’s straightforward but layered, a dish that rewards quiet attention and a good sprinkle of love.

    Why I Keep Coming Back to This Chili

    Because it’s forgiving, adaptable, and always hits the spot. It reminds me of lazy weekends, shared laughs, and simple comfort. No matter the season, a bowl of this chili feels like a warm hug after a long day.

    A Closer Look at the Core Ingredients

    • Ground beef: : Rich and juicy, it forms the hearty base. Swap for turkey for leaner fare.
    • Canned tomatoes: : Juicy and zesty, they give the chili its tang. Use fresh in summer, but canned is reliable.
    • Beans: : Creamy and filling, black beans or kidney beans work well. Rinse to remove extra salt.
    • Chili powder: : Smoky and warm, essential for depth. Mix with smoked paprika for extra punch.
    • Onions and garlic: : A flavor foundation, fragrant and sweet when cooked properly. Skip garlic if allergic.
    • Spices: : Cumin, oregano, a pinch of cinnamon—layered warmth. Adjust to taste.
    • Oil: : Helps sauté ingredients; olive oil adds a fruity note, but neutral oils work too.

    Tools of the Trade for Chili Success

    • Heavy-bottomed pot or Dutch oven: Distributes heat evenly for a slow, even simmer.
    • Wooden spoon or spatula: Stirs ingredients without scratching the pot.
    • Measuring spoons and cups: Keeps spices and liquids balanced.
    • Knife and chopping board: Preps onions, garlic, and other ingredients.
    • Ladle or large spoon: Serves the chili at the table.

    Step-by-Step for a Soulful Bowl

    Step 1: Start by gathering all your ingredients. A messy kitchen is a happy kitchen.

    Step 2: Heat a large heavy-bottomed pot over medium heat, about 160°C/320°F. Add some oil.

    Step 3: Sauté chopped onions and garlic until soft and fragrant, about 5 minutes. The smell should be sweet and savory.

    Step 4: Add ground beef, cook until browned, breaking it apart. If it starts to stick, splash in a bit of water.

    Step 5: Stir in diced tomatoes, beans, and spices. Bring to a simmer.

    Step 6: Reduce heat to low, cover, and cook gently for an hour, stirring occasionally.

    Step 7: Taste and adjust salt and pepper. The chili should be thick, rich, and bubbling.

    Cooking Checks & Tips to Keep You on Track

    • The onions should be translucent and sweet-smelling.
    • The beef must be browned and crumbly, not pink or greasy.
    • The chili should be thick and bubbling gently by the end.
    • Taste and adjust seasoning before serving.

    Common Mistakes and How to Fix Them

    • Adding too much salt early on.? FORGOT to taste and adjust seasoning at the end. → Add a splash of vinegar or a pinch of sugar to balance flavors.
    • Overcooking the chili and losing structure.? DUMPED in all spices at once. → Add spices gradually, tasting as you go.
    • Using too much oil.? OVER-TORCHED the garlic and onions. → Lower heat and add a splash of water to cool.

    Hearty Smoky Chili

    This classic chili recipe features a slow simmer of ground beef, canned tomatoes, and beans, layered with smoky spices and aromatics. The dish develops a thick, rich texture with a deep, flavorful profile, perfect for comforting moments. It’s a forgiving, adaptable meal that’s both satisfying and easy to make.
    Prep Time 15 minutes
    Cook Time 1 hour 10 minutes
    Total Time 1 hour 25 minutes
    Servings: 4
    Course: Main Course
    Cuisine: American
    Calories: 350

    Ingredients
      

    • 1 lb ground beef or turkey for leaner option
    • 1 can canned diced tomatoes use fresh in summer if preferred
    • 1 can black beans rinsed
    • 2 tbsp chili powder smoky and warm
    • 1 tsp ground cumin
    • 1/2 tsp dried oregano
    • 1/4 tsp ground cinnamon adds warmth
    • 1 medium onion chopped
    • 3 cloves garlic minced
    • 2 tbsp olive oil

    Equipment

    • Heavy-bottomed pot or Dutch oven
    • Wooden spoon or spatula
    • Measuring spoons and cups
    • Knife and chopping board
    • Ladle or large spoon

    Method
     

    1. Chop the onion finely and mince the garlic, set aside.
    2. Heat a heavy-bottomed pot over medium heat and add olive oil. Once shimmering, add the chopped onion and minced garlic, sautéing until they turn translucent and fragrant, about 5 minutes. The aroma should be sweet and savory.
    3. Add the ground beef to the pot, breaking it apart with your spoon. Cook until browned and crumbly, about 8-10 minutes. If the mixture starts sticking, splash in a little water to loosen.
    4. Stir in the chili powder, cumin, oregano, and cinnamon, cooking for another minute until the spices are fragrant and coated the beef evenly.
    5. Pour in the canned diced tomatoes with their juice, and add the rinsed black beans. Mix everything thoroughly, bringing the mixture to a gentle simmer.
    6. Reduce the heat to low, cover the pot, and let the chili simmer gently for about 60 minutes, stirring occasionally. The chili should thicken and develop deep flavors.
    7. Uncover and taste the chili, adjusting the salt, pepper, or spices as needed. The final dish should be thick, bubbling, with a rich aroma and a deep, layered flavor.
    8. Serve hot, ladled into bowls, and enjoy this comforting, smoky chili with your favorite toppings or sides.

    Notes

    For extra smoky flavor, add a dash of smoked paprika or a chipotle pepper. Feel free to customize the beans or spice level to your taste.
    This chili isn’t just about filling bellies; it’s about the memories stirred up with each spoonful. It’s a recipe I keep coming back to because it’s forgiving and adaptable, perfect for cold nights or when you need comfort in a bowl. Feel free to tinker with the spices or add a splash of your favorite hot sauce—whatever makes it yours. Enjoy every bite, knowing you’ve created something honest and hearty.

  • Lasagna Soup Recipe: A Cozy Twist on Classic Comfort Food

    Lasagna Soup Recipe: A Cozy Twist on Classic Comfort Food

    This lasagna soup was born out of a craving for comfort and a need to use up that half jar of marinara. It’s a messy, cheesy bowl that somehow captures all the best parts of lasagna in a single spoonful. No layering, no fuss—just simple ingredients coming together in a pot.

    Why I keep coming back to this lasagna soup

    It’s a perfect blend of comfort, flavor, and simplicity. It’s forgiving enough to experiment with, yet satisfying enough to serve as a family dinner. Plus, that cheesy aroma wafting through the kitchen—nothing beats it after a long day.

    Breaking down the key ingredients in your lasagna soup

    • Crushed tomatoes: Vivid and tangy, they form the soup’s base—use good-quality canned ones for richer flavor.
    • Ground beef: Adds richness and depth, but turkey works for a leaner version—just season well.
    • Lasagna noodles: Broken into pieces, they absorb broth and cheese—go for regular or gluten-free.
    • Mozzarella cheese: Melted and gooey, it’s the heart—swap for provolone if you prefer a sharper taste.
    • Fresh basil: Bright, aromatic, and a little peppery—if fresh isn’t available, dried works in a pinch.
    • Garlic and onion: Fundamental aromatics—smash the garlic and sauté until fragrant, about 1 minute.

    Tools of the trade for this cozy soup

    • Large heavy-bottomed pot: For simmering everything evenly without burning
    • Wooden spoon: To stir and break up ingredients gently
    • Measuring cups and spoons: Accurate ingredient portions for consistent results
    • Ladle: For serving the hot, hearty soup

    Step-by-step to a cozy bowl of lasagna soup

    Step 1: Gather your ingredients and prep all your vegetables and cheeses beforehand—mise en place makes this easier.

    Step 2: In a large pot over medium heat (around 160°C/320°F), sauté onions and garlic until fragrant, about 3 minutes.

    Step 3: Add ground beef, cook until browned and crumbly, about 8 minutes. Break it apart with your spatula.

    Step 4: Pour in crushed tomatoes, beef broth, and a splash of red wine if you like—let it simmer for 20 minutes.

    Step 5: Stir in broken lasagna noodles, cook until al dente, about 10 minutes.

    Step 6: Finish with torn basil, grated mozzarella, and a sprinkle of Parmesan. Let it sit for 5 minutes off heat.

    Step 7: Serve hot, topped with extra cheese and fresh herbs. Enjoy the hearty, cheesy aroma.

    Cooking checkpoints and tips to get it just right

    • Noodles should be tender but not mushy—taste test at 10 minutes after adding them.
    • The soup should be thick enough to coat the back of a spoon—if too runny, simmer longer.
    • Cheese should be melted and bubbly—don’t wait until it’s burnt around the edges.

    Common mistakes and how to fix them

    • Boiling noodles too vigorously.? Use a lower heat if the noodles stick or overcook.
    • Adding cheese too early, causing clumps.? Add cheese at the end to prevent it from getting stringy.
    • Cooking at too high a temperature.? Simmer gently, avoid a rolling boil to keep flavors balanced.
    • Using too fatty meat or not draining enough.? Skim excess oil or fat if the soup looks greasy.

    Lasagna Soup

    This lasagna soup combines the comforting flavors of traditional lasagna into a hearty, cheesy broth. It features ground beef, crushed tomatoes, broken lasagna noodles, and melting mozzarella, creating a thick, flavorful soup with a gooey cheese topping. The dish is cooked entirely in one pot, resulting in a rich, satisfying meal with a rustic, inviting appearance.
    Prep Time 10 minutes
    Cook Time 30 minutes
    Total Time 40 minutes
    Servings: 4
    Course: Main Course
    Cuisine: American
    Calories: 350

    Ingredients
      

    • 1 lb ground beef or turkey for a leaner version
    • 1 can crushed tomatoes use good-quality canned ones for richer flavor
    • 4 cups beef broth
    • 1 cup broken lasagna noodles regular or gluten-free
    • 1 cup mozzarella cheese shredded
    • 2 cloves garlic smash and minced
    • 1 medium onion diced
    • a handful fresh basil roughly torn
    • 2 tablespoons olive oil
    • to taste salt and pepper

    Equipment

    • Large heavy-bottomed pot
    • Wooden spoon
    • Measuring cups and spoons
    • Ladle

    Method
     

    1. Heat olive oil in a large heavy-bottomed pot over medium heat until shimmering.
    2. Add diced onion and smashed garlic to the pot, sauté until fragrant and translucent, about 3 minutes. The onions should be soft and slightly golden.
    3. Add ground beef to the pot, breaking it apart with your wooden spoon. Cook until browned and crumbly, about 8 minutes, until no pink remains.
    4. Pour in crushed tomatoes and beef broth, stirring to combine everything evenly. Bring the mixture to a gentle simmer.
    5. Season with salt and pepper, then reduce heat to low and let simmer for 20 minutes, stirring occasionally. The flavors will meld, and the broth will thicken slightly.
    6. Add broken lasagna noodles to the pot, stirring to distribute evenly. Cook until al dente, about 10 minutes, tasting to ensure noodles are tender but not mushy.
    7. Stir in torn basil and grated mozzarella cheese, allowing the cheese to melt into the hot soup. Let sit off the heat for 5 minutes to let flavors meld and cheese to become gooey.
    8. Ladle the hot, cheesy soup into bowls, ensuring each serving has plenty of noodles, beef, and melted cheese. Garnish with extra basil if desired and serve immediately.

    Notes

    Ensure noodles are cooked al dente to prevent over-softening. Add cheese at the end for maximum gooeyness. Adjust broth thickness by simmering longer if needed.
    This soup isn’t just a quick fix; it’s a warm hug after a long day. You can tweak the ingredients—add spinach or swap the beef for turkey—whatever keeps it interesting. It’s forgiving, forgiving enough to make your own. Pour yourself a bowl, and let the flavors remind you why cozy casseroles are worth the fuss.

  • Chicken Noodle Soup Recipe with a Twist: The Umami Boost You Didn’t See Coming

    Chicken Noodle Soup Recipe with a Twist: The Umami Boost You Didn’t See Coming

    I’ve always thought chicken noodle soup is more than just a remedy for colds or a quick fix for a chilly day. It’s a blank canvas, a foundation for experimenting with flavors. This version, with its secret umami punch, is my go-to when I want something familiar but with a little extra depth.

    Why This Soup Calls Me Back Again and Again

    The comforting warmth, layered with savory depth from slow-simmered bones, never fails to lift my spirits. It’s a dish that adapts easily, welcoming a splash of hot sauce or a handful of greens at the end. The process itself is a soothing ritual that reconnects me to home, even when I’m miles away.

    The Heart of the Soup: Ingredient Breakdown

    • Chicken bones: Gives the broth a rich, meaty base; use leftover carcasses or buy a small bag of wings.
    • Carrots: Add sweetness and color, releasing a subtle earthiness as they cook.
    • Celery: Brings a fresh, slightly bitter note that balances the richness.
    • Garlic: Infuses the broth with a warm, pungent aroma, essential for depth.
    • Noodles: Use egg noodles or rice noodles; cook separately to avoid mushiness.
    • Soy sauce: A splash adds smoky, salty umami that makes every sip memorable.
    • Fresh herbs (parsley, thyme): Finish with bright, herbal notes that lift the whole dish.

    Tools of the Trade for a Perfect Pot of Soup

    • Large stockpot: To simmer the broth and cook the vegetables and noodles.
    • Strainer: To strain out bones and vegetable solids from the broth.
    • Sharp knife: For chopping vegetables and chicken.
    • Cutting board: Provides a safe surface for prepping ingredients.
    • Measuring spoons and cups: To measure ingredients precisely.

    A Step-by-Step Guide to the Best Chicken Noodle Soup

    Step 1: Start by gathering all your ingredients and setting your stove to a medium-low heat.

    Step 2: In a large pot, simmer chicken bones or carcass with water, garlic, and a splash of soy sauce for 1.5 hours to extract deep umami flavor.

    Step 3: While the broth simmers, prepare your vegetables: chop carrots, celery, and onions into small, even pieces.

    Step 4: Once the broth is rich and fragrant, strain out the solids and return the clear broth to the pot.

    Cooking Checkpoints & Tips for Perfection

    • Broth should develop a deep, meaty aroma and a slightly oily surface.
    • Vegetables should be tender but not mushy, with bright, fresh colors.
    • Noodles should be al dente—slightly firm to bite, not overcooked.

    Common Mistakes & How to Avoid Them

    • Adding too much water during simmering.? If broth is too bland, add a splash of soy sauce or fish sauce to boost umami.
    • Boiling noodles directly in the broth for too long.? If noodles are sticking or overcooked, rinse with cold water and add later.
    • Overcooking vegetables in the initial stages.? If vegetables turn mushy, add them later in the cooking process.
    • Not skimming the broth during simmering.? If soup lacks clarity, skim the surface for foam and fat.

    Hearty Chicken Noodle Soup

    This chicken noodle soup is a comforting dish featuring a rich, slow-simmered broth infused with umami flavors from bones, complemented by tender vegetables and al dente noodles. The process involves building a deeply flavored stock, then adding fresh vegetables and noodles for a cozy, textured final dish with bright herbal notes.
    Prep Time 20 minutes
    Cook Time 1 hour 30 minutes
    Total Time 1 hour 50 minutes
    Servings: 4
    Course: Main Course
    Cuisine: Comfort Food
    Calories: 350

    Ingredients
      

    • 1 lb chicken bones or carcass leftover or purchase small bag of wings
    • 2 carrots carrots peeled and chopped
    • 2 stalks celery celery stalks chopped
    • 3 cloves garlic garlic minced
    • 8 oz egg noodles egg noodles
    • 2 tbsp soy sauce adds umami and depth
    • 1/4 cup fresh parsley chopped, for garnish
    • 1 tsp dried thyme optional, for added flavor
    • to taste salt and pepper

    Equipment

    • Large stockpot
    • Strainer
    • Sharp knife
    • Cutting board
    • Measuring spoons and cups

    Method
     

    1. Place the chicken bones in a large stockpot, cover with water, and add minced garlic and a splash of soy sauce. Bring to a gentle simmer and cook for about 1.5 hours, skimming foam from the surface as needed until the broth develops a rich aroma.
    2. While the broth simmers, peel and chop the carrots into small, even pieces, and chop the celery stalks. Set aside for later.
    3. Strain the broth through a fine strainer into a clean pot, discarding the solids. Return the clear broth to the stove and bring to a gentle simmer.
    4. Add the chopped carrots and celery to the simmering broth. Cook for about 10 minutes until vegetables are tender but still vibrant in color.
    5. Meanwhile, cook the egg noodles separately in boiling water until just al dente, then drain and set aside.
    6. Stir the cooked noodles into the simmering broth, then add soy sauce, dried thyme, salt, and pepper to taste. Let everything heat through for 2-3 minutes.
    7. Taste the soup and adjust seasoning as needed, adding more soy sauce, salt, or pepper for desired flavor.
    8. Pour the hot soup into bowls, garnish generously with chopped fresh parsley, and serve immediately for a comforting, flavorful meal.

    Notes

    For extra richness, add a splash of sesame oil or a squeeze of lemon juice at the end. Make sure to skim foam during simmering to keep the broth clear and flavorful.
    This soup isn’t just about comfort; it’s about leaning into the simple joys of slow cooking and the magic of building flavor from scratch. Feel free to toss in your favorite greens or swap the noodles for rice if that’s your vibe. Most importantly, enjoy every spoonful—this is the kind of dish that tastes better when made with a bit of love and patience.

  • A Cozy Twist on Classic Turkey Chili You Can’t Miss

    A Cozy Twist on Classic Turkey Chili You Can’t Miss

    This recipe started as a way to make turkey exciting again, a way to turn leftovers into something vibrant and warming. I found that adding smoky spices and a slow simmer really transforms it from plain to memorable. It’s not just about comfort; it’s about reclaiming the humble turkey in a dish that feels hearty and fresh.

    Why I keep returning to this turkey chili

    It’s honest, straightforward, and forgiving. I love how adaptable it is—throw in whatever veggies or spices I have. The aroma alone makes the whole house feel cozy. Plus, it’s a reminder that humble ingredients can turn into something satisfying with patience and a little heat.

    Breaking down the ingredients that make this chili special

    • Ground turkey: Lean and mild, it absorbs spices well and stays juicy if cooked right.
    • Diced tomatoes: Gives a tangy, bright base; opt for fire-roasted for extra smoky flavor.
    • Chili powder: Adds warmth and depth; try smoked if you like a richer, woodsy tone.
    • Beans (kidney or black): Creamy and filling, they add texture and a hearty feel.
    • Onions and garlic: Start with these aromatics—they’re the backbone of flavor.
    • Smoked paprika: Gives a subtle smoky kick, especially good if you skip the chili powder.
    • Lime juice (optional): Brightens the dish with a citrus spark, just before serving.

    Tools that make the magic happen

    • Large heavy-bottomed pot: Ensures even heat for sautéing and simmering.
    • Wooden spoon: Stirs without scratching pots and helps incorporate flavors.
    • Measuring spoons and cups: Keeps spices and liquids balanced.
    • Knife and cutting board: Prepares vegetables efficiently.

    Step-by-step for a hearty, balanced bowl

    Step 1: Heat a large, heavy-bottomed pot over medium heat, about 180°C (355°F).

    Step 2: Add a splash of oil, then toss in chopped onions and garlic. Sauté until they turn translucent and smell sweet, about 5 minutes.

    Step 3: Stir in ground turkey, breaking it apart. Cook until it loses its pink, about 8 minutes.

    Step 4: Mix in diced tomatoes, beans, chili powder, cumin, and a pinch of smoked paprika. Simmer uncovered for 30 minutes, stirring occasionally.

    Step 5: Taste and adjust salt, pepper, and heat level. Let it rest off the heat for 10 minutes before serving.

    Cooking checkpoints and tips that matter

    • The onions should be golden and fragrant before adding turkey.
    • Turkey should be browned and cooked through, no pink left.
    • The chili should simmer gently, not boil vigorously, to meld flavors.

    Avoid these common pitfalls

    • Burnt bits or stuck-on residue.? Add a splash of water or broth if the chili sticks to the bottom.
    • Overly charred or bitter flavor.? Reduce heat if the chili starts to splatter or burn.
    • Uneven cooking or scorched spices.? Stir more frequently if ingredients aren’t blending.
    • Too bland or too salty.? Taste and adjust seasoning before serving.

    Hearty Turkey Chili

    This turkey chili combines lean ground turkey with smoky spices, simmered with diced tomatoes and beans for a comforting, hearty dish. The slow simmering process develops rich flavors and a thick, inviting texture, finished with a bright squeeze of lime. Perfect for a cozy meal that transforms leftovers into a vibrant, satisfying bowl.
    Prep Time 10 minutes
    Cook Time 40 minutes
    Total Time 50 minutes
    Servings: 4
    Course: Main Course
    Cuisine: American
    Calories: 350

    Ingredients
      

    • 1 tablespoon olive oil for sautéing
    • 1 large yellow onion finely chopped
    • 3 cloves garlic minced
    • 1 pound ground turkey lean
    • 1 can diced tomatoes fire-roasted preferred
    • 1 can kidney beans drained and rinsed
    • 2 tablespoons chili powder smoked if preferred
    • 1 teaspoon cumin
    • 1/2 teaspoon smoked paprika
    • to taste salt and pepper
    • 1 lime lime for optional brightening

    Equipment

    • Large heavy-bottomed pot
    • Wooden spoon
    • Measuring spoons and cups
    • Knife
    • Cutting board

    Method
     

    1. Heat a large heavy-bottomed pot over medium heat until warm, then add a splash of olive oil.
    2. Add chopped onions and minced garlic to the pot. Sauté until the onions turn translucent and fragrant, about 5 minutes, with a gentle sizzle and aroma filling the air.
    3. Stir in ground turkey, breaking it apart with your spoon, and cook until it loses its pink color and begins to brown, about 8 minutes, until the mixture is fragrant and slightly caramelized.
    4. Add diced tomatoes, drained beans, chili powder, cumin, smoked paprika, and a pinch of salt and pepper. Stir well to combine all ingredients evenly.
    5. Bring the mixture to a gentle simmer, then reduce heat to low and cover partially. Let it simmer uncovered for about 30 minutes, stirring occasionally, until the chili thickens and flavors meld together.
    6. Taste the chili and adjust the seasoning with more salt, pepper, or spices if desired. Squeeze fresh lime juice over the chili just before serving for a bright, citrusy finish.
    7. Serve the hearty turkey chili hot, garnished with your favorite toppings or a sprinkle of fresh herbs for an inviting, comforting bowl.

    Notes

    For extra smoky flavor, use smoked paprika and fire-roasted tomatoes. Feel free to add chopped bell peppers or corn for extra texture and sweetness.
    This turkey chili is a warm blanket on a cold day, but it also kicks up with a smoky depth that surprises. Feel free to swap in different beans or add a splash of lime for brightness. It’s simple, forgiving, and a perfect way to clear out the fridge. Enjoy it with a sprinkle of cheese or a dollop of sour cream, whatever makes it feel like home.

  • White Chicken Chili: A Cozy Bowl with a Unexpected Kick

    White Chicken Chili: A Cozy Bowl with a Unexpected Kick

    I’ve always loved how chili can be a quick fix for chilly evenings but making a good one from scratch feels like an ongoing little experiment. This version, with shredded chicken, is a favorite because it’s forgiving and full of flavor. It’s a dish that invites improvisation and makes you feel like a pro, even if you’re just winging it after a long day.

    Why You’ll Keep Coming Back to This White Chicken Chili

    It’s the kind of meal that feels like an embrace—warm, spicy, and familiar but with enough zing to keep you interested. It’s adaptable for leftovers, easy to double, and always a quick fix after a long day. Plus, the balance of creaminess and spice keeps it from feeling heavy, even in the middle of winter.

    Breaking Down the Key Ingredients

    • Shredded cooked chicken: Tender, versatile base protein that absorbs flavors well. Use leftover roast or poached chicken.
    • White beans: Creamy, neutral beans that add substance without overpowering. Cannellini or Great Northern work great.
    • Green chilies: Adds a smoky, slightly spicy kick. Use fresh or canned, depending on what’s on hand.
    • Corn kernels: Sweet, pops with a hint of crunch. Frozen or fresh, whichever is handy.
    • Cumin and chili powder: Warm, earthy, and smoky spices that define the chili’s character.
    • Lime and cilantro: Bright, fresh finishing touches that lift the dish and add complexity.

    Tools of the Trade for a Flawless White Chicken Chili

    • Large heavy-bottomed pot: To ensure even heat and prevent sticking during simmering.
    • Wooden spoon: For stirring without scratching your pot.
    • Measuring cups and spoons: To keep seasoning and liquids balanced.
    • Lime squeezer: For a fresh splash of citrus at the end.

    Step-by-Step to a Hearty, Spicy White Chicken Chili

    Step 1: Start by gathering all your ingredients and tools. Preheat your large pot over medium heat.

    Step 2: Add a splash of oil, then sauté diced onions and garlic until they turn fragrant and translucent, about 5 minutes.

    Step 3: Toss in the shredded cooked chicken, stirring until heated through, about 2 minutes.

    Step 4: Pour in chicken broth, add beans, corn, and seasonings. Bring to a simmer and cook uncovered for 20 minutes.

    Step 5: Taste and adjust salt, pepper, or chili powder as needed. The chili should be slightly thickened, with flavors melding.

    Step 6: Finish with a squeeze of lime and chopped cilantro for brightness. Serve hot, preferably with crusty bread.

    Cooking Checkpoints & Tips to Keep in Mind

    • The onions should be golden and fragrant before adding other ingredients.
    • Beans and corn should be heated through and tender but not mushy.
    • The chili should have a vibrant aroma, with spices well-rounded and not overpowering.

    Common Mistakes & How to Fix Them

    • Too thick or burnt bottom.? Add more broth or water if the chili is too thick or sticking to the bottom.
    • Ingredients sticking to the pan.? Reduce heat and stir if ingredients start sticking or burning.
    • Flavor lacking brightness.? Add a splash of acid if flavor is dull—more lime or vinegar.
    • Beans turning to mush.? Overcooked beans can turn mushy—add them later or use firmer beans.

    White Chicken Chili

    This hearty white chicken chili is made with shredded cooked chicken, creamy white beans, and sweet corn, all simmered together with smoky spices. The dish develops a rich, flavorful broth with a slightly thickened texture, finished with bright lime and cilantro for a fresh kick. It’s a comforting, adaptable meal perfect for chilly evenings or quick weeknight dinners.
    Prep Time 10 minutes
    Cook Time 30 minutes
    Total Time 40 minutes
    Servings: 4
    Course: Main Course
    Cuisine: American
    Calories: 350

    Ingredients
      

    • 2 cups cooked shredded chicken use leftover roast or poached chicken
    • 1 cup white beans cannellini or Great Northern, drained and rinsed
    • 1 cup corn kernels frozen or fresh
    • 2 cups chicken broth
    • 1 can green chilies diced, 4 oz can
    • 1 small onion diced
    • 2 cloves garlic minced
    • 1 teaspoon cumin
    • 1 teaspoon chili powder
    • to taste salt and pepper
    • 1 lime lime for squeezing fresh lime juice
    • a handful cilantro chopped, for garnish

    Equipment

    • Large heavy-bottomed pot
    • Wooden spoon
    • Measuring cups and spoons
    • Lime squeezer

    Method
     

    1. Heat a large heavy-bottomed pot over medium heat and add a splash of oil. Sauté diced onion and minced garlic until fragrant and translucent, about 5 minutes, until the onions are golden and soft.
    2. Add the shredded cooked chicken to the pot, stirring for about 2 minutes until heated through and slightly browned around the edges.
    3. Pour in the chicken broth and stir in the drained white beans, corn kernels, diced green chilies, cumin, chili powder, and a pinch of salt and pepper. Bring the mixture to a gentle simmer.
    4. Reduce heat to low and let the chili simmer uncovered for about 20 minutes, stirring occasionally. The broth should thicken slightly, and flavors will meld together beautifully.
    5. Taste the chili and adjust the seasoning with more salt, pepper, or chili powder if needed. Squeeze fresh lime juice into the pot, stirring to incorporate bright citrus flavor.
    6. Finish by garnishing with chopped cilantro for a fresh, herbal note. Serve hot, ideally with crusty bread or over rice for a satisfying meal.
    This chili isn’t just about comfort; it’s about the layers of flavor that surprise you with each spoonful. It’s forgiving enough to tweak with what you have—more heat, less, or some extra veggies. Keep it on hand for busy nights or a spontaneous gathering. Just warm, fill, and enjoy the little surprises in every bite.