Stuffed peppers aren’t just a meal; they’re a canvas for every ingredient I love. This version skips the usual tomato sauce for something smoky and bright, thanks to a pinch of smoked paprika and lemon zest. It’s a dish born from chaos in the kitchen, a way to make something simple feel special.
Why I Keep Coming Back to This Recipe
It’s forgiving when I’m short on time but still crave something satisfying. The filling’s versatility lets me get creative with what’s in my pantry. Plus, the smell of baking peppers fills the house with comfort, and every bite feels like a small victory.
Breaking Down the Key Ingredients
- Bell Peppers: Colorful, sweet, and sturdy enough to hold fillings without collapsing.
- Rice or grains: Acts as a hearty base, absorbing flavors. Use leftovers or instant for convenience.
- Ground meat or beans: Adds protein; opt for lean meat or hearty beans for vegetarian.
- Cheese: Melty, gooey, with a smoky edge if you use smoked cheese or paprika.
- Aromatics (onions, garlic): Build flavor from scratch, filling the kitchen with warm, inviting smells.
- Herbs and spices: Fresh parsley or cilantro brightens everything, while smoked paprika adds depth.
- Lemon or hot sauce: A splash of acidity or heat to finish, balancing richness.
Tools and Equipment for Stuffed Peppers
- Baking dish: Holds the peppers upright during baking.
- Sharp knife: Slices the tops off the peppers and helps scoop out seeds.
- Skillet: Sautés aromatics and prepares the filling.
- Mixing bowls: Combines the filling ingredients.
- Spoon or spatula: Fills the peppers evenly.
Step-by-Step on How to Stuff and Bake Perfect Peppers
Step 1: Preheat your oven to 190°C (375°F).
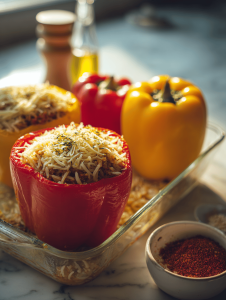
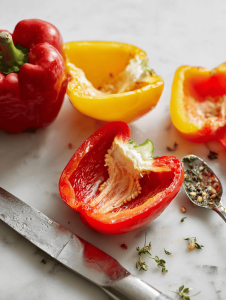
Step 2: Slice the tops off the peppers and scoop out the seeds and membranes.
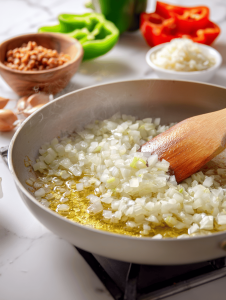
Step 3: In a skillet, heat a splash of oil over medium heat. Add chopped onions and garlic, cook until fragrant and translucent, about 5 minutes.
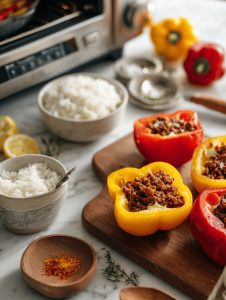
Step 4: Mix cooked rice, your choice of ground meat or beans, and the sautéed aromatics in a bowl. Season well.
Step 5: Stuff the peppers with this filling, pressing down lightly. Place them upright in a baking dish.
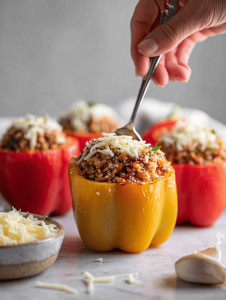
Step 6: Top each pepper with shredded cheese and a sprinkle of herbs.
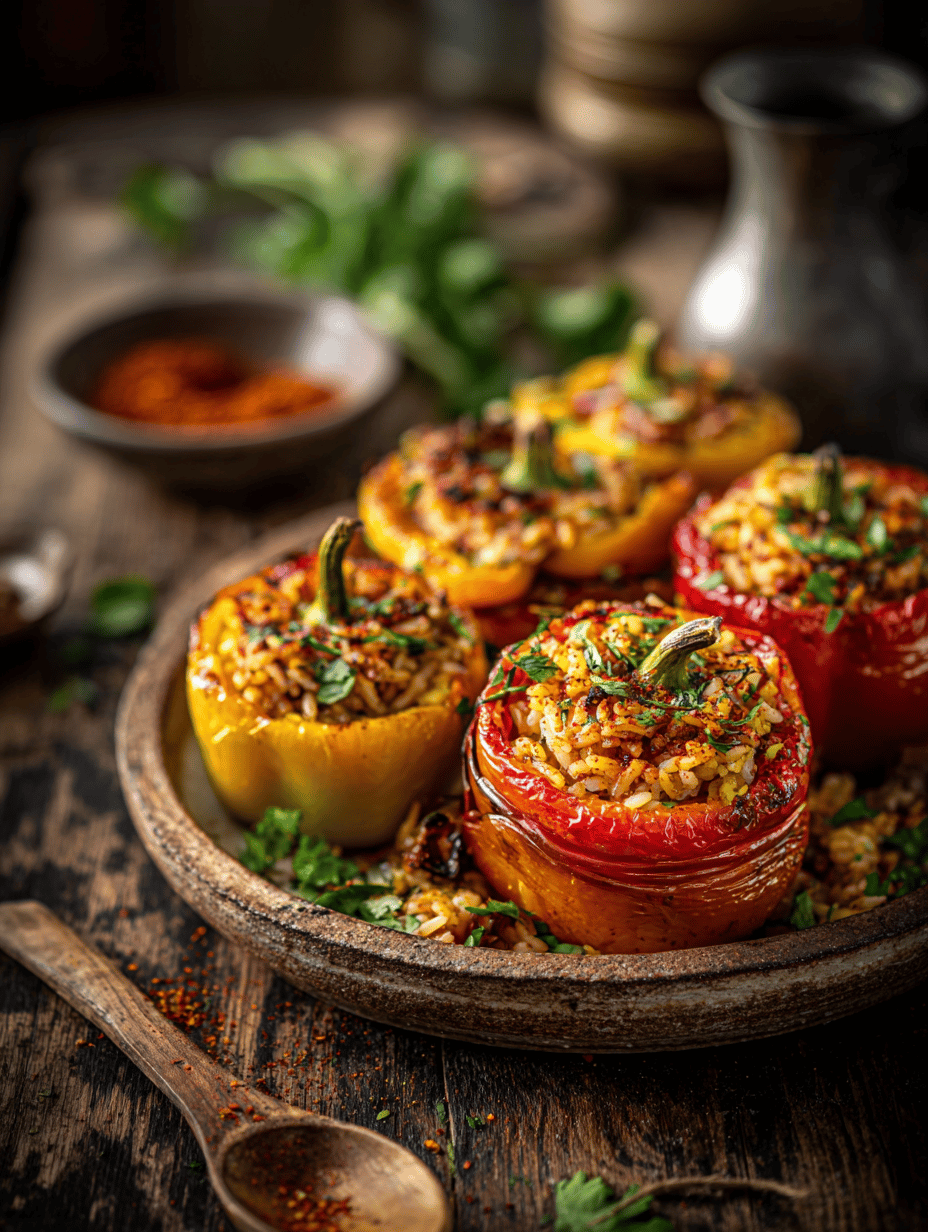
Step 7: Bake uncovered for 30-35 minutes, until peppers are tender and filling is bubbling.
Step 8: Rest for 5 minutes out of the oven. Serve hot, with a fresh squeeze of lemon or a drizzle of hot sauce.
Cooking Checkpoints & Tips to Keep in Mind
- Peppers should be tender but still hold their shape. Test with a fork.
- Cheese on top should be golden and bubbly. Keep an eye on the oven.
- Filling should be hot all the way through, reaching at least 75°C (165°F).
- Peppers might release some liquid; if so, drain excess before serving.
Common Mistakes and How to Fix Them
- Squeezing the peppers too hard when stuffing.? USE a sharp knife to avoid crushing peppers.
- Overbaking, causing peppers to turn mushy.? Baking at 190°C (375°F) ensures even cooking.
- Adding cheese too early, resulting in a burnt top.? Add cheese towards the end of baking to prevent burning.
- Filling releases too much juice, making peppers watery.? Drain excess liquid from filling to prevent sogginess.
Smoky Stuffed Peppers
Ingredients
Equipment
Method
- Preheat your oven to 190°C (375°F). Place the bell peppers upright in a baking dish, and carefully slice off the tops. Scoop out the seeds and membranes to create a hollow cavity for the filling.
- Heat olive oil in a skillet over medium heat. Add the chopped onion and cook, stirring frequently, until translucent and fragrant, about 5 minutes. Then, stir in the minced garlic and cook for another minute until aromatic.
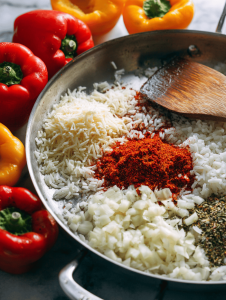
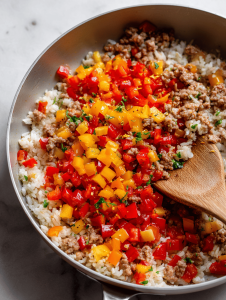
- Add the ground meat or beans to the skillet, breaking up any large pieces, and cook until browned and heated through, about 5-7 minutes. Stir in smoked paprika, lemon zest, salt, and pepper for flavor.
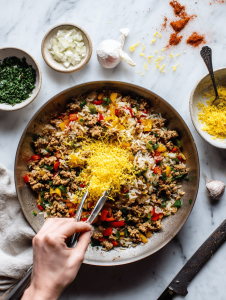
- Transfer the cooked mixture to a mixing bowl. Fold in the cooked rice and shredded cheese until well combined. Adjust seasoning as needed.
- Stuff each hollowed pepper with the filling, pressing down lightly to pack it in. Place the stuffed peppers upright in the baking dish.
- Top each stuffed pepper with a generous sprinkle of shredded cheese and a little chopped parsley or herbs if desired.
- Bake uncovered in the preheated oven for 30-35 minutes, until the peppers are tender and the cheese is golden and bubbly.
- Remove from oven and let sit for 5 minutes. Squeeze fresh lemon juice over the peppers or drizzle hot sauce for an extra zing.