
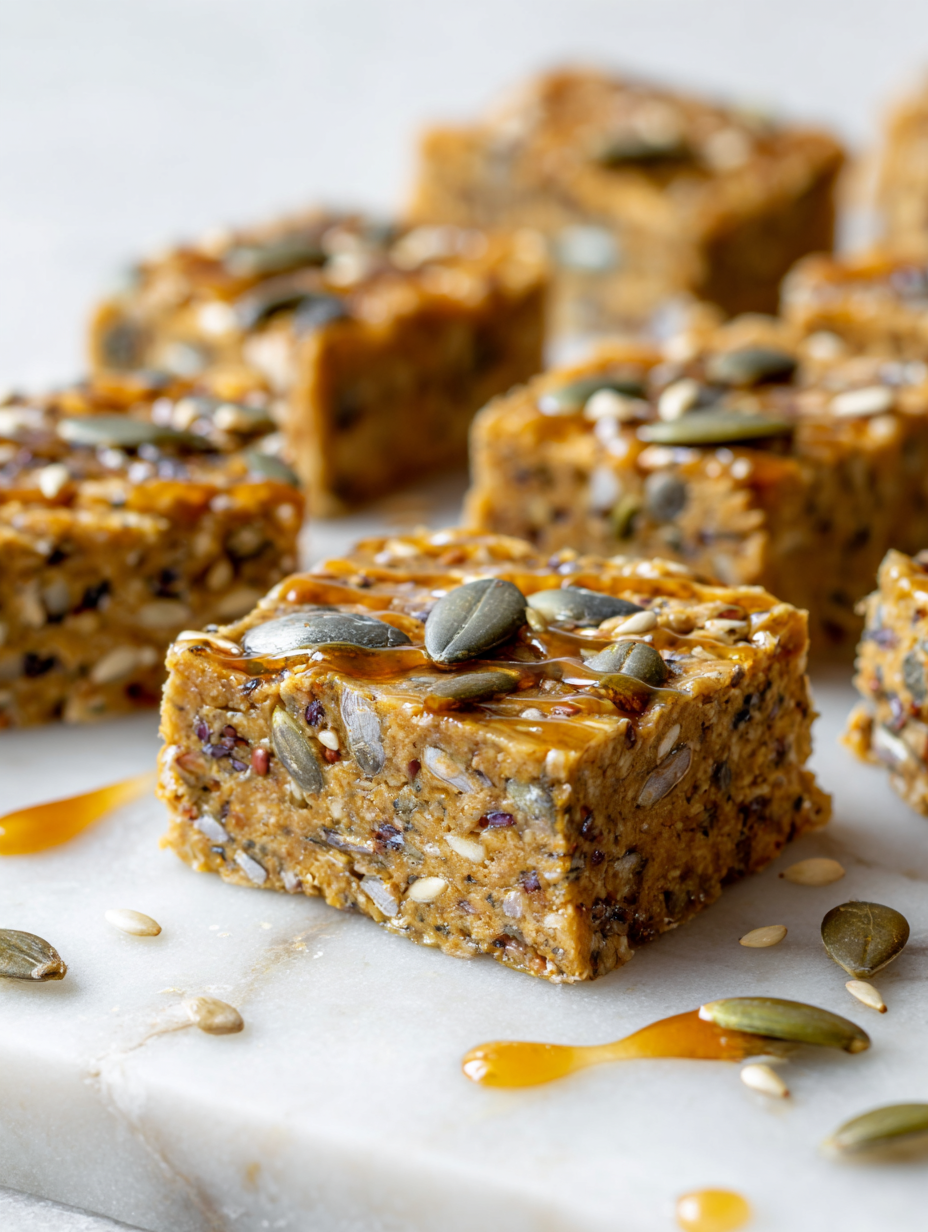
These no-bake seed bars started as a quick fix for my chaotic mornings. I wanted something crunchy, satisfying, and honest — no fuss, no long ingredient list. It’s about simplicity, but with enough texture and flavor to keep me coming back for more, especially when I need a boost between meetings or post-yoga.
What’s surprising is how endlessly adaptable they are. I’ve tweaked the seeds, added a splash of honey or maple syrup, and still get that perfect, sticky crunch. It’s a recipe born from wanting quick nourishment that’s transparent in ingredients and satisfying in every bite.
Focusing on creating a snack that combines nostalgic crunch with modern health-conscious ingredients, perfect for busy mornings or post-workout refuels, emphasizing the importance of simplicity and transparency in food choices.
The story behind this recipe
These seed bars came from a moment of needing a snack that felt honest and straightforward. I was tired of overly processed energy bites that promised health but packed in ingredients I couldn’t pronounce. One afternoon, I grabbed a handful of mixed seeds and some sticky honey, and just started mixing. That simple act turned into a habit—something I could whip up quickly, with ingredients I trust, and that packed a satisfying crunch.
Ingredient breakdown: key components
- Sunflower seeds: I love their nutty, toasty flavor that adds crunch, but if you prefer milder, try pumpkin seeds instead.
- Chia seeds: They swell and become slightly gel-like, giving bind and a subtle crunch. Skip if you dislike their texture or want fewer seeds.
- Honey: It’s the glue that holds everything together with a sweet, floral scent. Maple syrup can replace it for a more caramel note.
- Oats: I use rolled oats for chew and structure, but quick oats work in a pinch—just watch for a softer, less chewy bar.
- Flaxseed: Adds a nutty flavor and omega-3 boost. Grind them fresh for maximum benefit, or leave whole if you like a little crunch.
- Coconut flakes: I prefer lightly toasted for a smoky sweetness, but unsweetened shredded coconut keeps it more neutral and chewy.
- Salt: Just a pinch enhances all the nutty and sweet flavors, making the seeds pop—don’t skip it, even if it seems small.
Spotlight on key ingredients
Sunflower seeds & Chia seeds:
- Sunflower seeds: I love their nutty, toasty flavor that adds crunch, but if you prefer milder, try pumpkin seeds instead.
- Chia seeds: They swell and become slightly gel-like, giving bind and a subtle crunch. Skip if you dislike their texture or want fewer seeds.
Notes for ingredient swaps
- Nuts: I often swap sunflower seeds for chopped almonds or walnuts, adding a richer, buttery flavor to the bars.
- Sweetener: Maple syrup can replace honey for a caramel-tinged sweetness, but it might make the bars slightly softer.
- Binders: Agave nectar is a good vegan alternative, offering a similar sticky quality with a mild flavor.
- Oats: Use gluten-free oats if needed; just keep in mind they might have a slightly different texture and chew.
- Flavor Boosters: A dash of cinnamon or vanilla can enhance the overall aroma and taste without overpowering the seed crunch.
- Additional Seeds: Pumpkin seeds or hemp hearts can be added or swapped for variety, each bringing their own crunch and flavor.
- Coconut: If you dislike shredded coconut, try chopped dried fruit for a chewy, sweet contrast.
Equipment & Tools
- Small saucepan: Toast seeds and gently warm honey mixture.
- Mixing bowl: Combine all ingredients evenly.
- Silicone spatula: Mix ingredients and press down in pan.
- 20x20cm baking pan: Shape and set the bars.
- Parchment paper: Line the pan for easy removal.
- Sharp knife: Cut bars into desired shapes.
Step-by-step guide to seed bars
- Gather all ingredients and equipment before starting. Use a small saucepan, mixing bowl, silicone spatula, and a baking pan (20x20cm) lined with parchment paper.
- In the saucepan, toast the seeds lightly over medium heat (about 5 minutes). Keep stirring until fragrant and slightly golden. Remove from heat and set aside.
- In a mixing bowl, combine honey (or maple syrup), a pinch of salt, and a teaspoon of vanilla extract if using. Warm gently until slightly runny, about 30 seconds in the microwave if needed.
- Pour the warm honey mixture over the toasted seeds. Add oats, flaxseed, chia seeds, and coconut flakes. Mix thoroughly with a silicone spatula until everything is evenly coated and sticky.
- Transfer the mixture to the prepared pan. Press down firmly with the back of a spatula or your fingers to create an even, compact layer. Work quickly before the honey cools and firms.
- Place the pan in the fridge for at least 2 hours to set. If in a hurry, chill for 30 minutes in the freezer, but avoid freezing as it may crack the bars.
- Once firm, lift the block out of the pan using the parchment paper. Slice into bars or squares with a sharp knife. For cleaner cuts, wipe the knife with a damp cloth between slices.
- Let the bars rest at room temperature for 10 minutes before serving for optimal texture. Store in an airtight container at room temp for up to a week or freeze for longer storage.
- Enjoy these seed bars as a quick breakfast, snack, or post-workout bite. They should be crunchy, sticky, and fragrant with toasted seed aroma.
Chill the bars in the fridge for at least 2 hours until firm. Slice into squares or rectangles, then let rest at room temperature for 10 minutes before serving. Store in an airtight container at room temperature or freeze for longer storage.
How to Know It’s Done
- Seeds are lightly toasted and fragrant, with a golden hue.
- Mixture is sticky and holds together when pressed.
- Bars are firm and slightly shiny after chilling, with a crisp bite.
No-Bake Seed Bars
Ingredients
Equipment
Method
- Begin by lining your baking pan with parchment paper to prevent sticking. In a small saucepan, toast the sunflower seeds over medium heat for about 5 minutes, stirring constantly until they’re fragrant and lightly golden.
- While the seeds toast, in a mixing bowl, combine honey, a pinch of salt, and vanilla if using. Warm the mixture gently in the microwave for about 30 seconds until it’s slightly runny and fragrant.
- Pour the warm honey mixture over the toasted seeds, then add oats, chia seeds, flaxseed, and coconut flakes. Mix everything thoroughly with a silicone spatula until the mixture is sticky and well coated.
- Transfer the mixture into the prepared pan. Use the back of a spatula or your fingers to press it down firmly and evenly, creating a compact, flat layer. This ensures the bars will hold together when set.
- Place the pan in the refrigerator and chill for at least 2 hours, or until the mixture is firm and set. If you’re in a hurry, pop it in the freezer for about 30 minutes, but avoid freezing completely to prevent cracks.
- Once firm, lift the block out of the pan using the parchment paper and place on a cutting board. Use a sharp knife to cut into bars or squares, wiping the knife with a damp cloth between cuts for clean edges.
- Allow the bars to rest at room temperature for about 10 minutes before serving to maximize crunch and flavor. Store in an airtight container at room temperature for up to a week, or freeze for longer storage.
Notes
Pro tips for perfect seed bars
- Toasty Seeds: Lightly toast seeds over medium heat until fragrant; this amplifies their nutty aroma and crunch.
- Sticky Mixture: Warm honey slightly before mixing; it spreads evenly and helps the bars hold together better.
- Press Firmly: Use the back of a spatula or a glass to press the mixture tightly into the pan, ensuring clean slices.
- Chill Time: Allow the bars to chill for at least 2 hours in the fridge; this helps set the texture and crispness.
- Even Cutting: Wipe the knife with a damp cloth between cuts to prevent sticking and achieve smooth edges.
- Avoid Overheating: Remove the mixture from heat once fragrant; over-torched seeds can turn bitter and affect flavor.
- Flavor Boost: Add a pinch of sea salt or vanilla to enhance the seed flavors and add depth to the bars.
Common mistakes and how to fix them
- FORGOT to toast seeds thoroughly → Do a sniff test for aroma, not just color.
- DUMPED too much honey → Use just enough to coat, avoid sticky, overly sweet bars.
- OVER-TORCHED mixture → Remove from heat immediately once fragrant, prevent bitterness.
- MISSED pressing firmly → Use the bottom of a glass or spatula for compact, even bars.
Quick fixes and pantry swaps
- When mixture is too dry, splash in a teaspoon of water and stir to loosen.
- If bars stick to the pan, patch with a damp cloth and let sit for a few minutes.
- Splash a few drops of oil on seeds before toasting for extra shimmer and flavor.
- Dumped too much honey? Add more oats or seeds to balance sticky texture.
- When seeds are under-toasted, return to heat briefly and stir until fragrant and golden.
Prep, store, and reheat tips
- Prep the seed mixture in advance by toasting seeds and mixing with honey; this speeds up assembly and keeps things simple.
- Store the assembled, uncut mixture in the fridge for up to 24 hours if you need to prepare ahead; it firms up nicely and stays fresh.
- Once cut into bars, keep them in an airtight container at room temperature for up to a week; the crunch remains satisfying and the flavors stay bright.
- For longer storage, freeze the bars in a sealed container for up to 3 months. Thaw at room temperature for a crisp bite with a fragrant seed aroma.
- Reheat slightly in the microwave for 10-15 seconds if you want a softer texture, but they’re best enjoyed chilled or at room temp, with that initial crunch intact.
Top questions about seed bars
1. Can I use a different sweetener?
Yes, you can swap honey for maple syrup or agave; it slightly alters the flavor and texture but still works well as a binder.
2. Can I substitute the seeds?
Absolutely. Pumpkin seeds, hemp hearts, or chopped almonds make great substitutes, adding different crunch and flavor profiles.
3. My mixture is too dry, what do I do?
If the mixture feels too dry, add a teaspoon of warm water or more honey to help it come together better.
4. How should I store the seed bars?
Store these bars in an airtight container at room temperature for up to a week or freeze for longer storage.
5. Can I use quick oats instead of rolled oats?
Using quick oats will give a softer texture, while rolled oats provide more chew and crunch—both work, just different textures.
6. Do I need to toast the seeds?
Yes, toasting the seeds until fragrant and golden is key; this enhances flavor and crunch—don’t skip this step.
7. Why won’t my bars hold together?
If the bars don’t set properly, make sure you pressed them firmly into the pan and chilled them thoroughly.
8. Can I add other ingredients?
You can add dried fruit or coconut flakes for extra flavor and texture, but keep in mind they may slightly affect crunch.
9. How long do I need to chill the bars?
Chilling for at least 2 hours helps the bars set firm and crispy, but a quick freeze can speed this up if needed.
10. Can I reheat the seed bars?
Yes, you can reheat these in the microwave for about 10 seconds to soften, but they’re best enjoyed cooled for crunch.
These seed bars are more than just a snack; they’re a simple reminder that good food doesn’t have to be complicated. They come together quickly, with honest ingredients that let the natural flavors shine through. Sometimes, it’s the straightforward things—like toasted seeds and sticky honey—that keep me coming back for more, especially when I need a quick, nourishing boost.
In a world of endless snack options, these bars remind me to keep it real and rely on what’s in my pantry. They’re perfect for busy mornings, lazy afternoons, or whenever I crave that satisfying crunch. No matter the season, they always feel like a small, wholesome act of kindness you can make yourself.