
This no bake chocolate slice is my go-to when I need something sweet but don’t want the fuss of turning on the oven. It’s a bit like a grown-up version of a childhood treat, with that rich, fudgy texture that melts on your tongue. Plus, it’s so quick to throw together, you can whip it up in moments, even on your busiest days.
What I love most is how forgiving it is—no precise measuring, no complicated techniques. Just good ingredients, a little patience, and a moment of quiet to enjoy the process. It’s the kind of dessert that feels like a warm hug, especially when shared with friends or family on a lazy weekend or after a hectic day. Sometimes, the simplest recipes carry the most comfort.
This recipe is inspired by my grandmother’s quick fix for rainy days, when chocolate and comfort are all I crave but I have no energy for baking. It’s a reminder that sometimes, the simplest ingredients and a bit of patience can turn into something unexpectedly satisfying.
The story behind this recipe
This recipe came together on a rainy afternoon, when I wanted something sweet but didn’t want to turn on the oven. I remembered my mum making something similar with just a few pantry staples, and I thought, why not make it my own? It’s become a bit of a ritual, especially when I need a quick fix for chocolate cravings or want to bring a treat to friends without fussing over it. The smell of melting chocolate and toasted biscuits always takes me back to lazy weekends and messy kitchen counters filled with laughter.
Ingredient breakdown: key components
- Dark chocolate: I love using a good-quality dark chocolate, it gives that rich, deep flavor. You can swap for semi-sweet if you prefer milder, but avoid overly sweet chocolates that drown out the cocoa notes.
- Butter: I melt butter until it’s silky to help everything bind smoothly. For a dairy-free version, try coconut oil — it adds a slight tropical aroma and keeps the texture creamy.
- Biscuits: I prefer plain malt or digestive biscuits for a subtle crunch. If you want a nuttier flavor, crushed graham crackers work well, or for a gluten-free twist, try crushed rice cereal.
- Sweetener: I usually stick with a touch of honey or golden syrup for a mellow sweetness. Maple syrup can add a smoky undertone, while agave keeps things neutral if you’re watching sugar.
- Vanilla extract: Just a splash lifts the chocolate flavor. For an extra layer, a hint of espresso powder amplifies richness, but skip it if you want a straightforward chocolate hit.
- Salt: A pinch of sea salt balances the sweetness and enhances the chocolate. If you’re feeling adventurous, a tiny sprinkle of smoked salt adds a surprising depth.
- Optional toppings: I often sprinkle chopped nuts or dried fruits on top before chilling. They add texture and bursts of flavor, but you can skip if you want a pure, fudgy slice.
Spotlight on key ingredients
Sweetener: I usually stick with a touch of honey or golden syrup for a mellow sweetness. Maple syrup can add a smoky undertone, while agave keeps things neutral if you’re watching sugar.:
- Dark chocolate: I love using a good-quality dark chocolate, it gives that rich, deep flavor. You can swap for semi-sweet if you prefer milder, but avoid overly sweet chocolates that drown out the cocoa notes.
- Butter: I melt butter until it’s silky to help everything bind smoothly. For a dairy-free version, try coconut oil — it adds a slight tropical aroma and keeps the texture creamy.
- Biscuits: I prefer plain malt or digestive biscuits for a subtle crunch. If you want a nuttier flavor, crushed graham crackers work well, or for a gluten-free twist, try crushed rice cereal.
Notes for ingredient swaps
- Dairy-Free: Swap butter for coconut oil — it melts just as smoothly and adds a subtle tropical aroma, but expect a slightly different richness.
- Chocolate: Use milk chocolate if you prefer a sweeter, creamier texture, though it will be less intense and fudgy than dark chocolate.
- Biscuits: Gluten-free digestives or graham crackers work well for a different crunch and flavor; crushed rice cereal is a neutral, allergy-friendly option.
- Sweetener: Honey or golden syrup can replace sugar or agave for a mellow sweetness, but note they add moisture and a slight flavor change.
- Add-ins: Nuts or dried fruits can be omitted or swapped with seeds or crushed pretzels for varied texture and flavor bursts.
- Salt: Regular sea salt can be replaced with smoked salt for a surprising depth, just use sparingly to avoid overpowering the chocolate.
- Toppings: Chopped nuts, dried fruits, or sprinkles can be customized or skipped entirely for a cleaner, more straightforward slice.
Equipment & Tools
- Baking dish: Holds the mixture and shapes the slice.
- Saucepan: Melts the chocolate and butter gently.
- Mixing bowl: Combines biscuits and melted chocolate.
- Spatula: Stirs and presses the mixture into the dish.
- Sharp knife: Cuts the set slice into portions.
Step-by-step guide to making no bake slice
- Gather your equipment: a rectangular baking dish (20x10cm or 8×4 inches), a saucepan, a mixing bowl, and a spatula. Line the dish with baking paper for easy removal.
- Melt the butter and dark chocolate together: place in a saucepan over low heat (about 50°C / 122°F). Stir occasionally until smooth and shiny, about 3-4 minutes. Smell that rich cocoa aroma as it melts.
- In a large mixing bowl, crush your biscuits roughly — aim for uneven pieces for texture. Pour the melted chocolate mixture over the biscuits and stir quickly to coat everything evenly. It should look fudgy and glossy.
- Transfer the mixture to your prepared dish. Use the spatula to press it down firmly, smoothing the top. The surface should look even, with no gaps or air pockets.
- Refrigerate uncovered for at least 2 hours, or until firm. If in a hurry, place in the freezer for 30-45 minutes, but avoid rushing the setting process to prevent cracking.
- Once set, remove from the fridge and let sit at room temperature for 5 minutes. Slice into bars or squares with a sharp knife. Tap the knife gently to avoid crumbling.
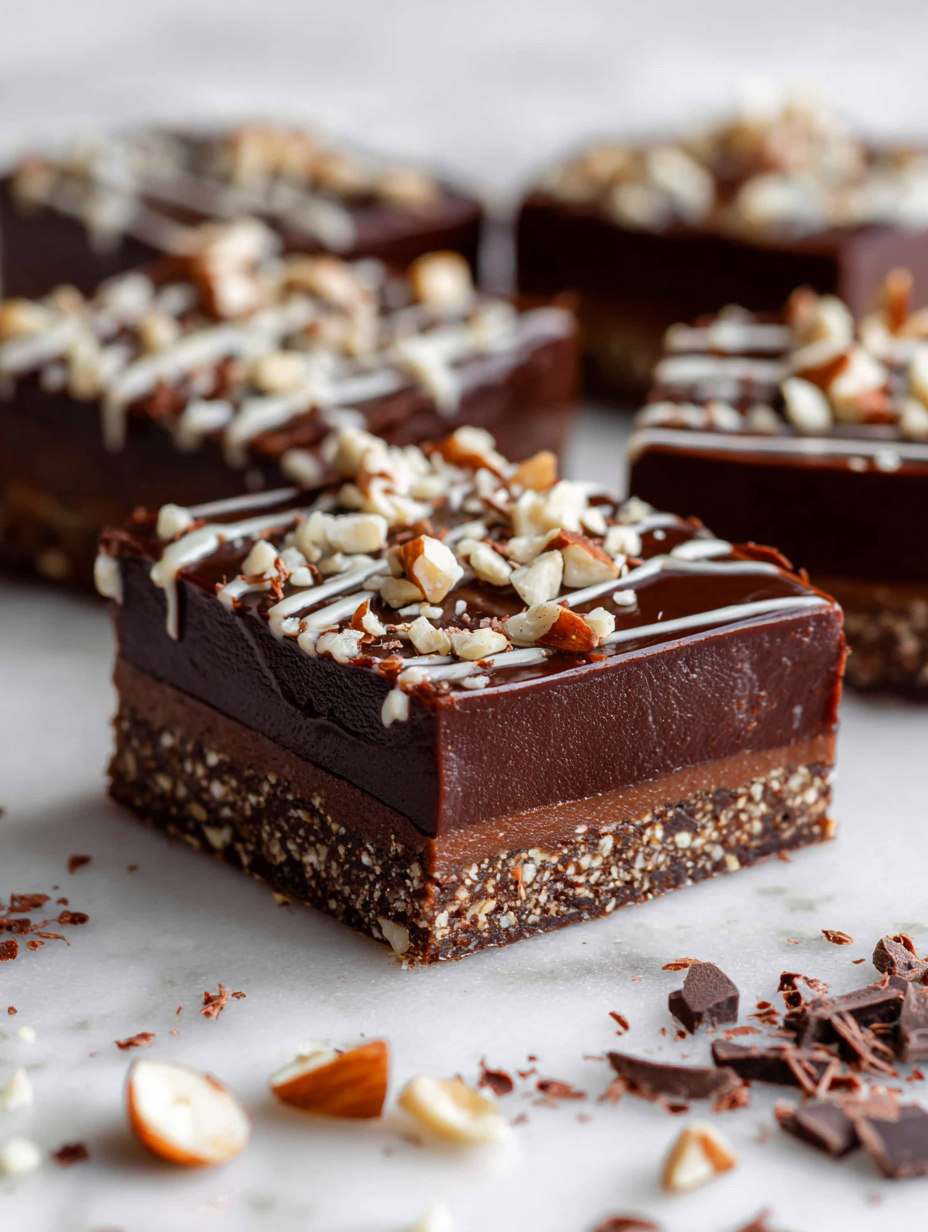
- Finish by sprinkling with chopped nuts or dried fruit if you like. Serve directly from the dish or plate on a pretty tray for sharing.
Refrigerate uncovered until firm, about 2 hours. Slice with a warm knife for clean edges. Serve immediately or store in an airtight container in the fridge for up to 3 days.
How to Know It’s Done
- Chocolate is fully melted and glossy before mixing.
- Mixture is evenly coated and slightly fudgy when pressed in dish.
- Slice holds shape and isn’t crumbly after setting.
No Bake Chocolate Slice
Ingredients
Equipment
Method
- Line your baking dish with baking paper to prevent sticking and set it aside.
- Place the dark chocolate and butter in a saucepan over low heat. Stir gently as they melt together, filling your kitchen with a rich cocoa aroma and a glossy, smooth mixture.
- Once fully melted and shiny, pour the mixture into a large mixing bowl. Add the honey, vanilla extract, and a pinch of sea salt, stirring until well combined and smooth.
- Roughly crush the digestive biscuits into uneven pieces for added texture, then fold them into the chocolate mixture. Stir quickly until the biscuits are evenly coated and the mixture is fudgy and glossy.
- Transfer the entire mixture into your prepared baking dish. Use the back of a spatula to press it down firmly and evenly, creating a smooth, compact surface.
- Sprinkle chopped nuts or dried fruits on top if desired, pressing them lightly into the surface for extra crunch and flavor.
- Place the dish in the refrigerator and chill for at least 2 hours, or until the mixture is firm and set. For a quicker option, freeze for about 30-45 minutes.
- Once set, remove from the fridge and let sit at room temperature for 5 minutes. Use a sharp knife warmed slightly under hot water to slice the firm chocolate into squares or bars.
- Serve immediately or store in an airtight container in the fridge for up to 3 days. Enjoy the rich, fudgy texture that melts on your tongue with every bite.
Pro tips for perfect slices
- Bolded mini-head: Use gentle heat → Melt chocolate slowly over low, steady heat to avoid burning or seizing.
- Bolded mini-head: Chill before slicing → Refrigerate for at least 2 hours to ensure clean, firm cuts and prevent crumbling.
- Bolded mini-head: Mix quickly → Combine biscuits and melted chocolate swiftly to maintain a fudgy, glossy texture.
- Bolded mini-head: Press firmly → Use the back of a spatula to press mixture evenly into the dish for uniform slices.
- Bolded mini-head: Add toppings last → Sprinkle nuts or dried fruits just before setting to keep them crisp and vibrant.
Common mistakes and how to fix them
- FORGOT to pre-line the dish → Use baking paper to prevent sticking.
- DUMPED too much chocolate → Melt gently over low heat to avoid seizing.
- OVER-TORCHED the chocolate → Remove from heat immediately if smell turns burnt.
- MISSED the chill time → Allow at least 2 hours in fridge for proper setting.
Quick Fixes and Pantry Swaps
- When chocolate seizes, splash in a teaspoon of warm milk to loosen it.
- If the slice cracks on slicing, briefly warm the knife for a cleaner cut.
- DUMPED too much butter? Chill the mixture briefly to firm it up before pressing.
- Over-melted chocolate? Patch with a spoonful of cocoa powder and mix well.
- When mixture feels too dry, add a splash of hot water or extra melted butter for gloss.
Prep, store, and reheat tips
- Prepare the mixture in advance: melt chocolate and butter, crush biscuits, and mix everything together up to 24 hours ahead. Keep the mixture covered in the fridge, so it stays fresh and fragrant.
- Store the assembled slice: once pressed into the dish, cover with plastic wrap and refrigerate for up to 3 days. The flavors deepen and the texture firms up nicely during this time.
- Shelf life: the no bake chocolate slice keeps well for 3 to 4 days in the fridge. After that, the biscuits may soften too much, and the chocolate could lose some of its shine.
- Reheating or serving tips: there’s no need to reheat. Serve straight from the fridge for that firm, fudgy bite. If you want it softer, let it sit at room temperature for 5-10 minutes and note the aroma will warm and intensify.
Top questions about no bake chocolate slice
1. Can I melt chocolate in the microwave?
Yes, using a microwave to melt the chocolate and butter works just fine. Just be sure to do it in short bursts and stir frequently to prevent burning.
2. Can I melt the chocolate and butter together?
Absolutely. Just melt the chocolate and butter together in a heatproof bowl over a pan of simmering water or in short bursts in the microwave.
3. My slice is crumbly, what can I do?
If your mixture isn’t holding together, it might be too dry. Add a little more melted butter or a splash of hot water to loosen it up.
4. Can I substitute dark chocolate with milk or white chocolate?
Yes, you can use milk or white chocolate instead of dark for a sweeter, creamier flavor. Expect a softer, less intense chocolate taste.
5. How can I make this dairy-free?
For a dairy-free version, replace butter with coconut oil, which melts similarly but adds a slight coconut aroma. The flavor will be a bit more tropical.
6. Can I add toppings or decorations?
To make it more festive, sprinkle on crushed peppermint candies or festive sprinkles before chilling. It adds a fun, colorful crunch.
7. How do I prevent it from sticking or crumbling?
The best way is to line your dish with baking paper and press the mixture down firmly so it doesn’t stick or crumble when slicing.
8. How long does it keep?
Yes, you can store it in an airtight container in the fridge for up to 3 days. For longer storage, freeze it for up to a month and thaw slightly before slicing.
9. Should I serve it cold or at room temperature?
Serve straight from the fridge for a firm, fudgy texture. If you prefer it softer, let it sit at room temperature for 5-10 minutes before slicing.
10. My slice cracks when I cut it, how do I fix it?
If the slice cracks when you cut it, briefly warm your knife under hot water and wipe dry to get a cleaner cut.
This no bake chocolate slice is more than just a quick treat; it’s a nostalgic reminder of lazy afternoons and shared smiles. The rich cocoa smell, the fudgy texture, and that satisfying crunch make it a simple pleasure I keep coming back to.
In a world that’s often rushing by, sometimes the best comfort is right in your pantry—easy, honest, and just enough sweet to slow down for a moment. It’s the kind of recipe that feels like a warm chat with an old friend, no fuss, no pretenses.