
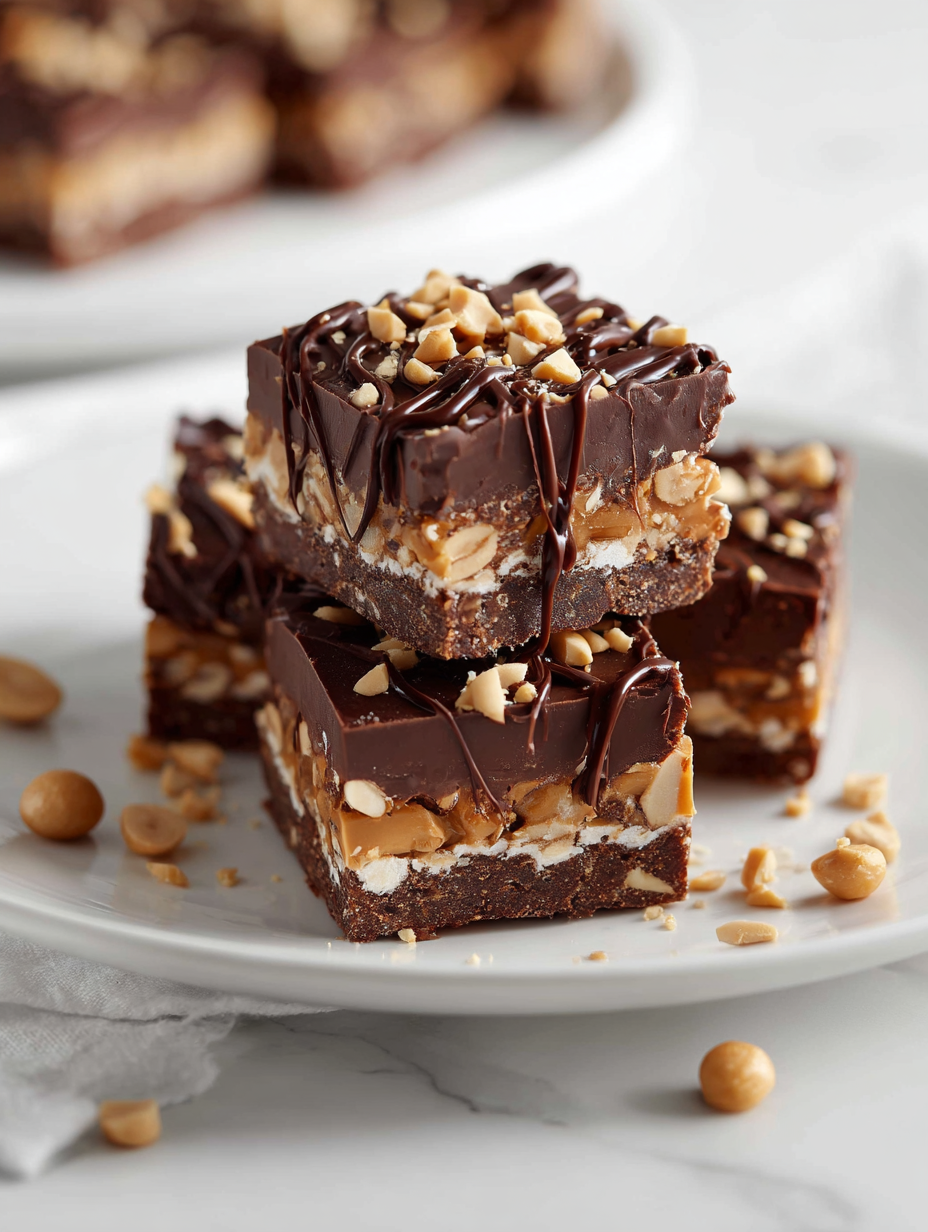
There’s something about the crunch of those chocolate peanut bars from childhood, right? I remember the smell of roasted peanuts mingling with melting chocolate, all held together by that sticky, sweet glue. But honestly, making them used to be a hassle—boiling sugar, waiting for it to set, washing all those pots.
Now, I’ve swapped all that fuss for a quick, no-bake version that’s just as nostalgic. No oven, no boiling, just a handful of ingredients and a little patience in the fridge. It’s the kind of treat you can whip up on a whim, perfect for when that craving hits or when friends drop by unannounced.
These bars aren’t just about convenience—they’re about capturing that childhood joy, but with a modern twist that fits into even the busiest days. The best part? They come together faster than you can say ‘peanut butter,’ and they taste like a warm memory wrapped in chocolate.
Focusing on the nostalgic comfort of childhood treats, but with a modern, no-bake twist that’s quick and fuss-free for busy adults.
The story behind this recipe
- This recipe came from a lazy summer afternoon when I was craving something sweet but didn’t want to turn on the oven or mess around with complicated layers. I remembered those childhood bars, how they seemed so simple and satisfying, yet I’d never really tried making them at home. One afternoon, I just threw together what I had—peanuts, chocolate, a little butter—and it clicked.
- It’s funny how a snack can become a little ritual. I started making these for friends, for movie nights, for those mornings when you need a quick pick-me-up. They’re not fancy, just honest, crunchy, gooey, chocolatey goodness that hits without fuss.
- Every time I make these, I think about how simple ingredients can create something so comforting. They remind me that sometimes, the best recipes are the ones you don’t overthink—just a handful of things, a little patience, and a moment to enjoy the smell of melting chocolate.
Ingredient breakdown
- Peanut butter: I prefer creamy, smooth peanut butter—it melts into the chocolate easily, creating that rich, nutty flavor. Swap for chunky if you want more texture, but expect a slightly chunkier bite.
- Chocolate: I use good-quality semi-sweet or dark chocolate, the kind that melts with a glossy sheen and a deep aroma. You can try milk chocolate for a sweeter, milder taste, but the texture may be softer and less firm.
- Honey or golden syrup: I add a splash for a hint of caramel sweetness and stickiness. If you want a less sweet version, skip it, but your bars might be a tad less cohesive.
- Roasted peanuts: I love the smoky, salty crunch they add. Use raw or salted peanuts depending on your salt preference, but roasting them first really boosts flavor.
- Butter: I melt unsalted butter for a rich, silky base that binds everything together. If you’re dairy-free, coconut oil works but will add a subtle coconut aroma and slightly softer texture.
- Vanilla extract: Just a splash brightens everything up. Skip if you’re going for a more straightforward chocolate-peanut flavor, but it really elevates the overall aroma.
- Optional sea salt: I sprinkle a tiny pinch on top before chilling. It cuts through the sweetness and enhances the nutty flavor—don’t skip if you love that salty-sweet contrast.
Spotlight on key ingredients
Peanut butter:
- I prefer creamy, smooth peanut butter—it melts into the chocolate easily, creating that rich, nutty flavor. Swap for chunky if you want more texture, but expect a slightly chunkier bite.
- Chocolate: I use good-quality semi-sweet or dark chocolate, the kind that melts with a glossy sheen and a deep aroma. You can try milk chocolate for a sweeter, milder taste, but the texture may be softer and less firm.
Chocolate:
- I use good-quality semi-sweet or dark chocolate, the kind that melts with a glossy sheen and a deep aroma. You can try milk chocolate for a sweeter, milder taste, but the texture may be softer and less firm.
- Roasted peanuts: I love the smoky, salty crunch they add. Use raw or salted peanuts depending on your salt preference, but roasting them first really boosts flavor.
Notes for ingredient swaps
- Dairy-Free: Swap regular butter for coconut oil. It’ll add a subtle coconut aroma and make the bars softer, but still hold together well.
- Vegan Chocolate: Use dairy-free dark chocolate or 70% cacao. It melts smoothly and keeps the rich, bittersweet flavor without dairy.
- Natural Sweetener: Replace honey with maple syrup or agave nectar. Expect a slightly different sweetness and a thinner melt, but still delicious.
- Peanuts: Substitute with roasted cashews or almonds for a different nutty crunch. Keep in mind, flavor profiles shift accordingly.
- Salted Peanuts: Use salted nuts if you want a more pronounced salty-sweet contrast. If using unsalted, sprinkle a pinch of sea salt on top before chilling.
- Chocolate Type: Try milk chocolate for a creamier, sweeter top layer. It melts with a softer, silkier texture, but less intense cocoa flavor.
- Extra Add-ins: Mix in dried fruit or coconut flakes for extra texture and flavor. Be mindful of moisture content that could affect setting.
Equipment & Tools
- 20×20 cm (8×8 inch) square pan: Holds your bars and lines with parchment for easy removal.
- Mixing bowl: Melts and combines the peanut butter, honey, butter, and vanilla.
- Spatula: Spreads and presses layers evenly.
- Microwave-safe bowl: Melts the chocolate quickly and smoothly.
- Sharp knife: Cuts the set bars into perfect squares.
Step-by-step guide to no bake bars
- Gather your equipment: a 20×20 cm (8×8 inch) square pan, a mixing bowl, a spatula, and a microwave-safe bowl for melting. The pan will hold your bars, the bowl melts the chocolate, and the spatula mixes everything smoothly.
- Line the pan with parchment paper, leaving a slight overhang for easy removal later. This prevents sticking and makes cleanup a breeze.
- In your mixing bowl, combine 1 cup (250 g) of peanut butter, 1/2 cup (120 ml) of honey or golden syrup, and 1/4 cup (60 g) of unsalted butter. Microwave in 30-second bursts, stirring each time, until smooth and glossy—about 1-2 minutes total.
- Add 2 cups (340 g) of chopped roasted peanuts and 1 teaspoon of vanilla extract to the melted mixture. Stir well until everything is evenly coated and sticky.
- Pour the peanut mixture into the prepared pan. Use the spatula to spread it evenly, pressing down firmly to compact everything. The mixture should be about 2-3 cm (1 inch) thick.
- In your microwave-safe bowl, melt 1 1/2 cups (270 g) of good-quality chocolate, stirring every 20 seconds until smooth and shiny, about 1-2 minutes. Be careful not to overheat, or it will seize up.
- Pour the melted chocolate over the peanut layer. Use the spatula to spread it to the edges, creating a smooth, glossy top. Tap the pan gently on the counter to settle the chocolate and remove air bubbles.
- Place the pan in the fridge for at least 2 hours, or until the chocolate is firm and the bars are set. For quicker results, pop it in the freezer for about 1 hour, checking that the chocolate doesn’t crack when you cut.
- Once set, lift the bars out using the parchment overhang. Slice into squares or rectangles with a sharp knife. For clean cuts, wipe the knife between slices.
- Serve immediately or store in an airtight container. Keep in the fridge for up to 1 week, or freeze for longer storage. Let sit at room temperature for 10 minutes before serving if chilled too cold.
Chill the assembled bars in the fridge for at least 2 hours until firm. Once set, lift out using the parchment edges, slice cleanly, and serve. Keep leftovers refrigerated, covered, for up to a week.
How to Know It’s Done
- Chocolate layer is glossy and firm, with no streaks or dull patches.
- Bars hold their shape when sliced, not sticky or squishy.
- Peanut layer is evenly distributed and pressed tightly, no crumbles or loose bits.
No-Bake Chocolate Peanut Bars
Ingredients
Equipment
Method
- Line your square pan with parchment paper, leaving some overhang for easy removal.
- In your mixing bowl, combine the peanut butter, honey, and melted butter. Microwave in 30-second bursts, stirring after each, until the mixture is smooth and glossy, about 1-2 minutes total.
- Add the chopped roasted peanuts and vanilla extract to the bowl. Stir everything together until the peanuts are evenly coated and the mixture is sticky.
- Pour the peanut mixture into the prepared pan. Use a spatula to press it down firmly and evenly, creating a compact layer about 2-3 cm thick.
- In your microwave-safe bowl, melt the chocolate chips, microwaving in 20-second bursts and stirring until smooth and shiny.
- Pour the melted chocolate over the peanut layer, spreading it evenly with your spatula. Tap the pan gently on the counter to settle the chocolate and remove air bubbles.
- Sprinkle a pinch of sea salt on top if desired, then place the pan in the fridge for at least 2 hours to set and chill.
- Once firm, lift the bars out of the pan using the parchment overhang. Slice into squares with a sharp knife, warming the blade slightly if needed for clean cuts.
- Serve immediately or store in an airtight container in the fridge for up to a week. Enjoy the crunchy, gooey, chocolatey goodness!
Pro tips for perfect bars
- Bolded mini-head: Use high-quality chocolate for a glossy, rich finish that melts smoothly and enhances flavor.
- Bolded mini-head: Chill the chocolate layer until just firm—about 20 minutes—to prevent cracking when cutting.
- Bolded mini-head: Press the peanut mixture firmly into the pan to avoid crumbling and ensure clean slices.
- Bolded mini-head: Stir the melted chocolate well—look for a shiny, smooth texture without streaks or lumps.
- Bolded mini-head: If the chocolate seizes or thickens, microwave in short bursts, stirring between to restore smoothness.
- Bolded mini-head: For cleaner cuts, wipe your knife with a warm, damp cloth between slices to prevent sticking.
- Bolded mini-head: For a shiny top, give the melted chocolate a quick stir before pouring to evenly distribute any settled cocoa.
Common mistakes and how to fix them
- FORGOT to chill? Place bars in fridge for at least 2 hours to set properly.
- DUMPED chocolate too hot? Let it cool slightly before pouring to prevent melting layers.
- OVER-TORCHED chocolate? Microwave in short bursts, stir often, avoid burning.
- SKIPPED lining pan? Use parchment to prevent sticking and make removal easier.
Quick fixes and pantry swaps
- When chocolate seizes, splash in a teaspoon of vegetable oil and stir until smooth.
- If bars crack when slicing, warm your knife with hot water for cleaner cuts.
- Dumped in too much salt? Rinse nuts briefly before roasting to control saltiness.
- Over-melted chocolate? Patch by adding a tiny bit of room-temperature cream or butter.
- When in doubt, swap peanut butter for almond butter—adds a milder, nuttier aroma and softer texture.
Prep, store, and reheat tips
- You can prepare the entire mixture up to 24 hours ahead. Keep it covered in the fridge, where it stays firm and fresh.
- Once the bars are assembled and the chocolate is poured, chill them for at least 2 hours, or overnight for best setting.
- Stored in an airtight container in the fridge, these bars will last up to one week. The flavors deepen slightly over time, becoming more chocolatey and peanutty.
- To reheat a single bar, microwave it for 10-15 seconds until slightly softened; the chocolate will shimmer and the peanut layer will loosen. Do not overheat, or the chocolate might seize.
Top questions about no bake bars
1. How do I cut the bars without them falling apart?
Use a sharp knife and warm it slightly to get clean slices without crumbling.
2. Why does my chocolate layer look dull or streaky?
Ensure the chocolate is fully melted and glossy; if it’s dull, it might need more stirring or gentle reheating.
3. How long should I chill the bars for best setting?
Chill the assembled bars for at least 2 hours until the chocolate is firm and the bars hold their shape.
4. My peanut mixture is too soft; how can I firm it up?
If the mixture is too sticky to press into the pan, refrigerate it for 15-20 minutes beforehand.
5. Can I use cheap chocolate for melting?
Use high-quality chocolate for a shiny, smooth top layer; lower-quality chocolate may seize or look dull.
6. How long can I keep these bars in the fridge?
Store the bars in an airtight container in the fridge for up to a week; for longer, freeze them wrapped well.
7. How do I reheat a leftover bar without melting it completely?
Reheat a slice briefly in the microwave—about 10-15 seconds—until just soft and shiny.
8. Should I add salt to the recipe?
Add a pinch of salt to enhance the nutty flavor; sprinkle on top before chilling for a salty-sweet contrast.
9. Can I use a different nut butter?
You can substitute with almond or cashew butter for different nutty flavors, but expect slightly different textures.
10. What if my chocolate layer cracks when I cut it?
If the chocolate cracks when slicing, warm your knife with hot water for cleaner cuts and less breakage.
Making these no-bake chocolate peanut bars is like capturing a childhood moment in a quick, satisfying treat. They’re messy in the best way—crunchy, gooey, and rich—and remind me that sometimes simplicity wins. Plus, they’re a little rebellious against the usual dessert fuss, which feels just right for today’s busy rhythm.
When I serve these, I think about how a handful of ingredients can turn into something that feels special—no oven, no complicated steps, just pure, honest flavor. It’s a reminder that comfort can be quick, easy, and deeply satisfying, especially now when those moments of pause are rare.