
There’s something about peanut butter bars that instantly takes me back to childhood afternoons, sitting at the kitchen table with a glass of cold milk. This no-bake version keeps it simple and honest, just like those carefree snack times. It’s a recipe that relies on good ol’ pantry staples, making it perfect for when you want something sweet but don’t want to fuss with the oven.
What I love most is how versatile and forgiving it is — you can tweak it with crunchy or creamy peanut butter, add a pinch of sea salt, or even toss in some chocolate chips. It’s honest, straightforward, and a little messy in all the right ways. Plus, it’s a quick fix for those days when you need a sweet hit without a long wait or complicated steps.
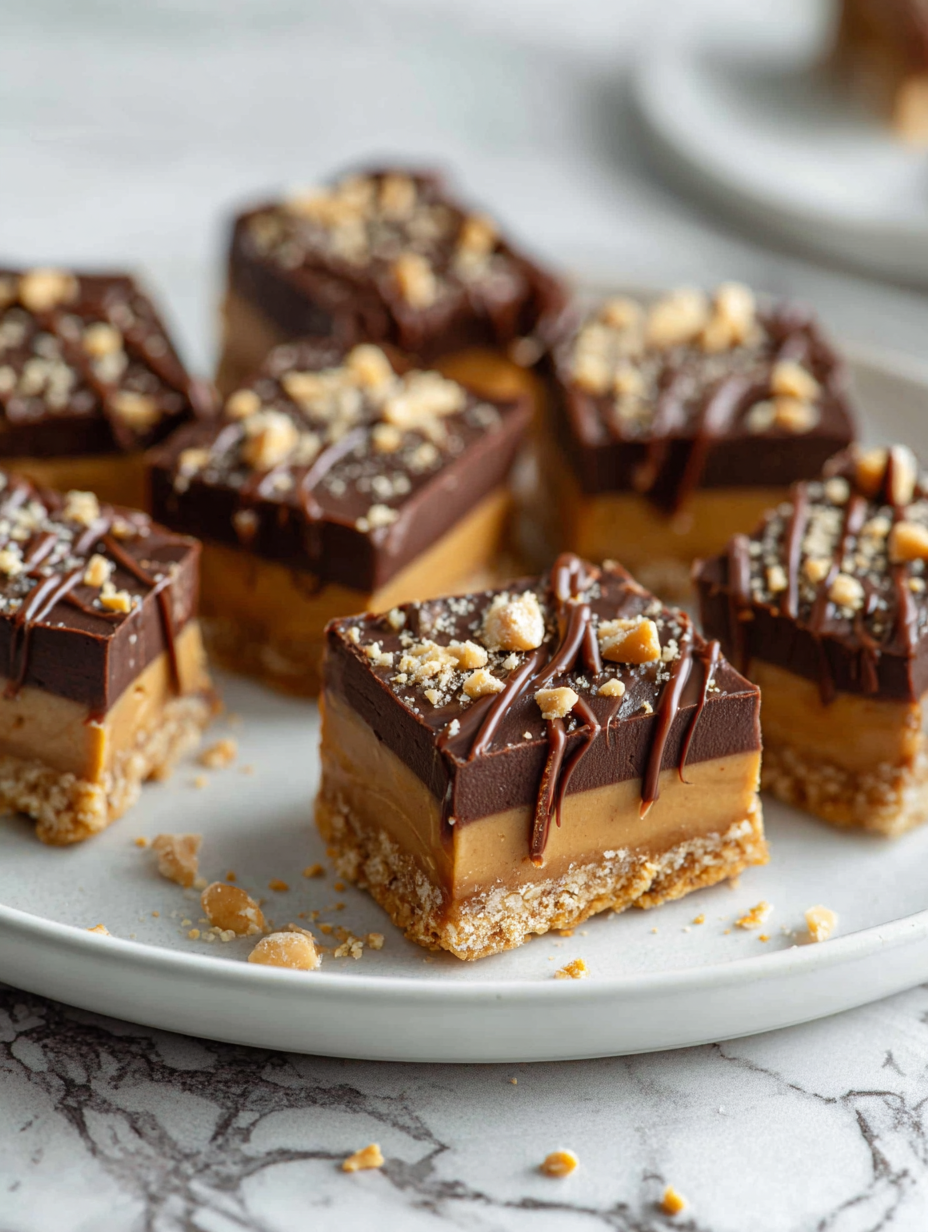
Focusing on the nostalgic comfort of childhood snack times, this recipe emphasizes the simplicity and honest flavors that remind us of carefree afternoons and shared treats.
The story behind this recipe
- This recipe came together one hectic afternoon when I needed a sweet fix that didn’t require turning on the oven or fussing over complicated layers. I remembered those peanut butter bars my grandma used to keep in her freezer—simple, rich, and honestly addictive. It’s funny how a handful of pantry staples can turn into something so comforting and familiar, like a quick hug from the kitchen.
- I’ve made these countless times—sometimes with a drizzle of chocolate, other times just plain—and each batch brings a little nostalgia and a lot of relief. They’re my go-to when I want something sweet that’s honest, no-nonsense, and easy to whip up, even on the busiest days.
- heading: The story behind this recipe
Ingredient breakdown: key components
- Peanut butter: I use creamy peanut butter for a smooth texture that melts in your mouth. If you prefer crunch, go for chunky—it adds a nice bite.
- Unsalted butter: I melt butter with the peanut butter to keep the bars rich and tender. Skip this if you’re making it dairy-free, but add a splash of coconut oil for moisture.
- Graham cracker crumbs: I like fine crumbs because they hold everything together better. If you only have larger pieces, pulse them a bit more for that perfect consistency.
- Powdered sugar: I sift it to avoid lumps—makes the filling silky and easy to mix. For a less sweet version, cut back slightly or try honey as a binder.
- Chocolate topping: I melt semi-sweet chocolate, which gives a deep, smoky flavor. You can swap in milk chocolate for a sweeter, creamier finish or dark chocolate for bitterness.
- Optional add-ins: I toss in a handful of sea salt or espresso powder for a flavor kick. Nuts or coconut flakes also work—just keep the texture in mind.
- Salt: I sprinkle a little flaky sea salt on top before chilling—brightens the richness and balances the sweetness. Skip if you prefer a milder finish.
Spotlight on key ingredients
Peanut butter:
- I use creamy peanut butter for a smooth texture that melts in your mouth. If you prefer crunch, go for chunky—it adds a nice bite.
- Unsalted butter: I melt butter with the peanut butter to keep the bars rich and tender. Skip this if you’re making it dairy-free, but add a splash of coconut oil for moisture.
- Graham cracker crumbs: I like fine crumbs because they hold everything together better. If you only have larger pieces, pulse them a bit more for that perfect consistency.
Chocolate:
- Chocolate topping: I melt semi-sweet chocolate, which gives a deep, smoky flavor. You can swap in milk chocolate for a sweeter, creamier finish or dark chocolate for bitterness.
- Powdered sugar: I sift it to avoid lumps—makes the filling silky and easy to mix. For a less sweet version, cut back slightly or try honey as a binder.
- Salt: I sprinkle a little flaky sea salt on top before chilling—brightens the richness and balances the sweetness. Skip if you prefer a milder finish.
Notes for ingredient swaps
- Dairy-Free: Swap butter for coconut oil or a dairy-free margarine. Expect a slightly different richness, but still creamy.
- Gluten-Free: Use gluten-free graham cracker crumbs or crushed gluten-free cookies. Keeps the bars safe for gluten sensitivities.
- Sweetener: Replace powdered sugar with honey or maple syrup, but reduce the amount of butter slightly to compensate for moisture.
- Chocolate: Opt for dairy-free or dark chocolate for a richer, more intense cocoa flavor, or white chocolate for a sweeter finish.
- Peanut Butter: Try almond or cashew butter—each brings a different nutty tone and texture, but expect a different flavor profile.
- Add-ins: Incorporate chopped nuts, coconut flakes, or dried fruit for texture and flavor variations; adjust quantity based on taste.
- Salt: Use finishing sea salt flakes or omit entirely for a less salty, more intensely sweet experience.
Equipment & Tools
- 20cm (8-inch) square pan: Holds the mixture while setting and cutting.
- Spatula or wooden spoon: Mixes and spreads the ingredients.
- Microwave-safe bowl: Melts the peanut butter, butter, and chocolate evenly.
- Parchment paper-lined baking sheet: Prevents sticking and makes removal easier.
- Sharp knife: Cuts clean, even squares.
Step-by-step guide to no-bake bars
- Gather your equipment: a 20cm (8-inch) square pan, a spatula or wooden spoon, a microwave-safe bowl, and a baking sheet lined with parchment paper.
- In the microwave-safe bowl, combine 1 cup (250g) peanut butter and 1/2 cup (115g) unsalted butter. Microwave in 30-second bursts, stirring each time, until fully melted and smooth. About 1.5 minutes total.
- Add 1 1/2 cups (150g) graham cracker crumbs and 1 cup (120g) powdered sugar to the melted mixture. Mix well until everything is evenly combined and the mixture feels thick but spreadable.
- Press the peanut butter mixture into the prepared pan. Use a spatula or your fingers to evenly spread and flatten the surface. Chill in the fridge for 20–30 minutes until firm.
- Meanwhile, melt 1 cup (170g) semi-sweet chocolate chips in the microwave in 20-second bursts, stirring each time until smooth.
- Once the peanut butter layer is firm, pour the melted chocolate over the top. Use a spatula to spread it evenly. Return to the fridge for at least 30 minutes, or until the chocolate is set and the bars are firm.
- Optionally, sprinkle a pinch of flaky sea salt or crushed nuts on top before the chocolate fully sets for extra flavor and texture.
- Cut into squares using a sharp knife. Wipe the knife clean between cuts for neat edges.
- Serve immediately or store in an airtight container in the fridge for up to a week.
Once cut, serve immediately or store in an airtight container in the fridge. Let sit at room temperature for 10 minutes before serving if chilled for a softer bite.
How to Know It’s Done
- The peanut butter mixture should hold together when pressed and feel slightly sticky but firm.
- The chocolate layer should be glossy and fully set, no longer sticky to the touch.
- Bars should hold their shape when cut, with clean edges and no crumbling.
No-Bake Peanut Butter Bars
Ingredients
Equipment
Method
- Combine the peanut butter and melted butter in a microwave-safe bowl. Microwave in 30-second bursts, stirring each time, until the mixture is smooth and fully melted, about 1.5 minutes total. The aroma of warm peanut butter and butter should fill the air.
- Add the graham cracker crumbs and sifted powdered sugar to the melted mixture. Stir well with a spatula or spoon until everything is evenly combined and the mixture feels thick but still spreadable.
- Press the peanut butter mixture evenly into the prepared parchment-lined pan, using the back of a spatula or your fingers to flatten the surface. Chill in the fridge for 20–30 minutes until firm and set.
- Meanwhile, melt the chocolate chips in a microwave-safe bowl in short 20-second bursts, stirring well after each, until smooth and glossy. The chocolate should be silky and fragrant.
- Remove the chilled peanut butter layer from the fridge. Pour the melted chocolate over the top, spreading it evenly with a spatula or the back of a spoon. The chocolate should glide smoothly over the surface.
- Sprinkle a pinch of flaky sea salt over the chocolate, if using, to enhance the flavor contrast. Return the pan to the fridge for at least 30 minutes, or until the chocolate is fully set and the bars are firm.
- Once set, use a sharp knife to cut the bars into neat squares. Wipe the knife with warm water between cuts for clean edges. These bars are best enjoyed chilled or at room temperature.
- Serve immediately or store in an airtight container in the fridge for up to a week. For longer storage, wrap tightly and freeze for up to a month. Allow to sit at room temperature for 10 minutes before serving for the perfect chewy bite.
Pro tips for perfect bars
- Bolded mini-head: Use room temperature peanut butter for easier mixing and a smoother texture.
- Bolded mini-head: Melt chocolate slowly in short bursts to prevent burning and achieve glossy finish.
- Bolded mini-head: Press mixture firmly into the pan to avoid air pockets and ensure clean cuts.
- Bolded mini-head: Chill the bars thoroughly—at least 30 minutes—so they set firm and hold their shape.
- Bolded mini-head: Wipe your knife with a warm cloth between cuts for neat, clean edges.
- Bolded mini-head: For a shinier top, give the chocolate a quick second melt and re-spread before chilling.
- Bolded mini-head: Add a pinch of flaky sea salt just before the chocolate sets for an enhanced flavor contrast.
Common mistakes and how to fix them
- FORGOT to level the ingredients? Use a spoon to scoop and a knife to level for accuracy.
- DUMPED too much chocolate? Warm it slightly and stir well to loosen, then re-spread evenly.
- OVER-TORCHED the chocolate? Add a splash of warm milk or coconut oil to smooth it out again.
- MISSED the chill time? Return to fridge for 10 minutes to firm up before cutting for clean edges.
Quick fixes for common issues
- When the mixture feels too dry, splash in a teaspoon of milk to loosen it.
- Splash warm water on melted chocolate to smooth out thick patches and shimmer.
- Patch a cracked top by gently pressing on it and adding a drizzle of melted chocolate.
- Shield the bars from excess moisture by wrapping them tightly and storing in an airtight container.
- If bars are crumbling, quick five-second microwave rescue with a gentle re-melt can help bind edges.
Prep, store, and reheat tips
- Prepare the peanut butter mixture and press into the pan a day ahead; keep covered in the fridge for easy assembly.
- Store the bars in an airtight container in the fridge for up to a week; the cold keeps them firm and fresh.
- For longer storage, freeze the bars wrapped tightly in plastic wrap and foil; they’ll keep for up to a month.
- Reheat individual bars briefly in the microwave—10-15 seconds—until just softened and fragrant, with the aroma of melting chocolate.
- Allow chilled bars to come to room temperature for 10 minutes before serving for optimal texture and flavor.
Top questions about no bake peanut butter bars
1. Can I use natural peanut butter?
Yes, you can substitute natural peanut butter, but it might make the mixture a bit runnier and harder to set.
2. Are these bars dairy-free?
Absolutely, swap in dairy-free chocolate chips or a bar, and use coconut oil instead of butter for a dairy-free version.
3. My chocolate is lumpy, what do I do?
If your chocolate isn’t melting smoothly, try adding a teaspoon of coconut oil or warming it in short bursts.
4. How long can I keep these bars?
Store these bars in an airtight container in the fridge for up to a week, or freeze for longer storage.
5. How should I serve these for best texture?
For a softer, chewier texture, let the bars sit at room temperature for about 10 minutes before serving.
6. Can I add extras to the bars?
Yes, you can add chopped nuts, dried fruit, or coconut flakes to customize your bars.
7. The mixture is too dry, what now?
If your mixture feels too dry, add a splash of milk or a little more peanut butter to loosen it up.
8. How do I get clean cuts?
Use a sharp knife wiped with warm water between cuts for neat, clean squares.
9. How do I know when they’re ready to cut?
Chilling the bars thoroughly helps them set firm and hold their shape when cut.
10. Can I prepare these in advance?
Yes, you can make these ahead of time and store in the fridge or freezer, just remember to re-soften slightly before serving.
These no-bake peanut butter bars are the kind of treat that sneaks up on you—simple, honest, and surprisingly satisfying. They’re perfect for when you need a quick fix that doesn’t sacrifice flavor or texture, especially now when the kitchen feels a little too busy for anything complicated.
Sharing them with friends or keeping a batch in the freezer makes for easy, comforting moments. Sometimes, it’s the familiar, no-fuss recipes like this that remind us to slow down and enjoy the little things.