
This no bake oatmeal cookies recipe is my secret weapon for quick, satisfying treats. I remember those afternoons as a kid, sticky hands and a warm, chocolatey bite feeling like pure magic. Now, I’ve adapted that nostalgic vibe into a recipe that’s fuss-free, perfect for when you need something sweet without turning on the oven.
What I love most is how flexible it is—no fancy ingredients needed, just pantry staples that come together fast. It’s a great way to satisfy a sweet tooth while keeping the clean-up minimal. Plus, there’s something oddly comforting about mixing everything in one pot and letting it set while I do other things.
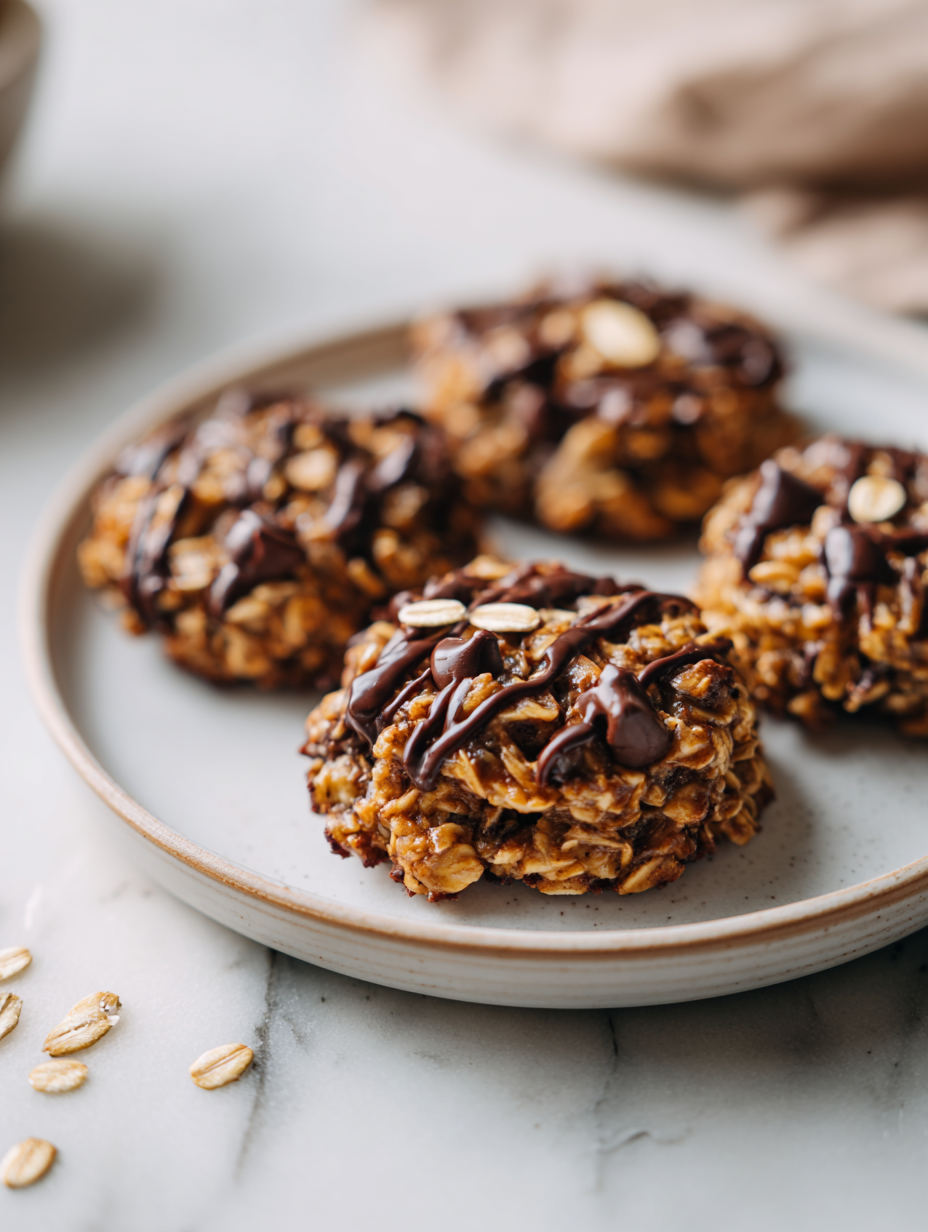
This recipe is a nostalgic throwback to childhood afternoons, but I’ve tweaked it to be a quick, no-fuss treat for busy adults craving comfort without the mess.
Unlikely Comfort in a Cookie
- Making these cookies always takes me back to lazy Sunday afternoons with my grandma, the smell of melting chocolate filling the house.
- There’s a strange satisfaction in how quickly you can whip these up — they’re my go-to when I need something sweet, fast.
- I used to hide these in the freezer, thinking I was sneaky, only to find them melting into gooey bites later; totally worth it.
- These cookies remind me that simple ingredients can create a moment of pure joy, no oven necessary, just a spoon and patience.
Unlikely Comfort in a Cookie
This recipe came about on a rainy afternoon when I was desperately craving something sweet but didn’t want to turn on the oven or deal with a mountain of dishes. I remembered how my grandma used to whip up batches of these cookies in no time, using just what was in the pantry. Since then, it’s become my go-to for a quick fix—no fuss, no oven, just good old-fashioned comfort in a chewy, chocolatey bite.
Historical Tidbits
- These cookies trace back to mid-20th-century America, a time when convenience foods rose to popularity in households.
- Originally, they were a clever way to use up leftover ingredients during wartime rationing, turning pantry staples into quick treats.
- The no-bake method gained popularity in the 1950s, especially among busy homemakers seeking speedy dessert options.
Ingredient breakdown: key components
- Old-fashioned rolled oats: I love their chewy texture and nutty flavor, but quick oats can work if you’re in a hurry—just expect a slightly softer bite.
- Chocolate chips: Using semi-sweet chips gives a balanced sweetness, but dark chocolate chunks add a deeper, richer taste that melts into the warm mixture.
- Peanut butter: Creamy peanut butter blends smoothly and adds richness, but crunchy peanut butter introduces a nice texture contrast if you prefer a bit of crunch.
- Sweetened condensed milk: It’s the glue that holds everything together, providing that luscious, sticky sweetness—skip it for a dairy-free version, but expect less cohesion.
- Vanilla extract: Just a splash brightens all the flavors, but feel free to experiment with a hint of cinnamon or espresso powder for a flavor twist.
- Butter: Adds richness and helps everything meld; if you want a lighter version, substitute with coconut oil, but don’t skip the fat—it’s key to the texture.
- Optional add-ins: Nuts or coconut flakes can add texture and flavor, but keep an eye on moisture—too much can make the cookies sticky or dry.
Spotlight on key ingredients
Old-fashioned rolled oats:
- I love their chewy texture and nutty flavor, but quick oats can work if you’re in a hurry—just expect a slightly softer bite.
- Chocolate chips: Using semi-sweet chips gives a balanced sweetness, but dark chocolate chunks add a deeper, richer taste that melts into the warm mixture.
- Peanut butter: Creamy peanut butter blends smoothly and adds richness, but crunchy peanut butter introduces a nice texture contrast if you prefer a bit of crunch.
Chocolate chips and peanut butter:
- Chocolate chips: They hold their shape during melting, and their sweet, slightly bitter flavor balances the richness of the butter and peanut butter.
- Peanut butter: Its oily, velvety texture helps bind the mixture and adds a deep, nutty aroma that’s essential for that classic cookie feel.
Notes for ingredient swaps
- Sugar: I prefer brown sugar for a caramel note, but white sugar works fine if you want a cleaner sweetness—just expect a slightly different texture.
- Butter: Swap with coconut oil for a dairy-free version that still helps everything come together, but you might notice a hint of coconut aroma.
- Chocolate chips: Dark chocolate chunks add depth, but milk chocolate melts softer and sweeter—choose based on your flavor mood.
- Peanut butter: Almond or cashew butter can stand in, giving a different nutty flavor but still helping everything stick together.
- Oats: Quick oats will make the cookies softer and less chewy, while steel-cut oats are too tough and not suitable here—stick with rolled or old-fashioned oats.
- Sweetened condensed milk: Use coconut cream or a thick syrup like honey for dairy-free, but expect a different sweetness and texture.
- Add-ins: Nuts or coconut flakes—feel free to customize. Just keep in mind extra moisture or crunch may alter the final chewiness.
Equipment & Tools
- Medium saucepan: For melting ingredients and boiling the mixture.
- Spoon: To stir and scoop the cookie mixture.
- Parchment paper-lined baking sheet: To hold the cookies as they set and prevent sticking.
Step-by-step guide to no bake cookies
- Gather your equipment: a medium saucepan, a spoon, and parchment paper lined baking sheet. The saucepan is for melting, the spoon for mixing, and the sheet for setting the cookies.
- Combine 1 cup of sugar, 1/2 cup of unsweetened cocoa powder, 1/2 cup of butter, and 1/2 cup of milk in the saucepan. Bring to a gentle boil over medium heat, stirring constantly.
- Once it reaches a boil, set a timer for 1 minute. Keep stirring—this helps the sugar fully dissolves and the mixture thickens slightly. You’ll notice a rich, chocolatey smell filling the air.
- Remove from heat and quickly stir in 1 teaspoon of vanilla extract. Then add 3 cups of rolled oats and 1 cup of peanut butter. Mix thoroughly until everything is well coated and sticky.
- Using a spoon, scoop dollops of the mixture onto the prepared parchment paper. Flatten each slightly for more uniform cookies. The mixture should hold its shape but still be soft.
- Let the cookies rest at room temperature for about 30 minutes. They’ll firm up as they cool, developing a chewy, fudgy texture. If you’re in a rush, pop them in the fridge for 15 minutes.
- Once set, gently peel the cookies from the parchment. They should be shiny, with a slight crackle on top, and hold together when gently pressed.
- Enjoy immediately or store in an airtight container at room temperature for up to 3 days. For longer storage, freeze for up to a month, letting them thaw slightly before eating.
Allow cookies to rest at room temperature until firm, about 30 minutes. Store in an airtight container, either at room temp or in the fridge for extra chewiness. Serve directly from the fridge for a cooler, denser bite.
How to Know It’s Done
- Mixture reaches a gentle boil, aroma fills kitchen, and bubbles are consistent for 1 minute.
- Cookies hold their shape when scooped and flattened, with a glossy top and slight crackle.
- Firm to touch but chewy when pressed, with a rich chocolate aroma.
No Bake Oatmeal Cookies
Ingredients
Equipment
Method
- Gather your equipment: a medium saucepan, a spoon, and a parchment paper-lined baking sheet. Set everything within reach before starting.
- Combine sugar, cocoa powder, butter, and milk in the saucepan. Turn the heat to medium and stir constantly as the mixture begins to melt and bubble gently, filling your kitchen with a rich chocolate aroma.
- Once it reaches a gentle boil, set a timer for 1 minute and continue stirring. You'll notice the mixture thickening slightly and becoming glossy, like a smooth chocolate sauce.
- Remove the saucepan from heat and quickly stir in the vanilla extract to brighten the flavors. Then add the oats, chocolate chips, and peanut butter, stirring vigorously until everything is evenly coated and the mixture is thick and sticky.
- Using a spoon, scoop dollops of the mixture onto your prepared parchment paper. Flatten each slightly with the back of the spoon for a uniform shape.
- Let the cookies sit at room temperature for about 30 minutes until they firm up and develop a chewy, fudgy texture. For a quicker set, place the tray in the refrigerator for 15 minutes.
- Once set, gently peel the cookies from the parchment paper. They should be shiny on top with a slight crackle and hold together when pressed.
- Enjoy these chewy, chocolatey treats immediately or store in an airtight container at room temperature for up to 3 days. For longer storage, freeze them and thaw slightly before serving.
Pro tips for perfect cookies
- Bolded mini-head: Use fresh ingredients whenever possible. Fresh oats and chocolate chips will have a more vibrant flavor and better texture.
- Bolded mini-head: Stir the mixture continuously during boiling. This prevents burning and ensures even heat distribution, leading to a smooth, glossy finish.
- Bolded mini-head: Chill the mixture slightly before scooping. It thickens just enough to hold shape better without becoming too stiff.
- Bolded mini-head: Use a cookie scoop for uniform cookies. This speeds up the process and results in evenly sized treats.
- Bolded mini-head: Flatten the cookies slightly with the back of a spoon. This encourages even setting and a more satisfying chew.
- Bolded mini-head: Let the cookies rest until firm. Rushing this step can cause them to fall apart or stay too soft.
- Bolded mini-head: Store in an airtight container at room temperature. Keeps them chewy and fresh for up to 3 days without drying out.
Common mistakes and how to fix them
- FORGOT to stir the mixture thoroughly before boiling—stir continuously to prevent burning and clumping.
- DUMPED the mixture too quickly into the cookies—use a spoon to control size and shape.
- OVER-TORCHED the chocolate mixture—remove from heat as soon as it boils to avoid a burnt flavor.
- FAILED to measure ingredients precisely—use standard measuring cups for consistent results.
Quick fixes and pantry swaps
- If mixture is too sticky, splash in a bit more oats to absorb excess moisture.
- When cookies spread too thin, patch edges with extra spoonfuls of mixture before setting.
- Splash a few seconds in the microwave to revive hardened cookies for a softer bite.
- Dumped in too much sugar? Reduce next time or add a pinch of salt for balance.
- When mixture shrinks or cracks, shield with a damp cloth and refrigerate briefly to rehydrate.
Prep, store, and reheat tips
- Prepare the cookie mixture in advance and store it covered in the fridge for up to 24 hours; it firms up and makes scooping easier later.
- Cookies can be stored in an airtight container at room temperature for 2-3 days, maintaining chewy texture and fresh flavor.
- For longer storage, freeze the cookies for up to a month; let them thaw at room temperature for 10 minutes before serving to regain softness.
- Reheat cookies briefly in the microwave (10-15 seconds) until warm and slightly gooey—perfect for that nostalgic, melty bite.
Top questions about no bake oatmeal cookies
1. Can I use quick oats instead of rolled oats?
Yes, you can use quick oats for a softer, less chewy texture, but the traditional rolled oats give a better chewiness.
2. Can I substitute peanut butter with other nut butters?
Absolutely, swapping peanut butter for almond or cashew butter works well, just expect a slightly different nutty flavor.
3. Can I omit the chocolate chips?
Yes, you can skip the chocolate chips and add dried fruits or nuts for variety, but the chocolate adds that classic flavor.
4. How should I store these cookies?
Storing in an airtight container at room temperature keeps them chewy for about 3 days. For longer, freeze them up to a month.
5. Can I prepare the mixture in advance?
You can refrigerate the mixture for up to 24 hours to make scooping easier or to prepare ahead of time.
6. How do I fix cookies that are too soft?
If cookies are too soft, chilling them in the fridge for 15 minutes helps firm them up before serving.
7. How do I get uniform cookies?
Use a spoon or cookie scoop to ensure even, round cookies. Flatten slightly for quicker setting.
8. What if the mixture is too sticky?
If mixture is too sticky, add a little more oats or let it sit for a few minutes to absorb moisture.
9. Can I make these dairy-free?
For a dairy-free version, use coconut oil instead of butter, but expect a slight coconut aroma.
10. How long do these cookies last?
Yes, they’re best enjoyed fresh but can be stored in the fridge or frozen for longer keeping their chewy texture.
These cookies are a reminder that sometimes simple, nostalgic treats can bring the biggest comfort. They’re perfect for busy days or when you need a little sweet escape without the fuss.
No matter how many times I make them, I’m always surprised by how quickly they come together and how satisfying that chewy, chocolatey bite is. Sometimes, the best moments happen with a spoon in hand and a batch of these waiting to be enjoyed.